Importing documents into a document tray
Document trays, importing, and storing work much as they do in classic DocuWare, with redesigned document trays for a clearer, faster experience. You can see all the document trays assigned to you. Add documents to the document tray by dragging and dropping files from your local file system, or by clicking the Import button to browse and upload files. Documents are displayed in table view by default. Single click a document to open it in the Viewer on the side, and double click to open the full Viewer window. Store documents from a document tray into a file cabinet one at a time.
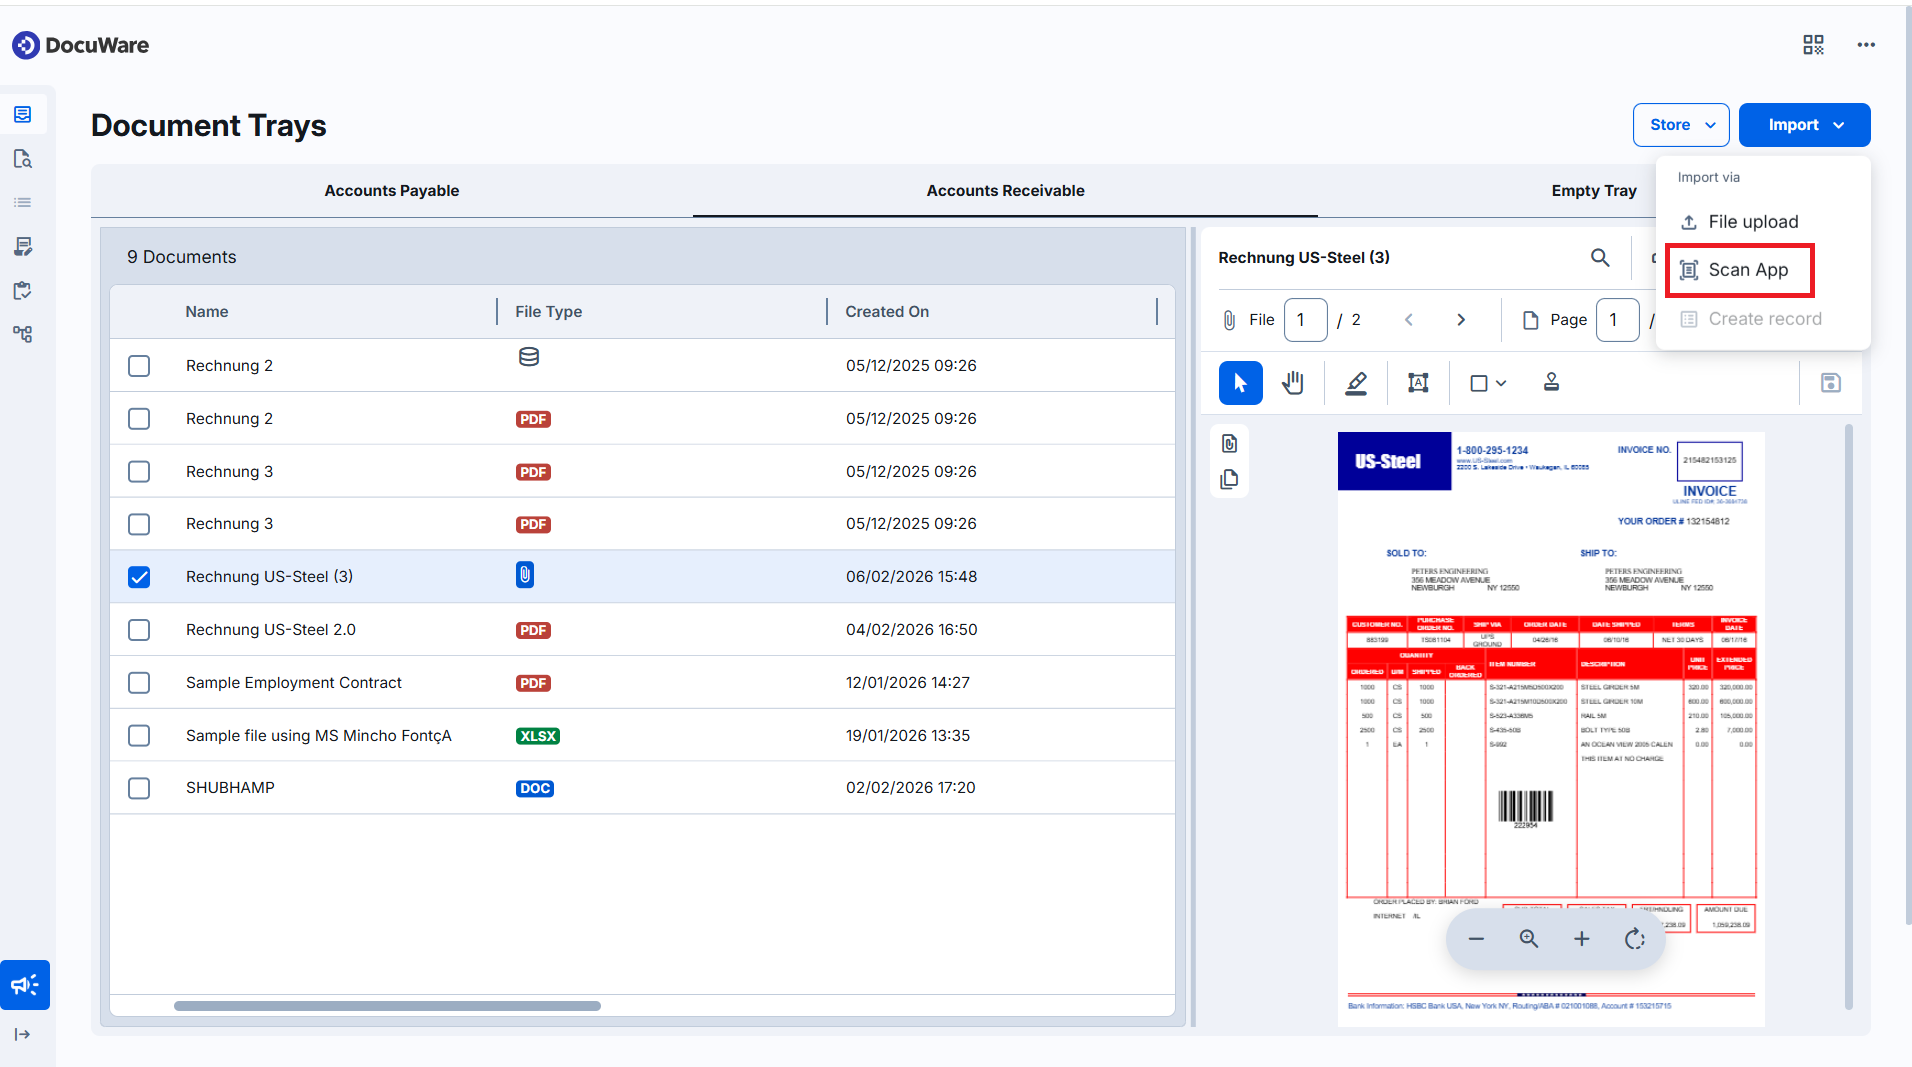
You can also add documents by scanning them directly using the Scan App with a locally connected scanner, keeping the same processing configurations as the classic DocuWare. A desktop application dialog opens, similar to the classic DocuWare. Here, select the scanner and processing configuration and store the documents.
Document trays are displayed as tabs. Each tray appears as a separate tab, and tab sizes adjust automatically as more trays are opened. Switching between trays does not reload content. You can choose which trays to keep open, view the list of all open trays, and close all open trays at once, except for the default tray, which always remains open.
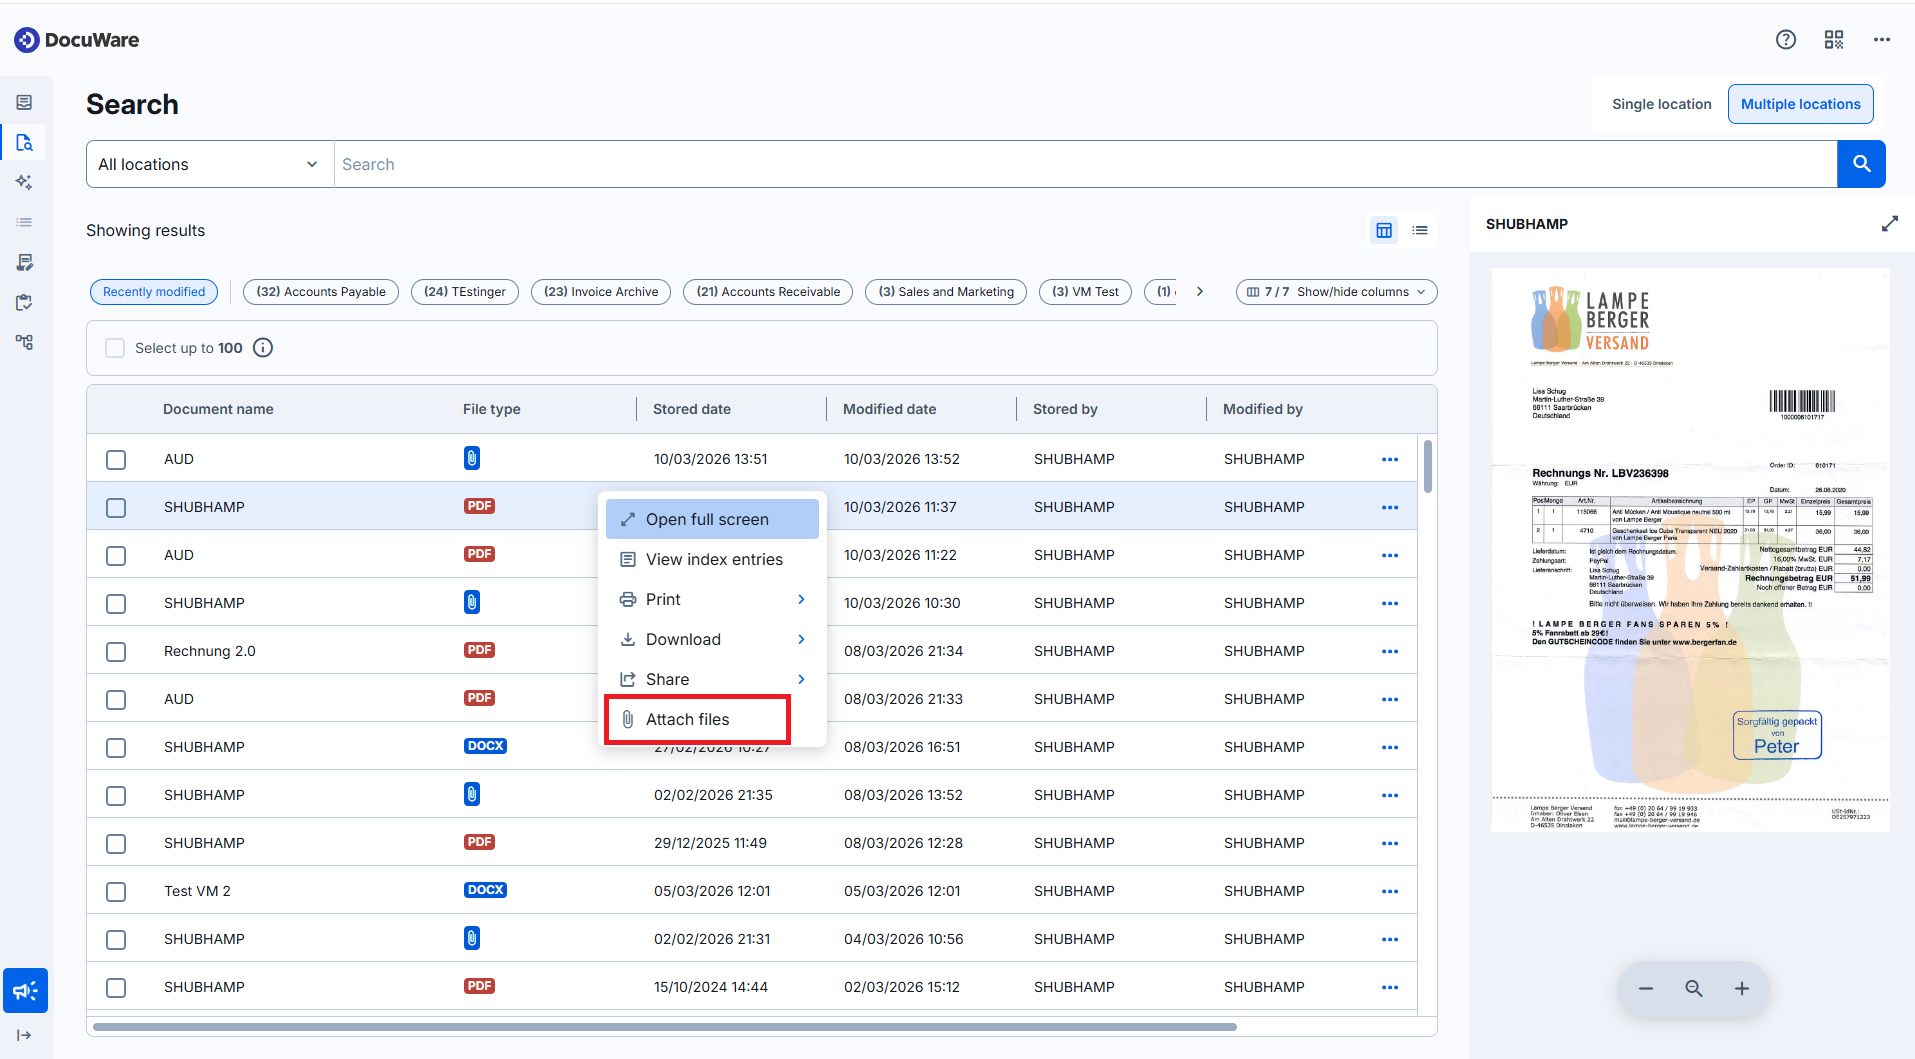
A right-click on a document in the tray or on the three-dot menu on the document row opens a context menu with quick actions:
Open full screen
View index
Rename
Attach files
Separate file
Edit in desktop app
Print
Download
Delete
Current limitations
Zooming functionality in document trays will be improved soon.
Currently, there is no way to set the default document tray in the new DocuWare client. The default tray is still set in classic Web Client and persisted.
Quick start tips
Select your document tray, then drag and drop files or use manual import:
.png)
Single-click a document to preview; open the full Viewer if you need a larger view.
To store, select a document in the tray, choose the destination file cabinet, enter the required index fields, and store.
To import a document using a locally connected scanner, choose the Scan App option:
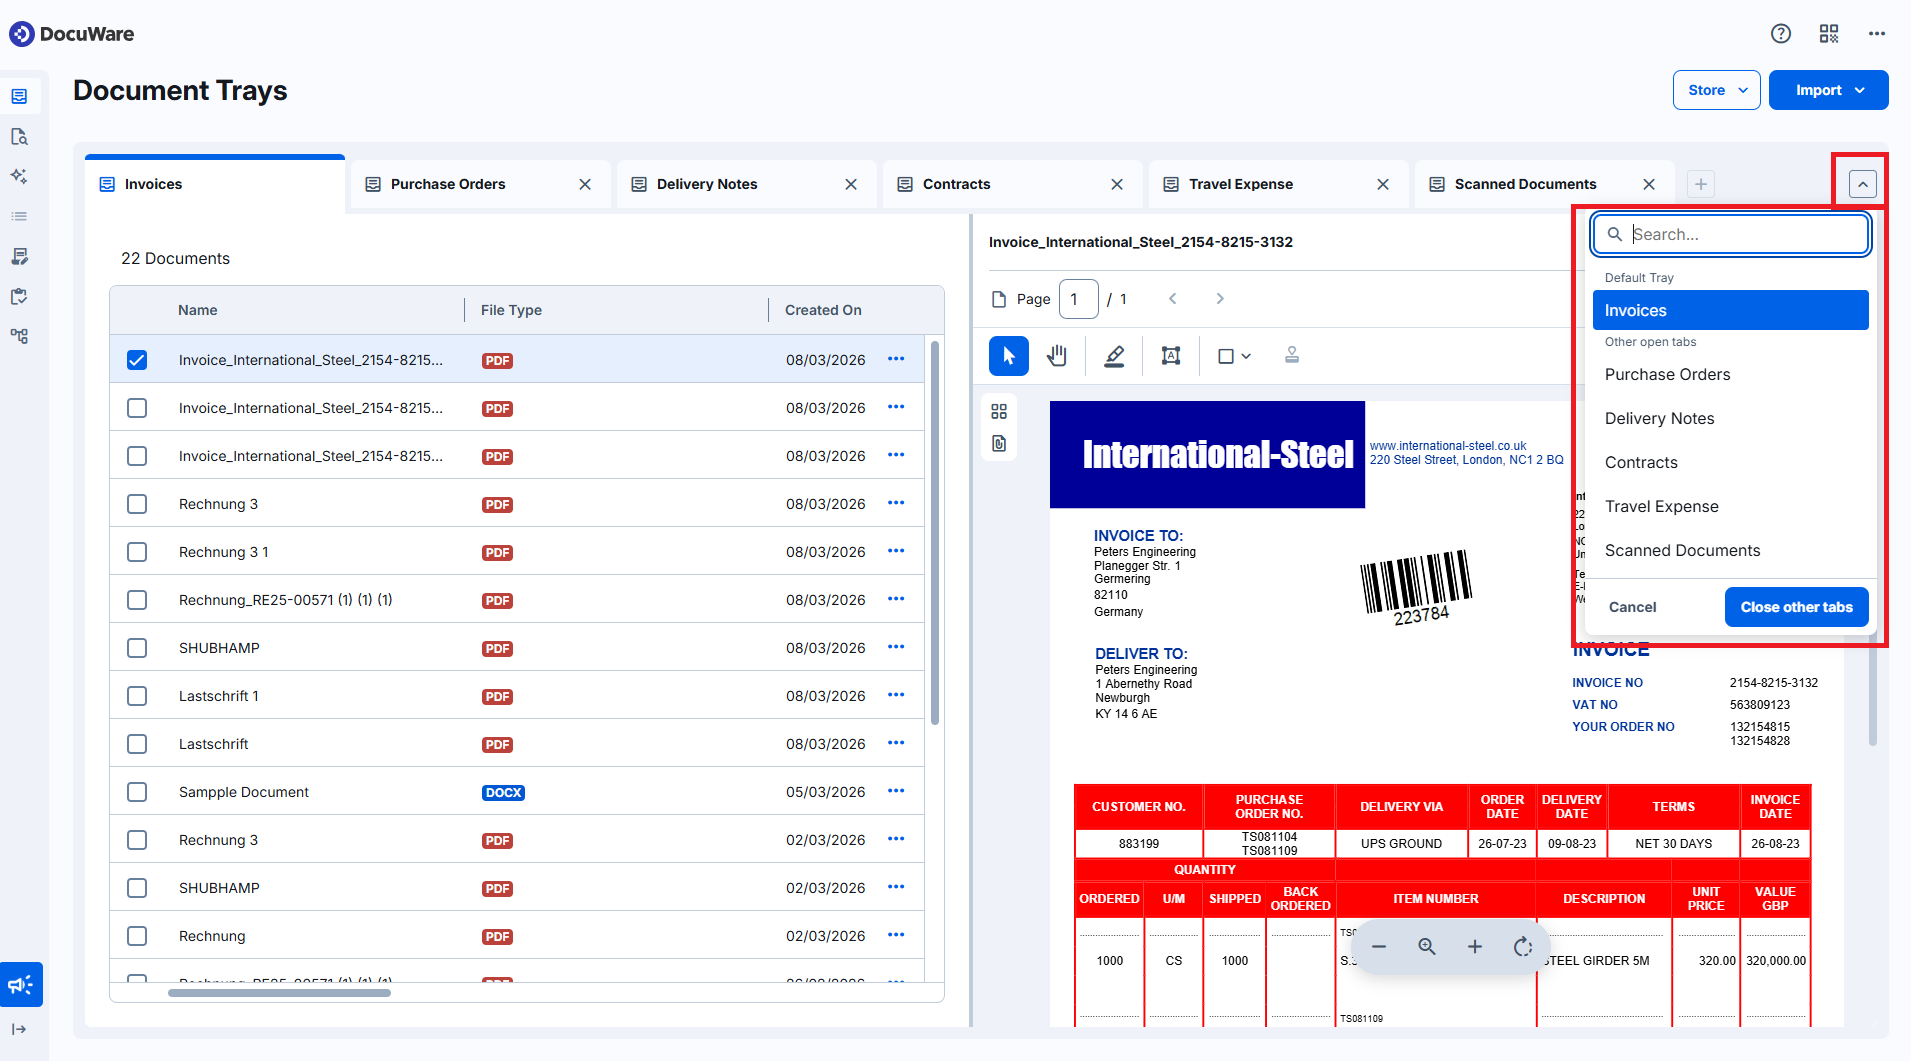
To open an additional tray, click the + icon next to the tray tabs and select a tray from the list. If many trays are available, use the search field to find one by name.
When many trays are open, click the tray list icon to see all open trays and jump to the one you need.
You can close all open trays at once by clicking on Close other tabs:
One Click Indexing
With One Click Indexing, you can select text directly from a document and populate index fields in the store dialog, similar to classic DocuWare. One Click Indexing has been moved from the Viewer, and now it is located in the store dialog.
To use One Click Indexing:
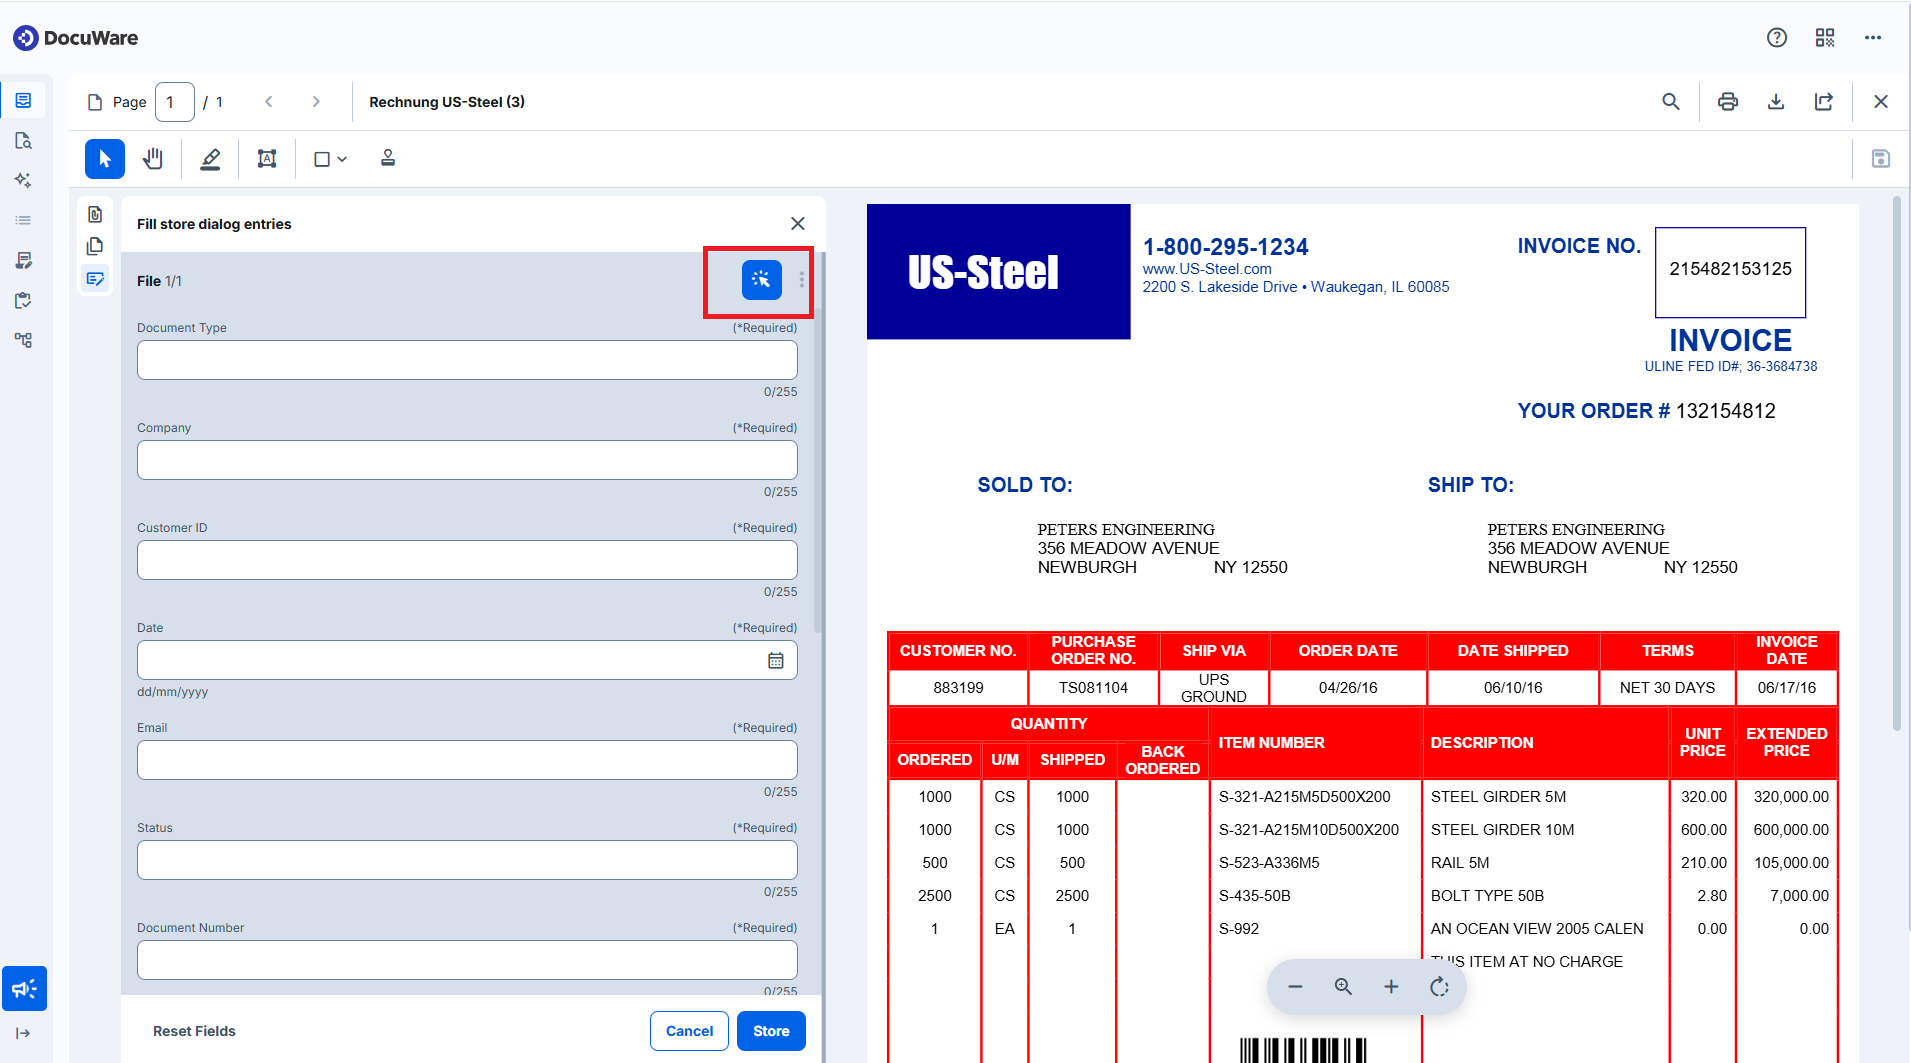
1. Click the One Click Indexing icon in the store dialog to enable it.
2. Select the index field in the store dialog where the value should be inserted.
3. Click on the desired text in the document, or drag over it to select a range.
Current limitations
Autofill table function is not yet available.
Text highlighting and color coding will be improved in a future update.
Quick start tip
Click on the One Click Indexing icon to enable the functionality:
Store dialog field validations and tooltips
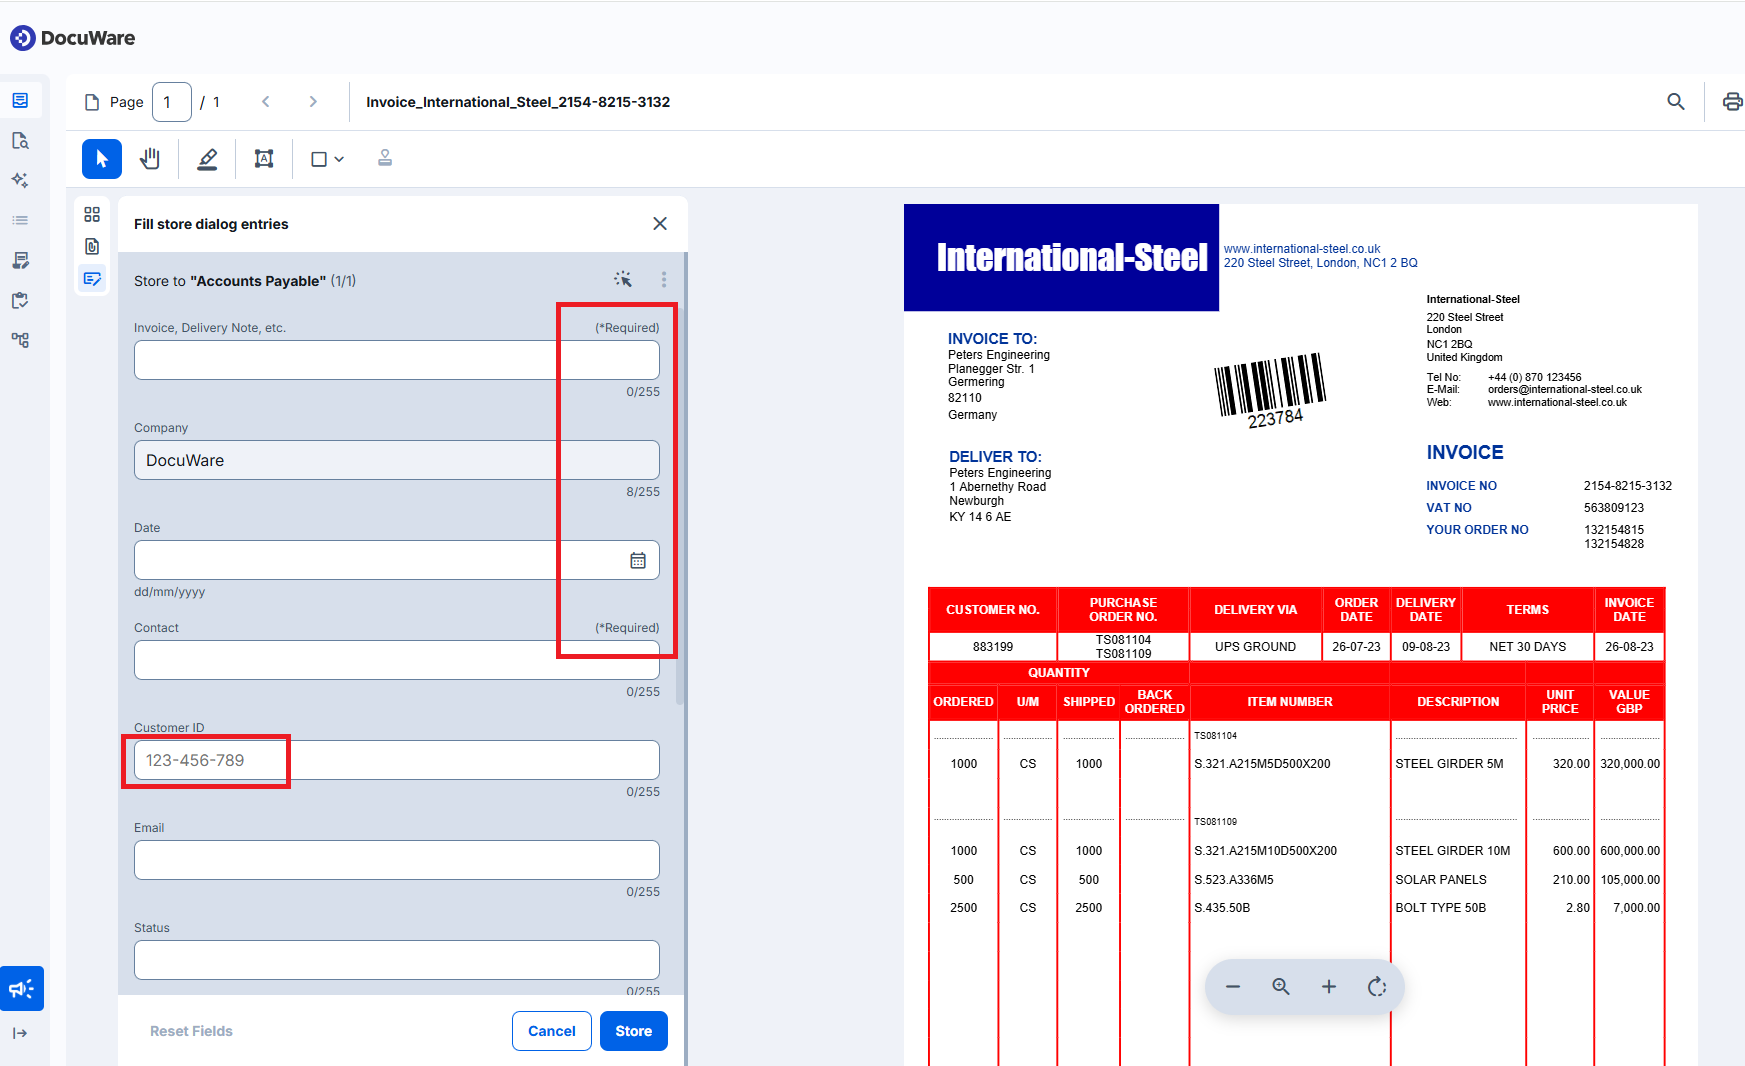
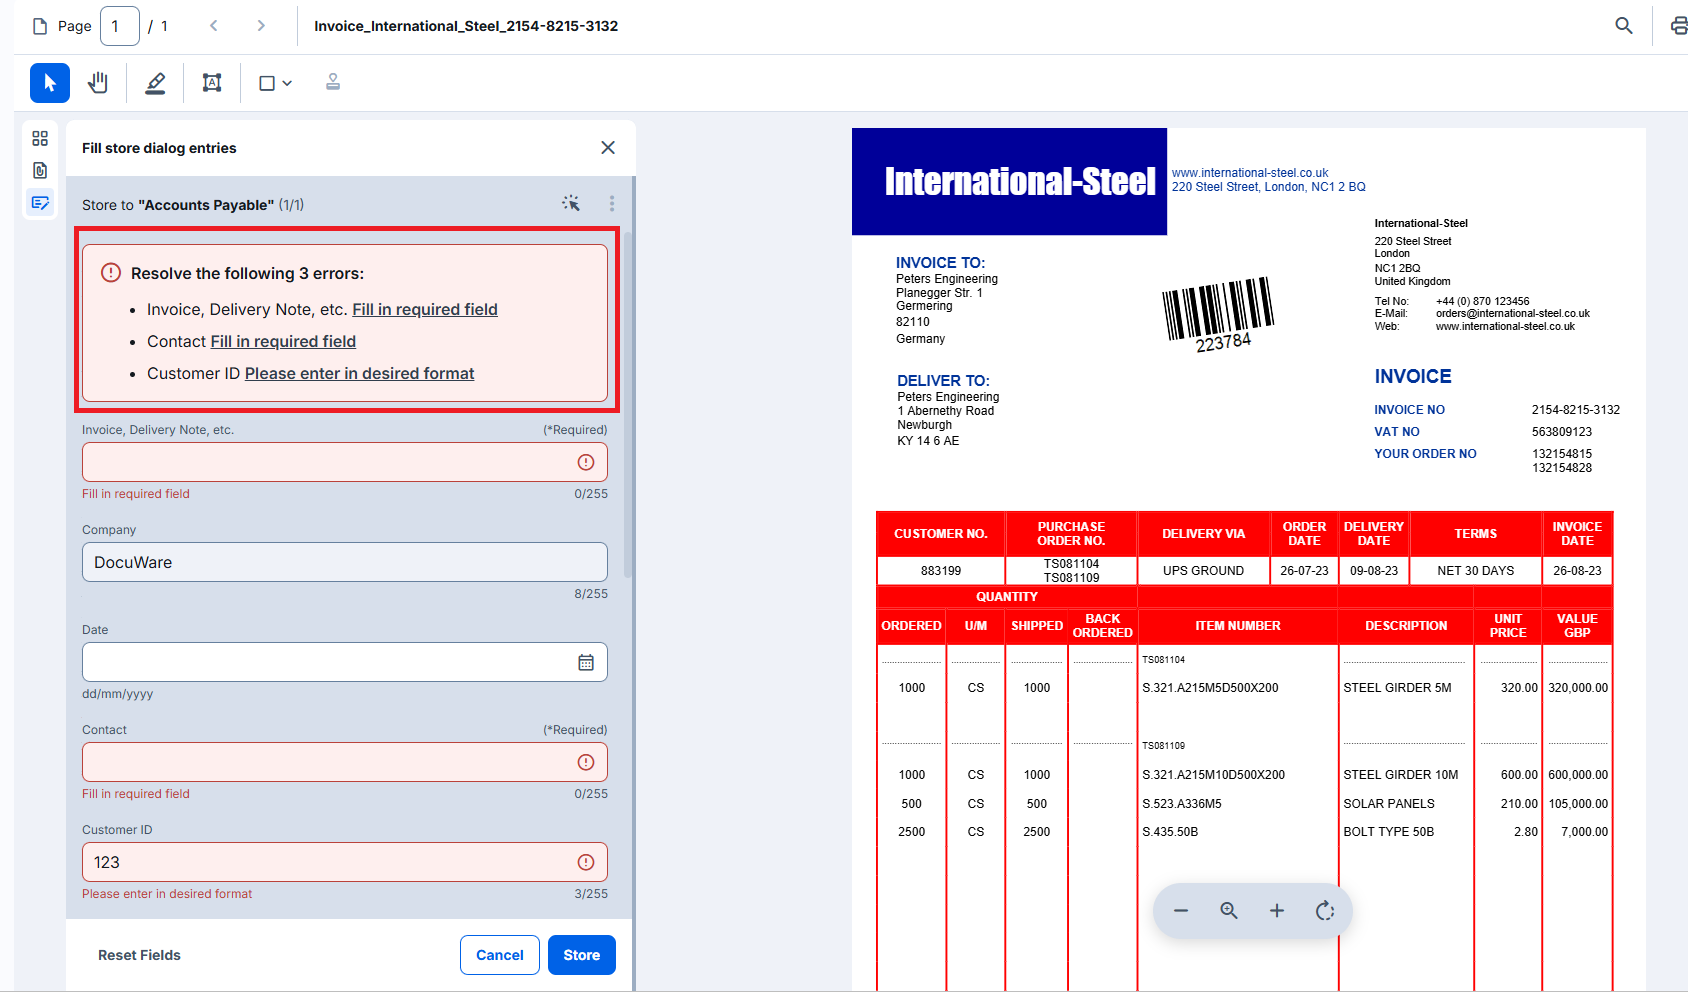
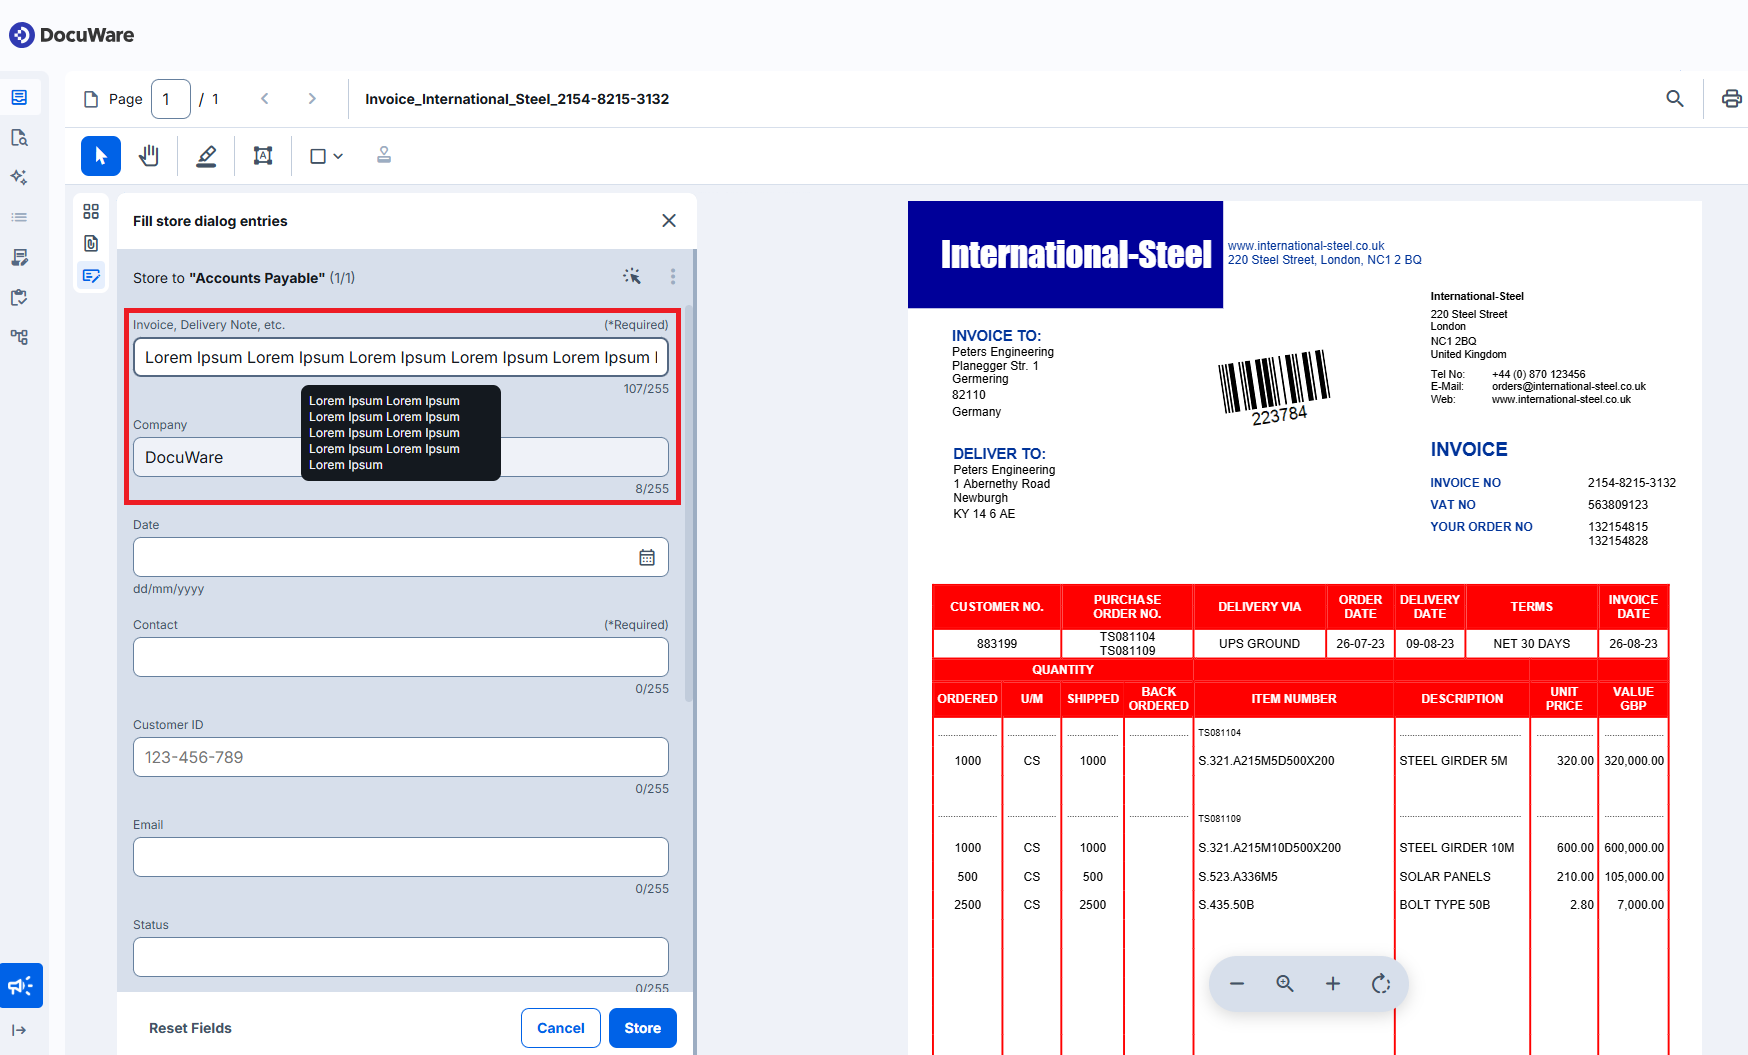
All input fields in the store dialog now support validation rules, including mandatory fields and field masks. If a field does not meet its requirements, an error summary appears at the top of the dialog. You can click an error in the summary to jump directly to the affected field. In addition, tooltips now appear on hover when a field description is too long to display fully.
Quick start tips
Indication of index fields and field masks:
Error summary with links to specific fields:
Tooltip on hover in case the text doesn't fit the visible length of the dialog field:
Store dialog context menu
The store dialog includes a context menu (three-dot icon, top right of the store dialog). Three checkbox options change how a document is stored from a tray, and two actions help you fill in the index entries:
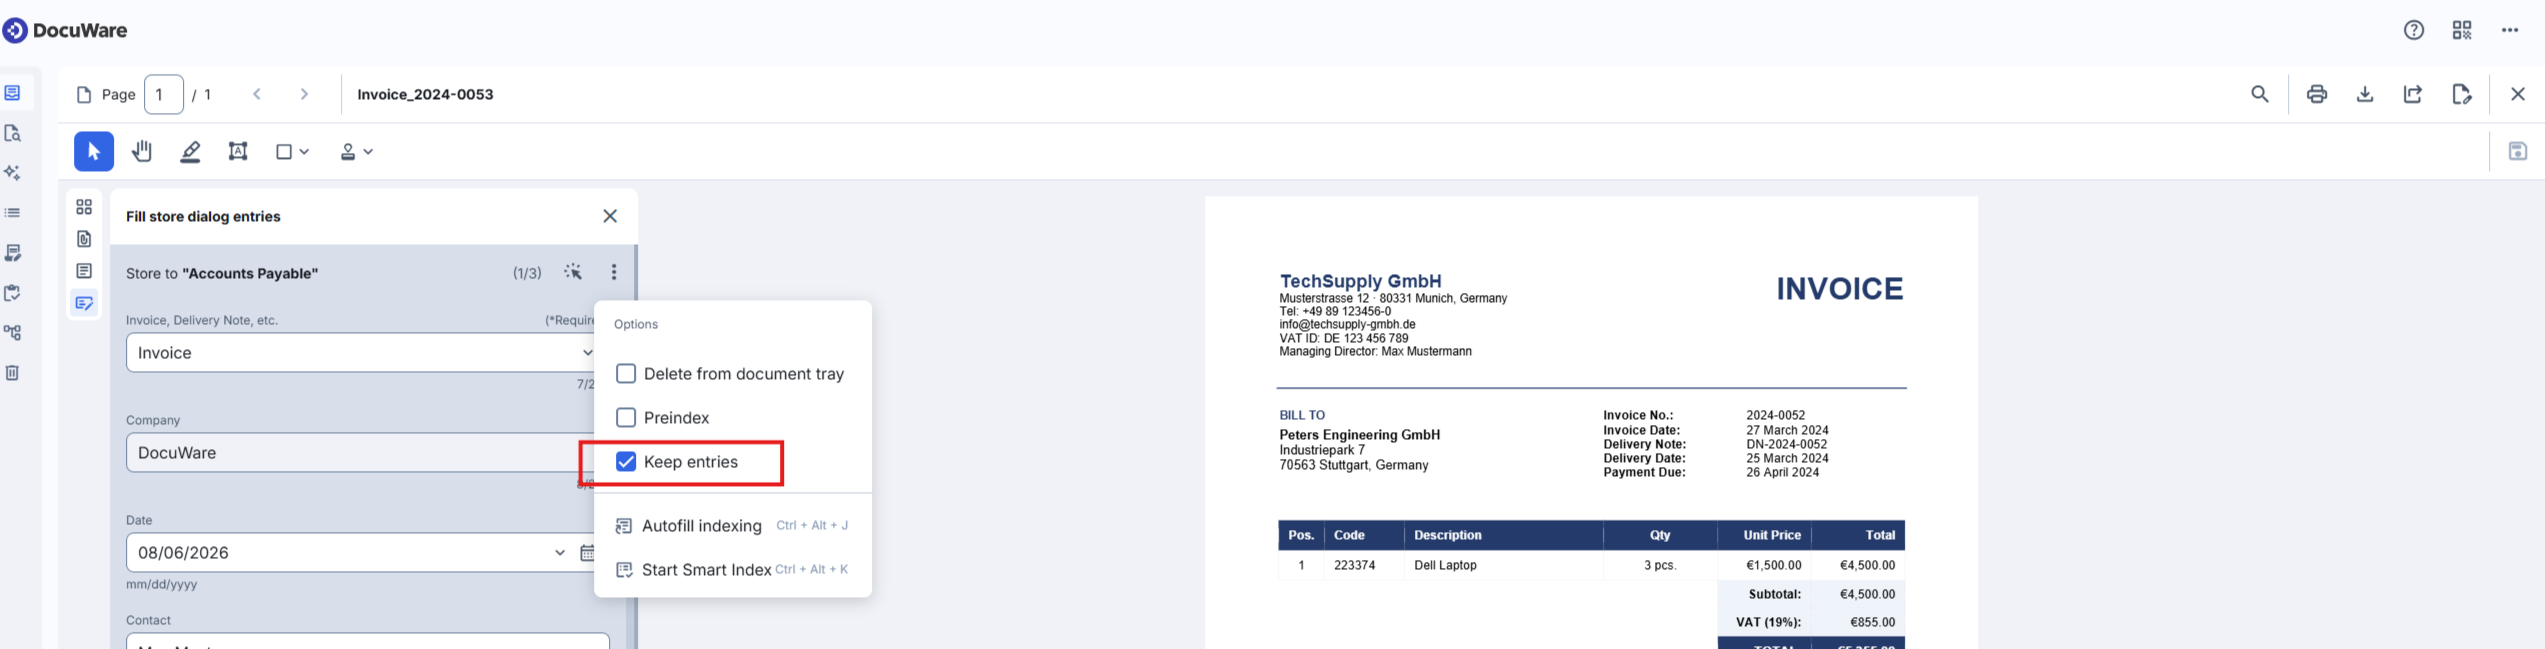
Delete from document tray — This option is selected by default: the document is removed from the tray after it is stored. Unselect the option to keep the document in the tray after storing, for example, to store the same document in another file cabinet as well.
Preindex —Select this option to save the index entries and close the store view; the document remains in the tray with its index values intact, ready to be stored later. When selecting Preindex, the primary action button switches from Store to Preindex, and Delete from document tray is temporarily disabled.
Keep entries — Keeps the index entries filled in for the next document when you store several documents in one go. Select multiple documents in the tray and open the store dialog: after you store the first document, the next selected document automatically opens in the same store dialog with your entries already filled in, so you only review them and change the fields that differ before storing. This saves re-entering identical values.
Autofill indexing — Fills the index fields in the store dialog with values from the document you stored most recently. Use it when processing a batch of similar documents and want to reuse previous values as a starting point. You can also press Ctrl + Alt + J.
Start Smart Index — Transfers data from the application you are already working with directly into the matching index fields; existing Smart Index configurations are applied automatically.
Quick start tips
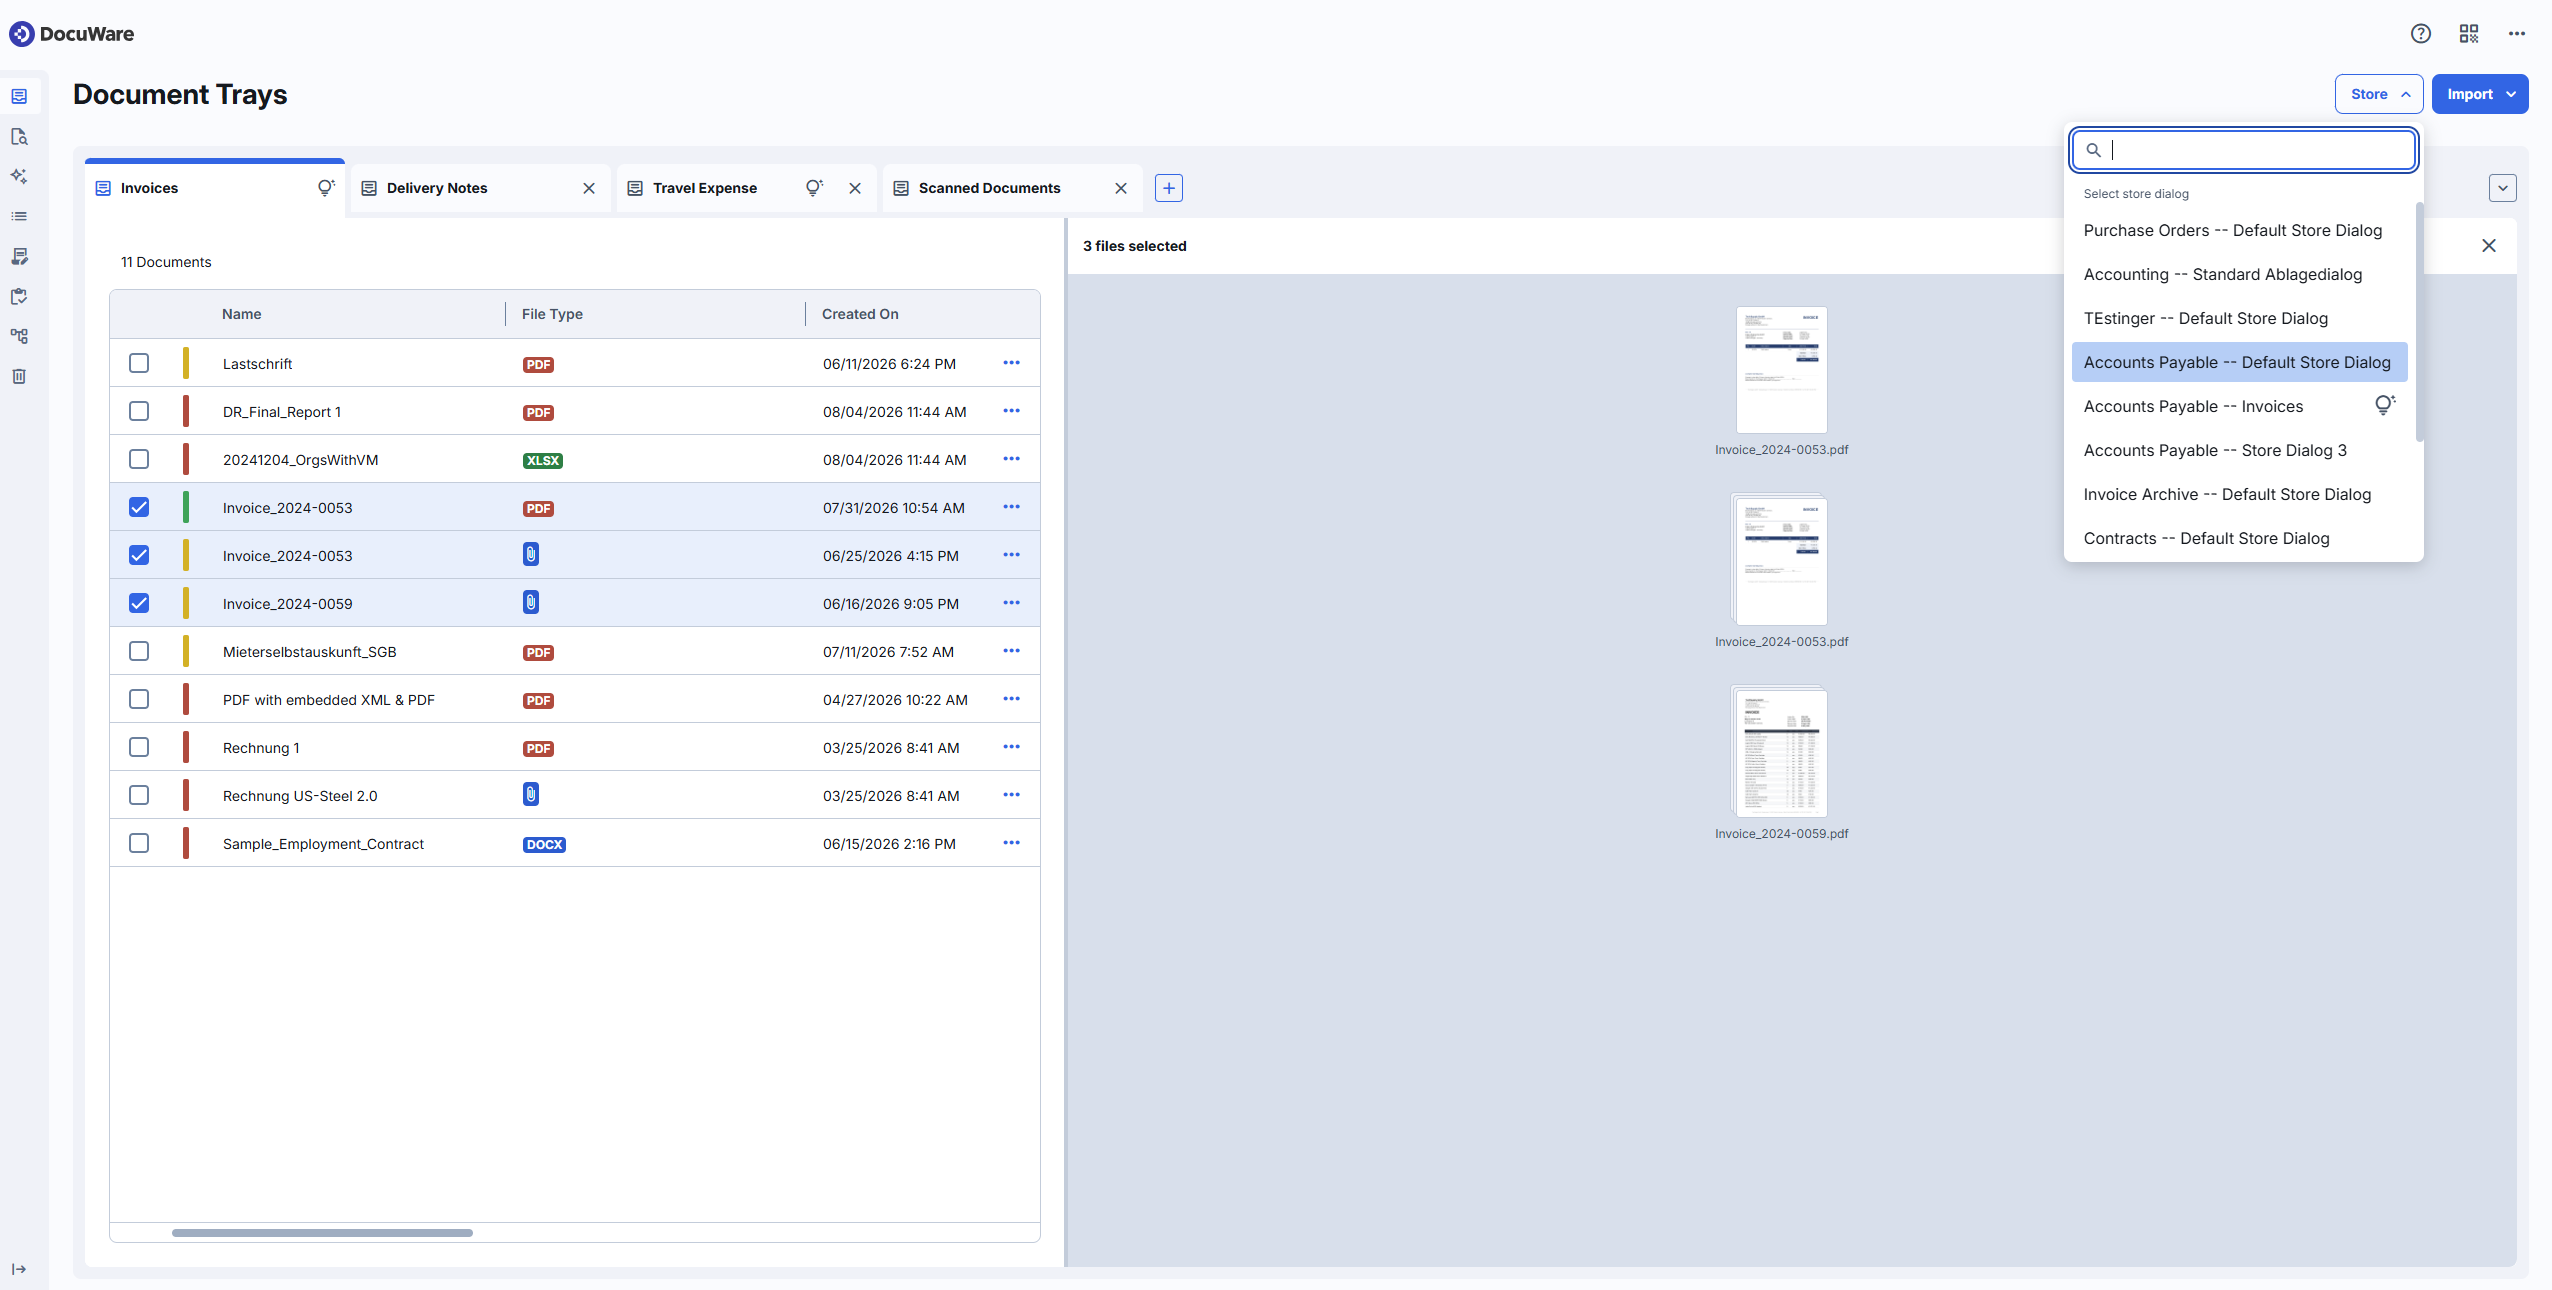
Select a document in the tray, click Store, choose a store dialog, then click the three-dot icon at the top right of the store dialog to open the context menu.
To store multiple documents in a tray, select the desired documents, click in Store and select the store dialog:
Organizing documents with Attach
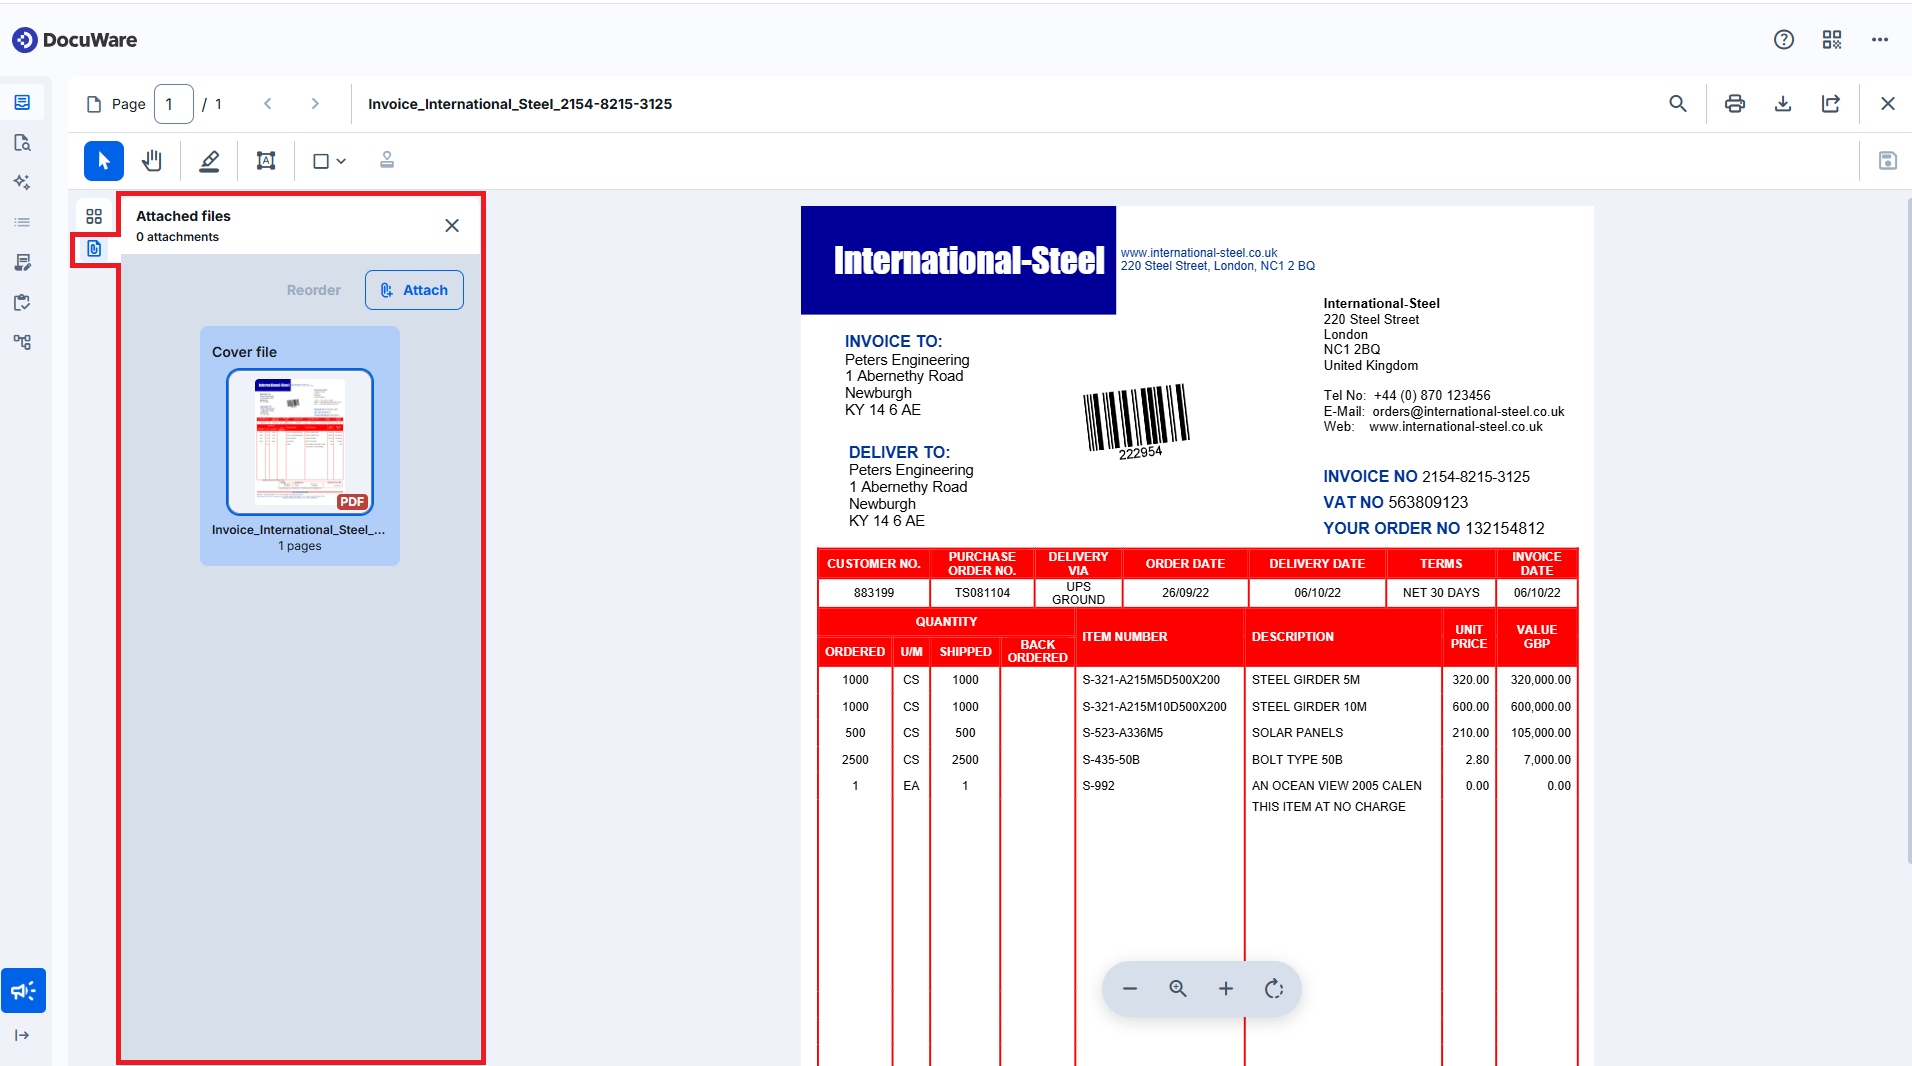
The Attach feature, previously called "Clip" in classic DocuWare, lets you group related documents together in a single location. The first document in an attachment set serves as the cover file, and all additional documents are added as attachments.
The functionality can be accessed directly from the Viewer or through search results in a file cabinet or document tray. In the Viewer, add documents from a document tray or local file system. You also have the option to change the order of attachments and remove individual documents from an attachment set in the Viewer. In a document tray, select multiple documents and attach them in a single action.
File cabinet permissions
Attaching and reordering documents requires the Edit permission in the relevant file cabinet. Deleting attachments requires the Delete permission in the relevant file cabinet.
To reorder attachments:
Open the attachment set in the Viewer.
Click Reorder.
Drag and drop documents to the desired position, or use the arrow buttons to move them.
To delete an attachment, select the document and remove it from the set. The last remaining document in an attachment set cannot be deleted. Deleting a document from an attachment is permanent and cannot be undone.
To separate previously attached documents in a document tray, right-click the document or open the context menu and select Detach files. Each document is then restored as an individual file.
Current limitation
The Attach feature is not yet available for database records.
Quick start tips
Upload documents for attaching From the file system or From DocuWare, which allows you to access the document tray:
.png)
Attach/Detach files From DocuWare (document tray): right-click the document or open the context menu (three horizontal dots) and select Attach files or Detach files. The selected documents are combined into an attachment set in the order you selected them. The first document becomes the cover file.
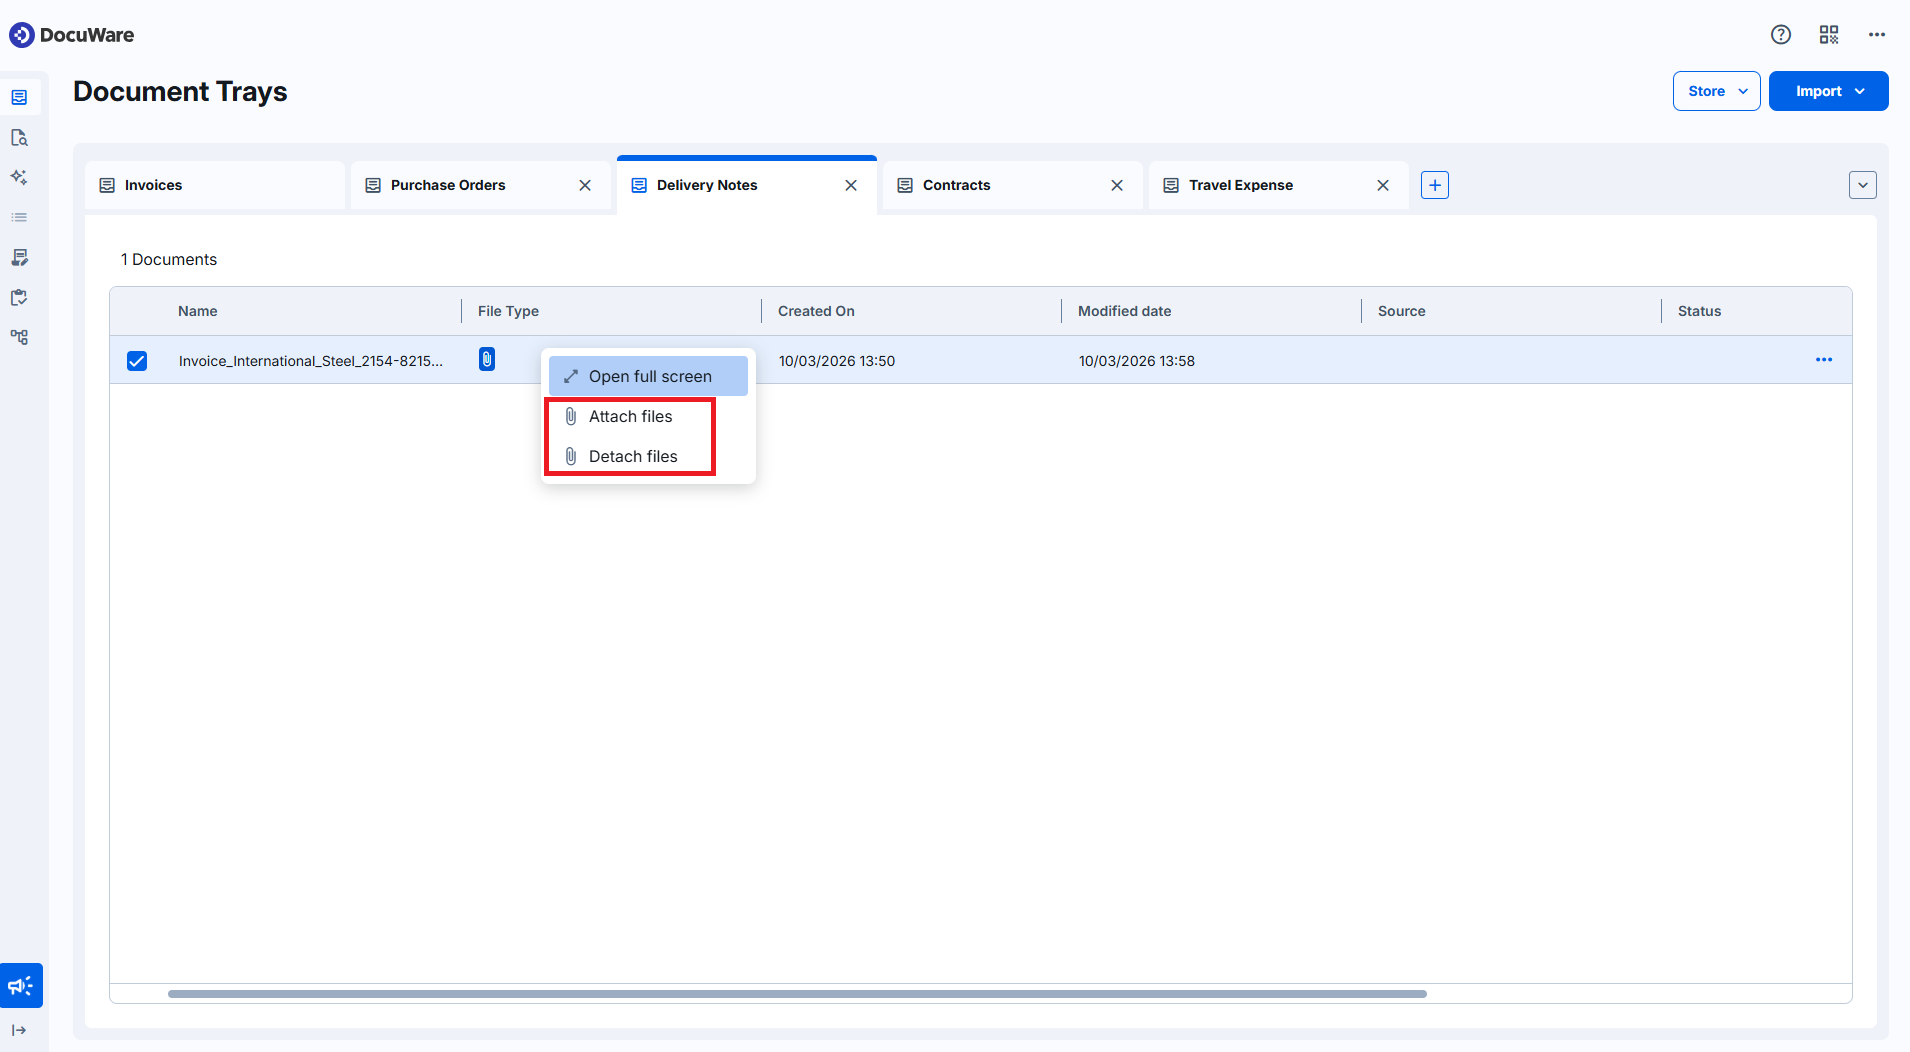
Attach multiple files together from a document tray:
.png)
Attach a document from a tray in the Viewer: click Attach and choose to add a document from a document tray or from your file system. The document is added to the attachment set. You can reorder or remove it afterward.
Attach files from the file cabinet (Search results): right-click the document and select Attach files.