Exploring documents in the Viewer
The new DocuWare Viewer features a clear, responsive and accessible interface. PDFs are rendered on the client side to support sharp text and images at any zoom level. Infinite scrolling loads long documents on demand.
More changes:
The annotation layer has been revised: A context-menu toolbar lets users create or edit annotations immediately and adjust style, color, and transparency without dialog hopping.
Two additional annotations - cross and check mark - support quick validation during reviews.
Copy text to clipboard: To copy text, simply drag over it to select it. There is no need to hold Ctrl before selecting.
Clickable hyperlinks: Links within documents are now interactive. Select the link text and press Ctrl + Click to open it.
Documents can be shared with other DocuWare users straight from the Viewer; no desktop application is required anymore. Printing runs through a simplified command and finishes in two clicks. A hit counter displays the total number of matches for the active search term as soon as the results appear.
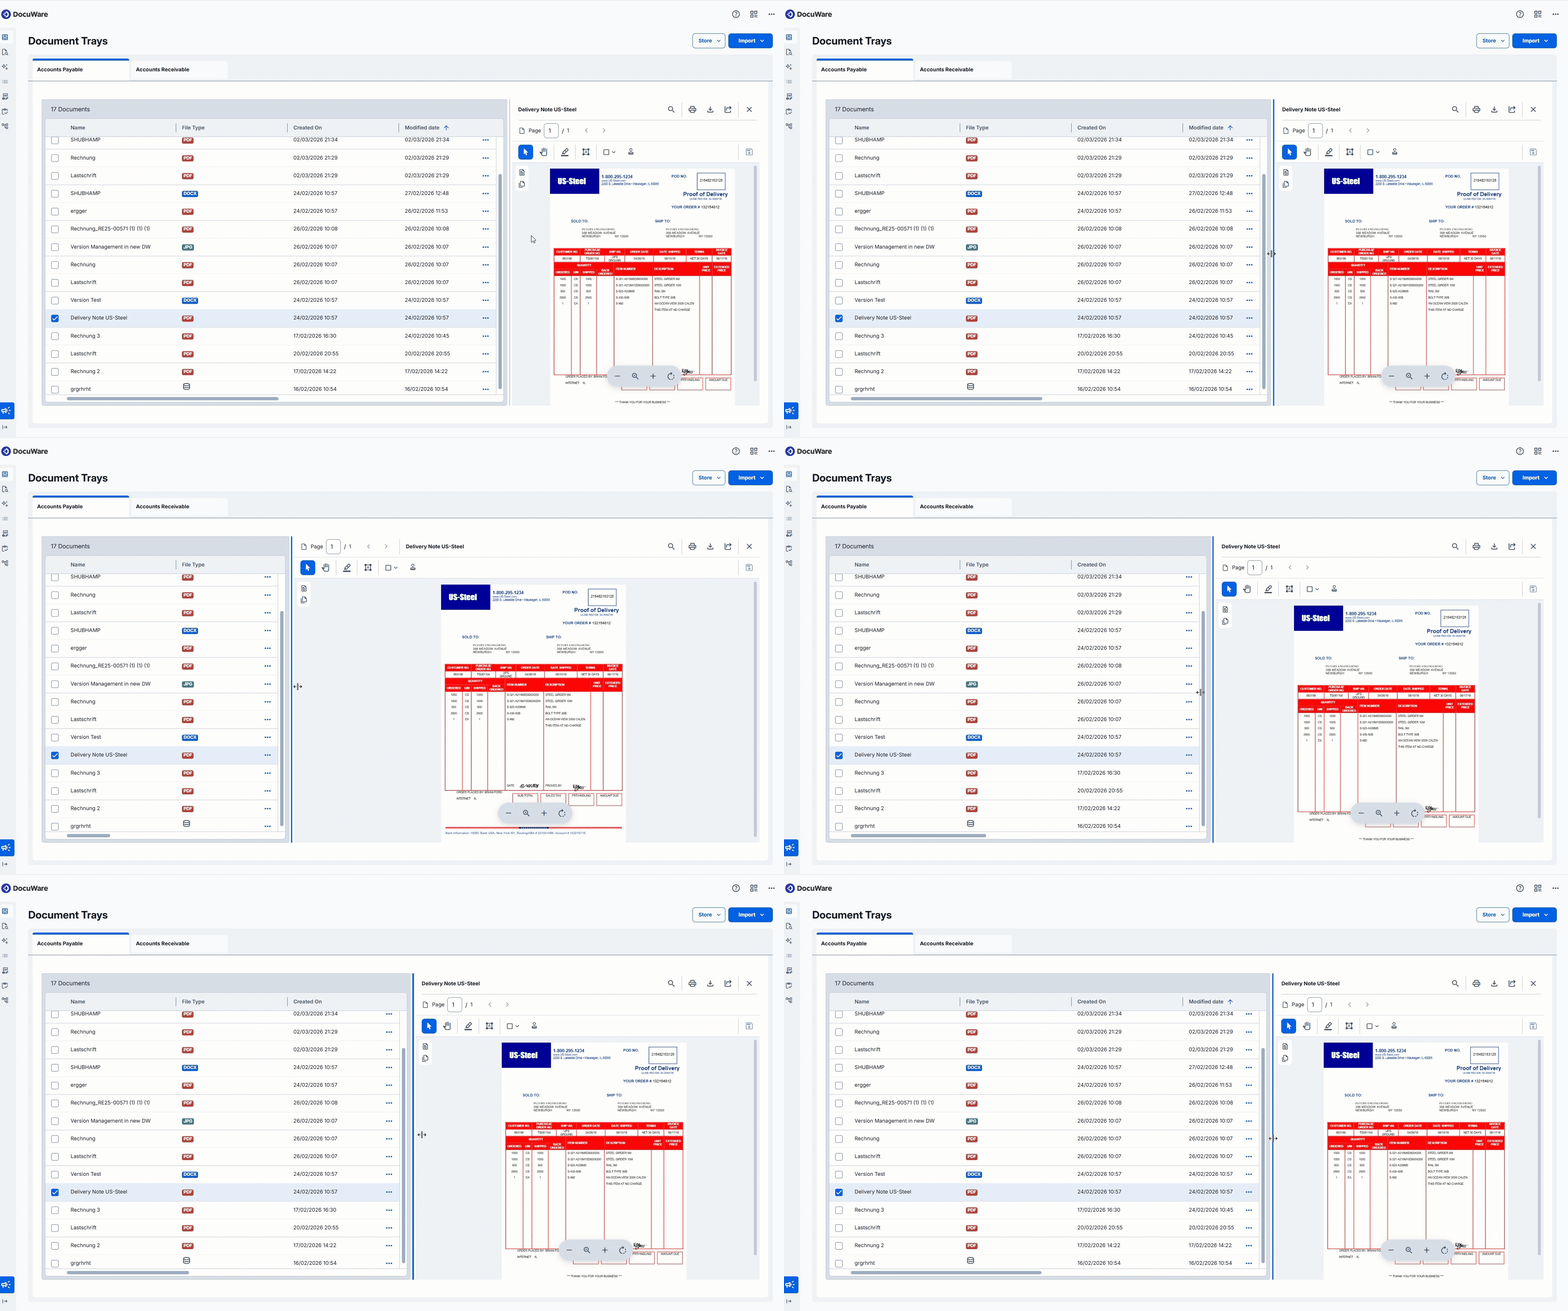
You can now adjust the width of the Viewer in the document tray or a workflow task using a slider. As you drag the slider left or right, the layout adapts in real time. Your preferred width is saved automatically and applies across DocuWare, which means you do not need to readjust it each session. The Viewer also preserves your selected zoom level across documents and sessions. When you set a zoom preference, it applies consistently without the need to readjust for each document. The Viewer layout adapts automatically when the Viewer is resized, providing a responsive viewing experience across all areas where the Viewer is available. This feature is available by default and requires no configuration.
Current limitations
Sharing with externals still relies on Desktop (download and attach to email).
Quick start tips
Use the annotation toolbar to adjust an annotation:
.png)
Hover over an annotation to reveal author and timestamp:
.png)
Adjust the width of the Viewer by dragging the slider:
Place stamps on documents
Stamps let you apply predefined visual marks, such as "Approved," "Received," or a date stamp, directly onto a document in the Viewer.
Stamp configuration is handled the same way as in classic DocuWare. The existing stamp configuration settings in DocuWare Configurations remain unchanged.
All stamps are applied according to their predefined configuration. Styling, color, and behavior, including any linked indexing updates or workflow triggers, follow the settings defined by the administrator.
To use stamps, you need the appropriate stamp permissions in the relevant file cabinet.
Quick start tips
Steps to apply a stamp
Open a document in the Viewer.
Click the Stamps icon in the annotation toolbar. A dropdown displays all stamps assigned to you.
Hover over a stamp to see a visual preview.
Select the stamp you want to apply. The stamp follows your cursor.
Click anywhere on the document page to place the stamp.
.png)
You can place the selected stamp on multiple pages within the same document without reselecting it.
If a stamp requires additional input, such as a comment or a date, an input dialog appears before placement.
If you have more than 15 stamps assigned to you, use the search function at the top of the stamp dropdown. Type part of the stamp name to filter the list.
.png)
Open documents in native applications
From the Viewer, open a document in its native application to view or edit it, as in classic DocuWare.
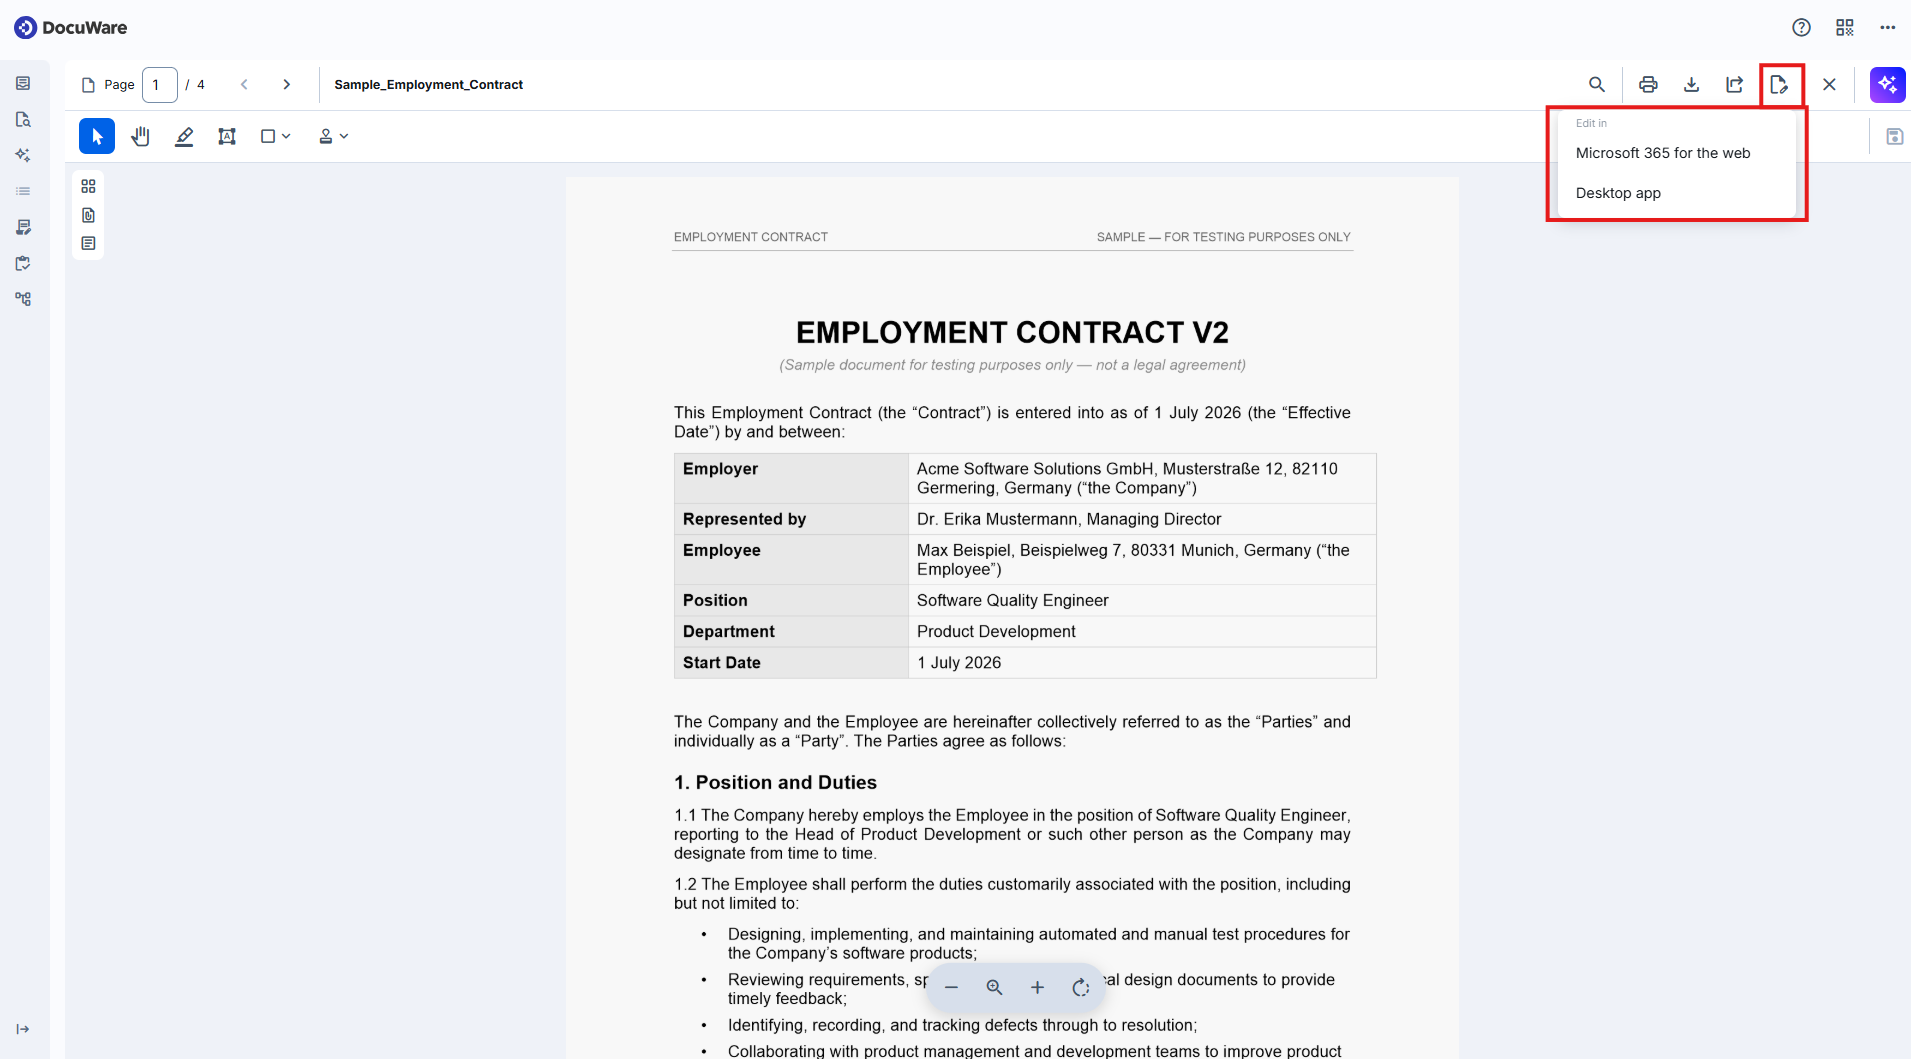
For Microsoft Office documents, two options are available:
Desktop App: opens the document in the Microsoft Office application installed on your computer.
Microsoft for the Web: opens the document in the matching Microsoft web application.
For all other supported file types, the document opens in the default desktop application set on your computer.
No configuration is required to use this function, however the Edit & Send desktop app need to be installed first.
Permission required
For documents stored in a file cabinet, you need the Edit permission to open them in a native application.
Current limitation
Opening documents in native applications is currently available only from the Viewer. It will be added to the result list and document tray context menus in a future release.
Quick start tips
Open a document in a native application: in the Viewer toolbar, click Edit in and select Desktop App or Microsoft for the Web.
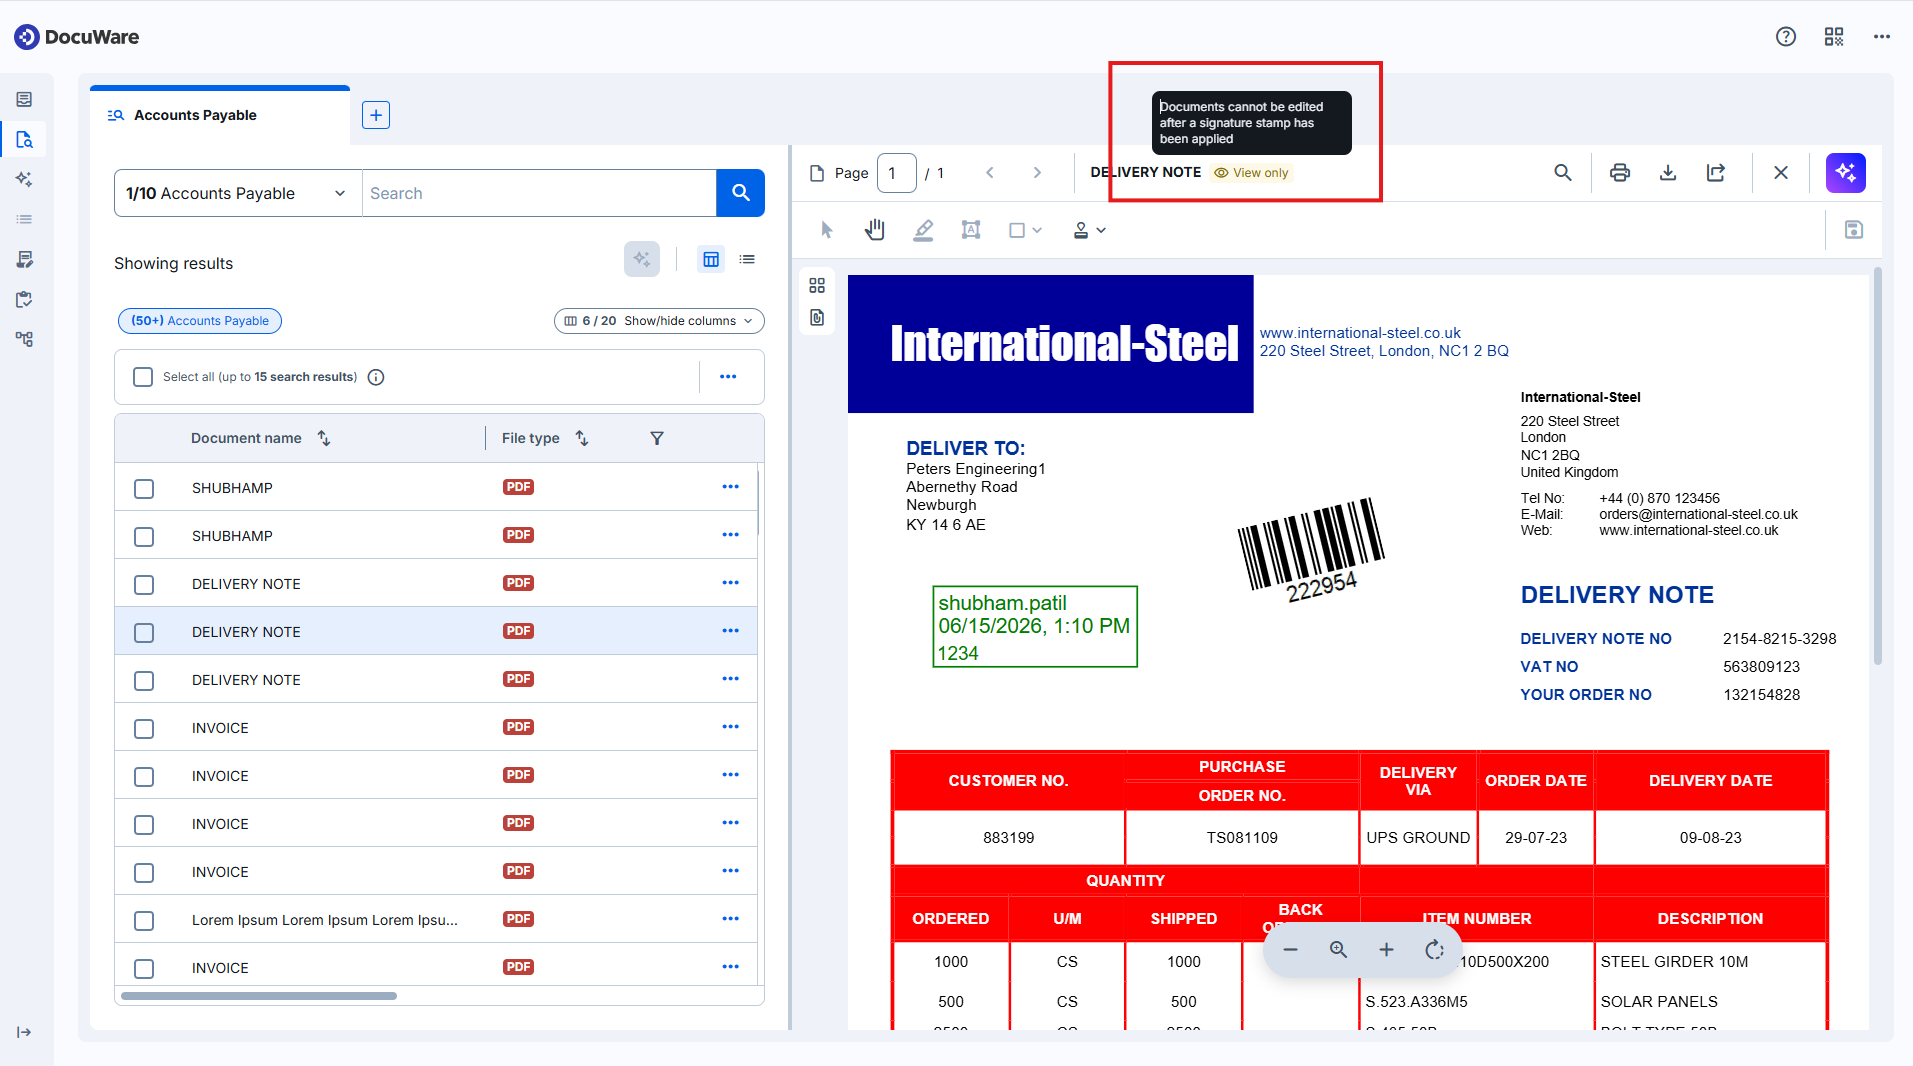
Documents that cannot be edited show a View only label with a tooltip that explains why editing is restricted, for example, after a signature stamp has been applied or while another user is editing the document.