In a workflow task, you are asked to make a decision about a document, for example to approve an invoice, check a contract, or release an order. Once you have made your decision and entered what is required, the workflow continues by itself.
In the new DocuWare client, you open your tasks with the Tasks icon in the left sidebar.
New client only
This article applies only to the new DocuWare client. For the classic client, see the classic DocuWare client help.
On this page
Coming from the classic DocuWare client?
In the classic client, open the new DocuWare client with the link Open new DocuWare. Your document trays are the same as in classic DocuWare. If you know document trays from there, these are the differences:
Several document trays stay open side by side, and switching between them does not reload the content.
The Upload function is new: While documents are being imported, you can follow the upload, cancel it, and restart failed uploads.
Create data record is now Store index entries only. The function is the same, storing index entries in a file cabinet without a document.
For now, you set your default tray in the classic client. This is not yet possible in the new DocuWare client, but the setting applies there as well.
The new DocuWare client is available in DocuWare Cloud only for now. On-premises systems continue to work with the classic client.
Action slike Move to, Copy to, Print, Download and Share will follow. View all current limitations of the new DocuWare client
Opening and switching document trays
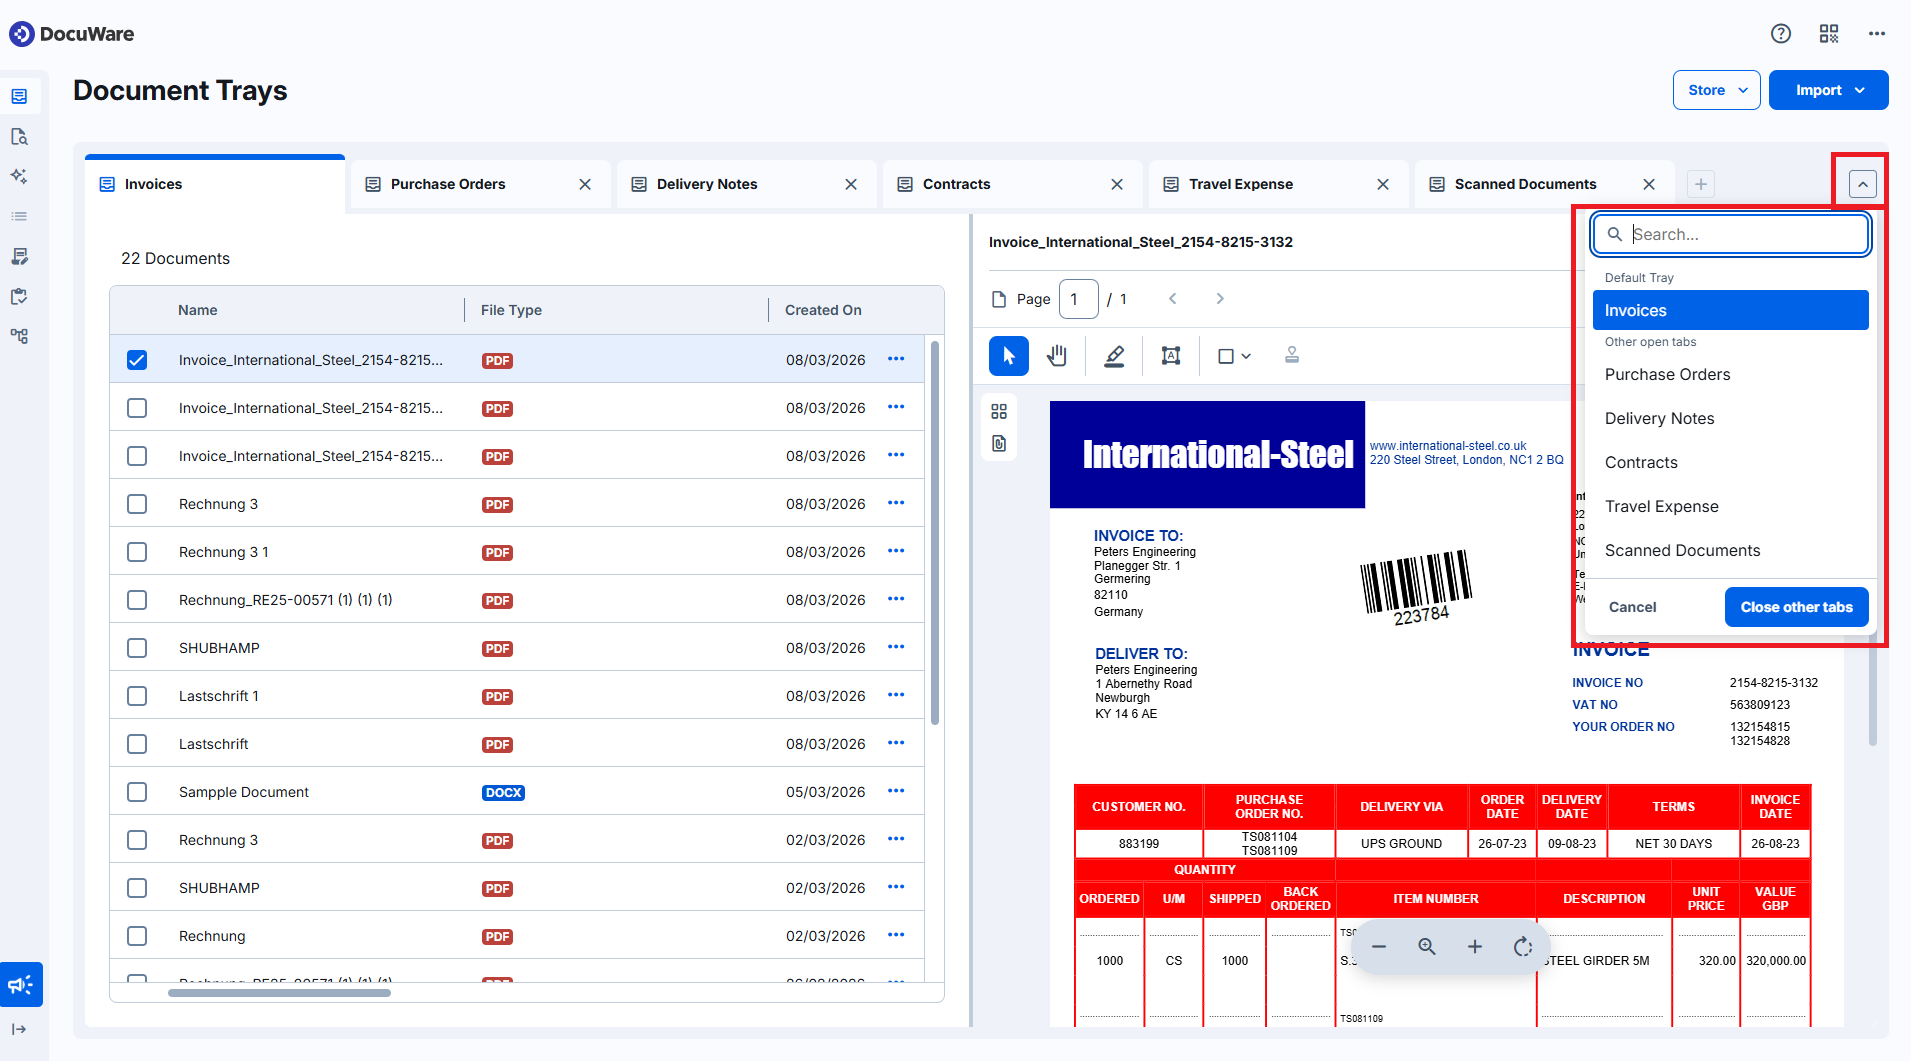
Each document tray you open appears as its own tab, and the tabs become narrower as more trays are added. Switching between tabs does not reload the content, so you can move back and forth while you work. Open tabs are restored after you login again.
Select the plus icon next to the tabs to open another document tray. If you have many trays, search for one by name in the search field. Select the tray list icon to see all open trays and go to the one you need.
Your default tray always stays open. To close all other trays at once, select Close other tabs:
Adding documents to a tray
There are three ways to get a document into a tray:
Drag files from your computer and drop them onto the tray.
Select Import to pick files from your computer in a dialog:
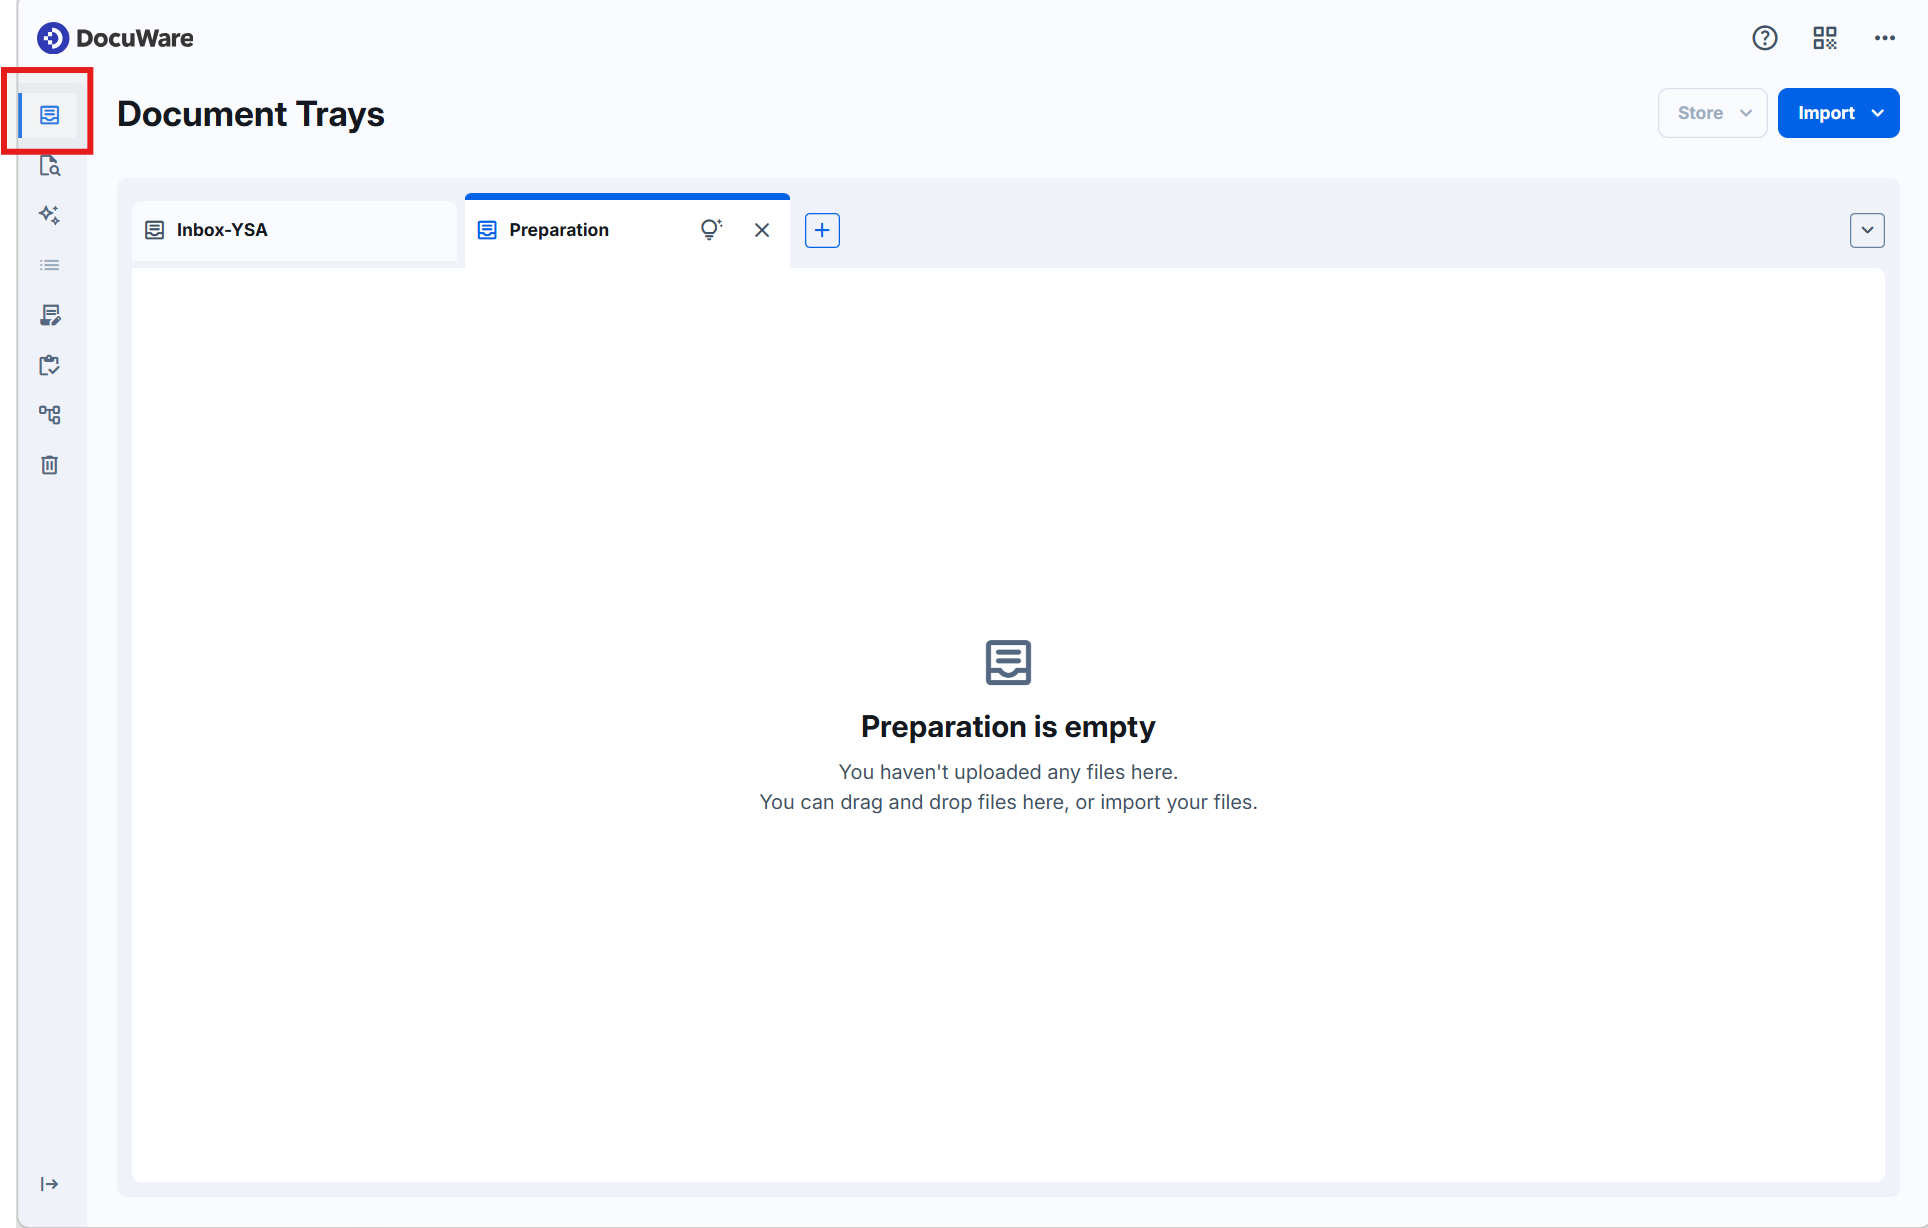
Select Scan App to scan paper with a scanner connected to your computer. A dialog of the desktop application opens, as in classic DocuWare. Select your scanner and a processing configuration, and the scanned pages arrive in the tray. Your existing processing configurations continue to apply. As in the classic client, DocuWare Desktop Apps are required to scan and import documents into the document tray.
.png)
Following an upload
As soon as documents are imported, Upload activity appears in the upper right corner. Select it to track the import. With many documents, this shows you the progress and whether an upload has failed. The panel covers all your trays and shows:
the estimated time until the upload is finished,
the option to cancel one upload or all running uploads at once, for example when you imported the wrong set of documents,
the uploads that failed, with the option to retry them. Only the failed documents are uploaded again, so you do not repeat the whole import.
Scanned documents are not listed here. You can leave the tray and the upload continues, but closing the browser cancels whatever has not been uploaded yet. After a successful upload the entry point stays available for 15 minutes once you have opened the panel, so you can still check afterwards whether everything went through.
Scanned documents are not listed in the Upload activity.
The upload continues even if you leave the tray. However, if you close the browser, the upload stops and any documents still pending are not uploaded. After a successful upload, the entry stays available for 15 minutes, provided you have opened the panel once. This lets you check later whether everything was uploaded.
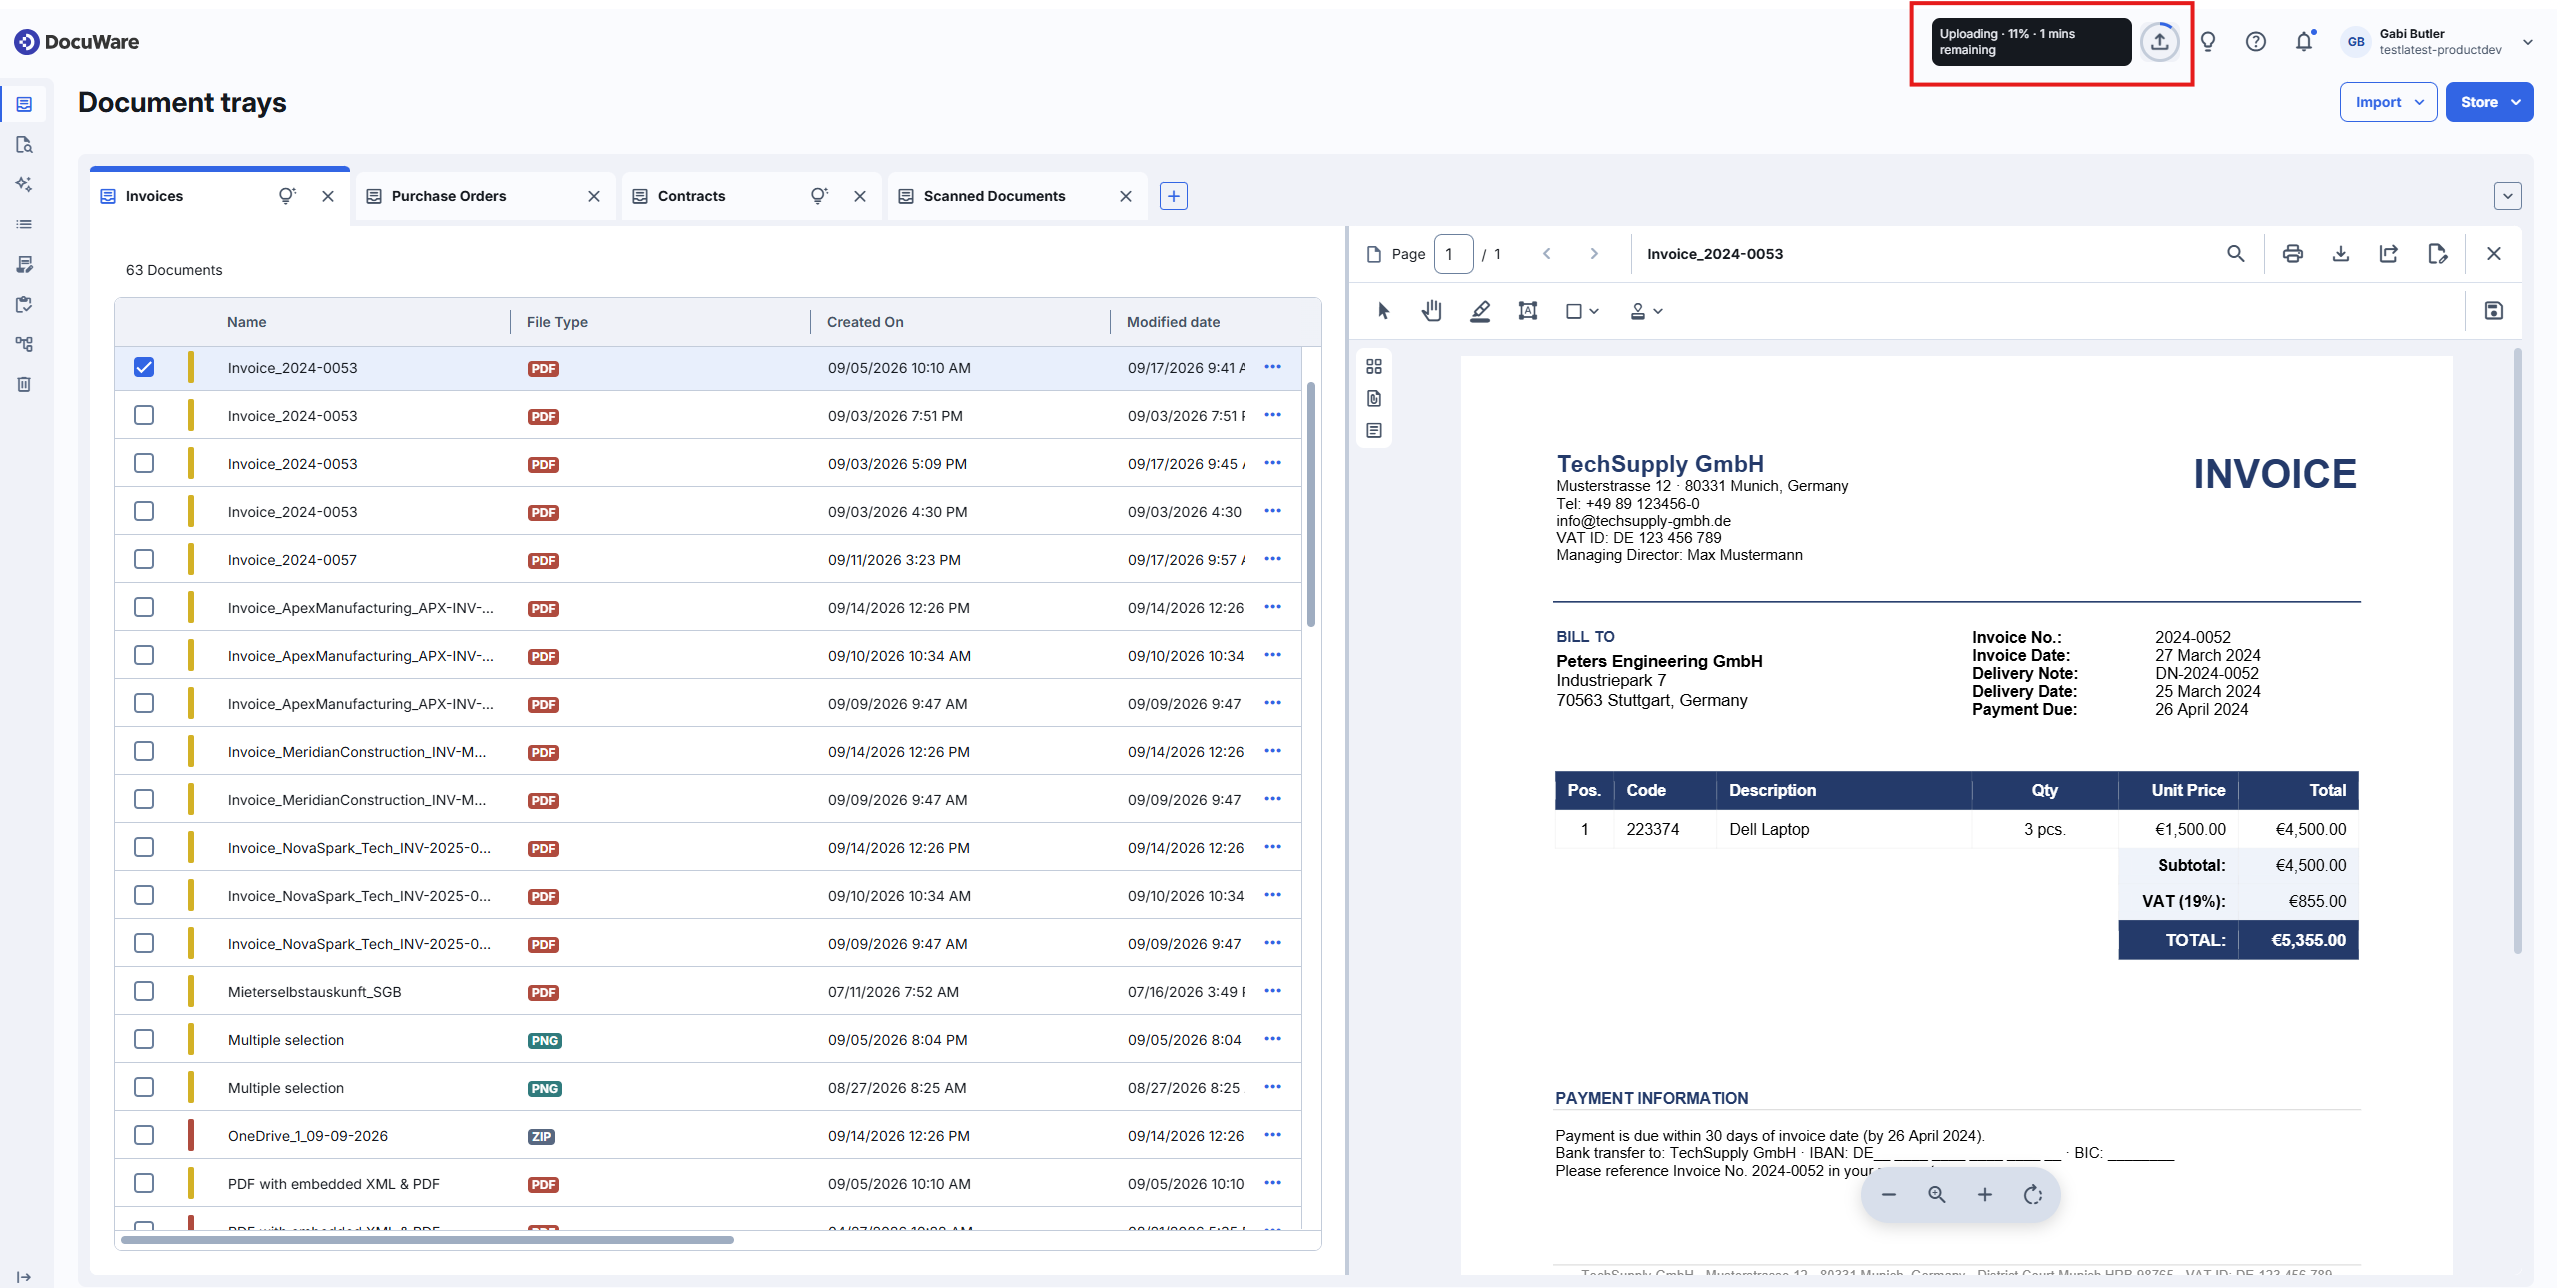
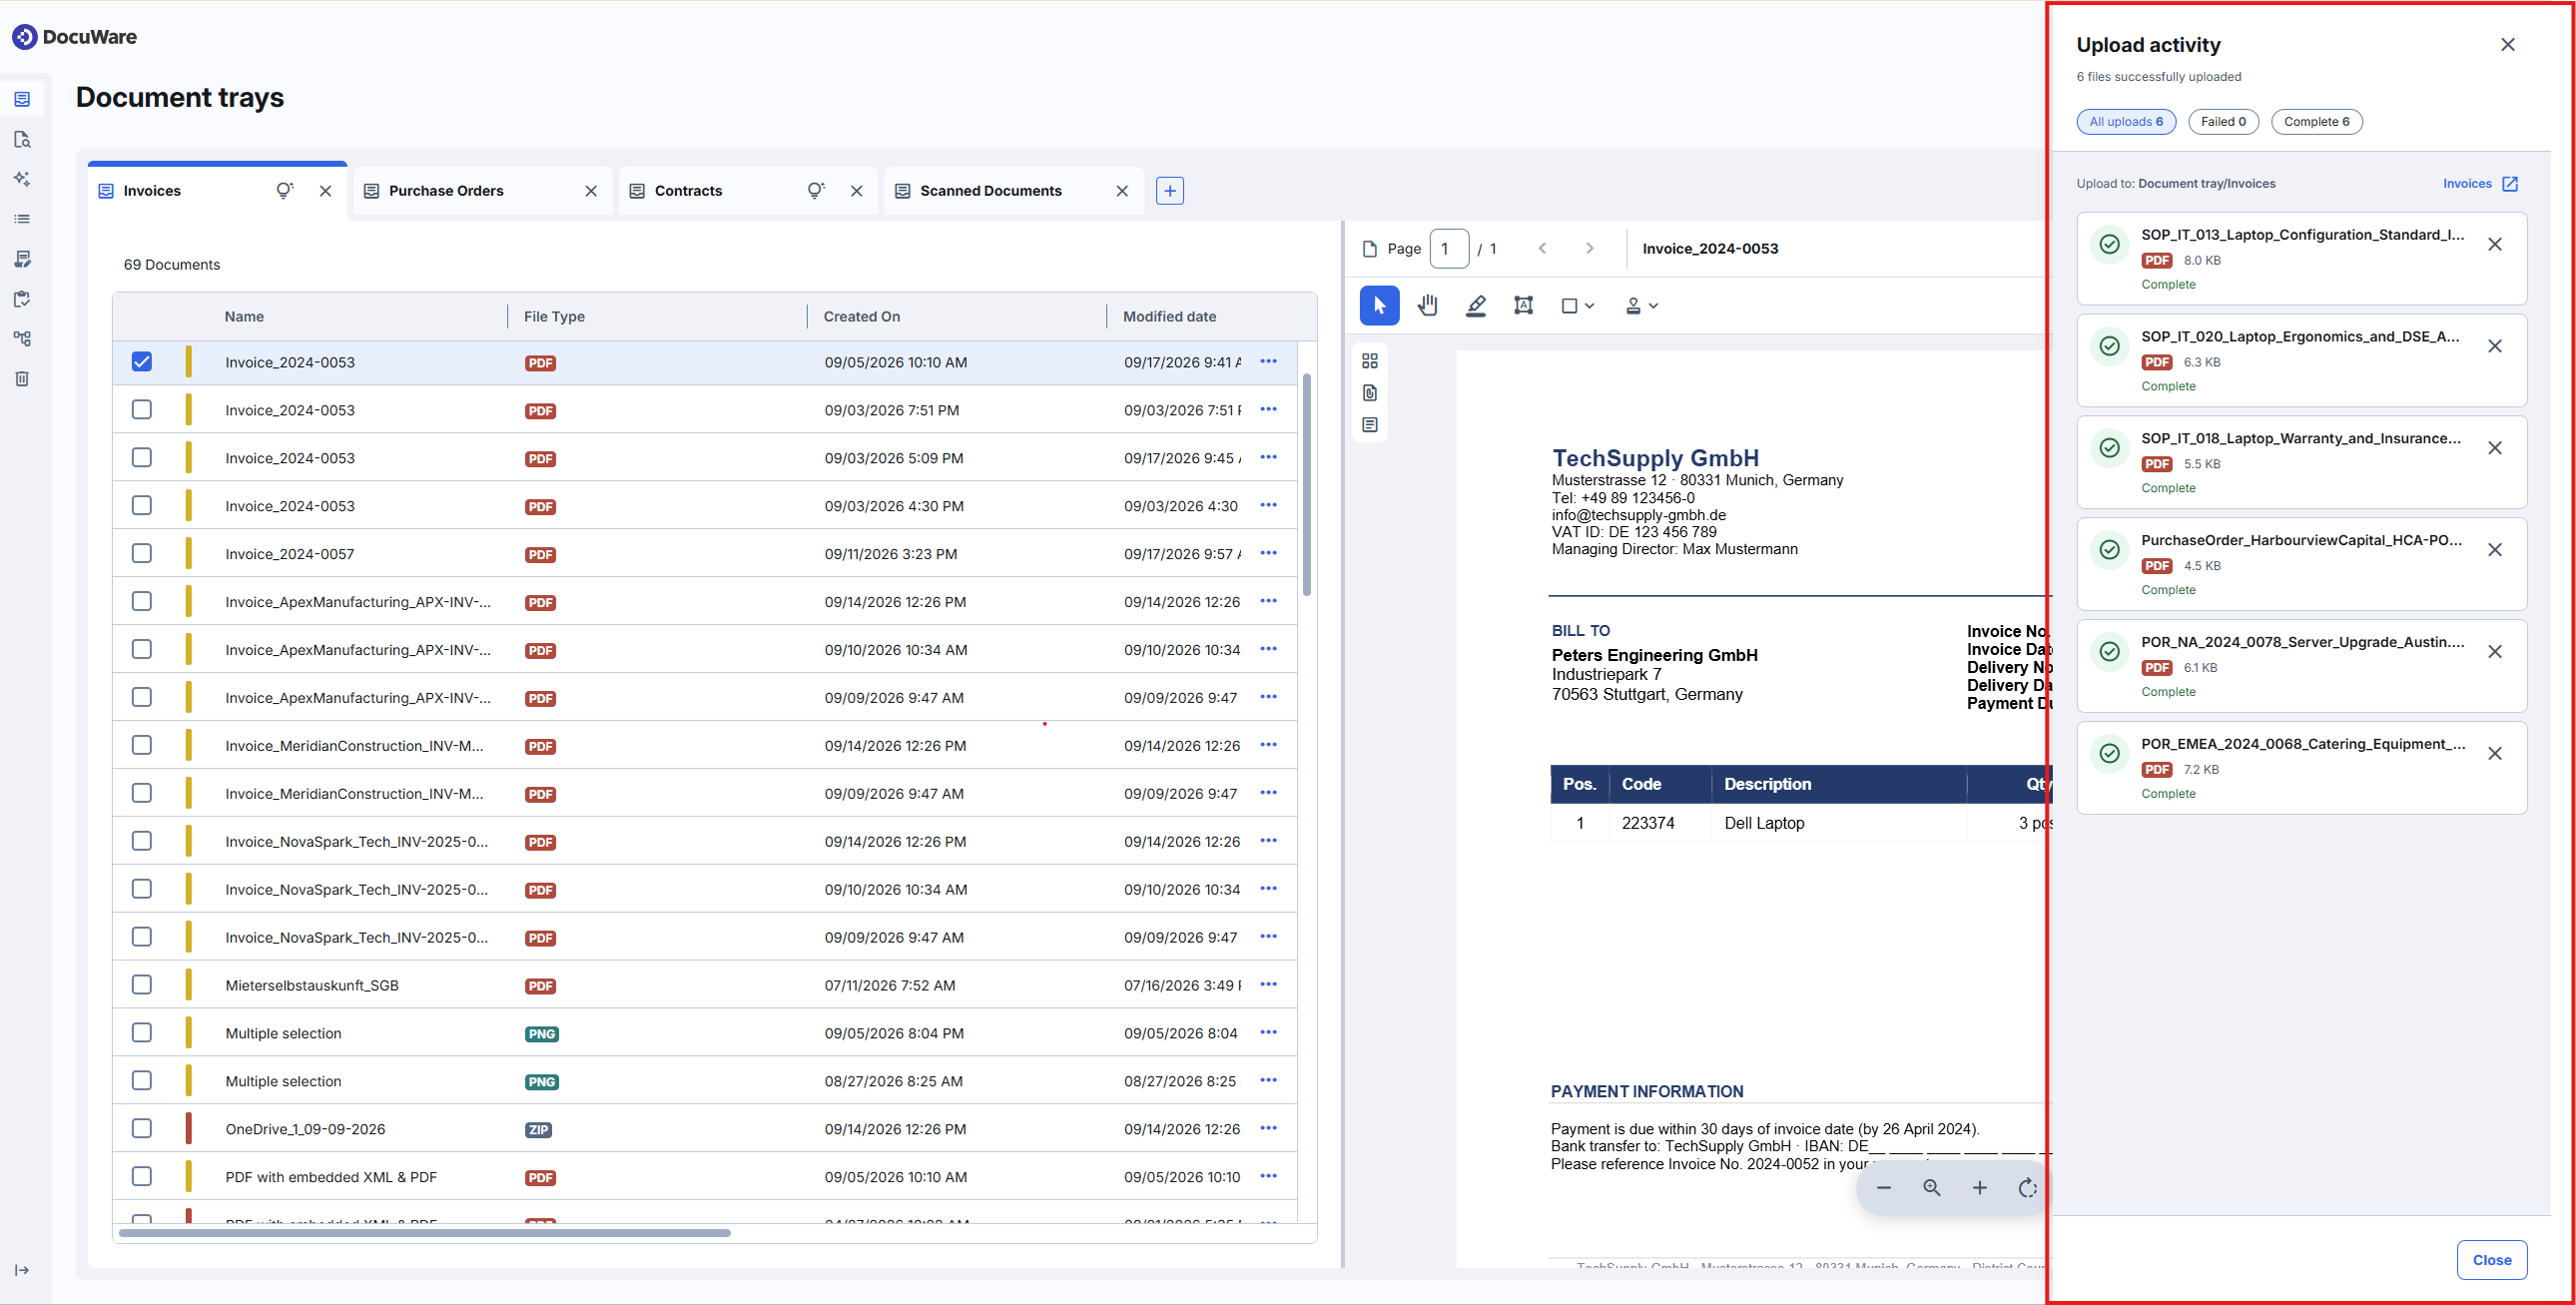
The upload activity panel covers all document trays.
Looking at a document in a tray
In a tray, the documents are listed as a table. Click a document once to open it in the viewer next to the list. Double-click it to open the viewer across the full window when you need more room.
More about Viewing and annotating documents.
Actions for a document in a tray
Right-click a document, or select the three dots at the end of its row, to reach the actions for that document:
Open full screen: Opens the document in the viewer across the full window.
View index entries: Shows the index entries already assigned to the document.
Rename: Changes the name of the document in the tray.
Attach files: Groups this document with others into one set. Each file is preserved.
More about Attaching and merging documents
Merge: Makes one PDF out of several selected PDF documents.
More about Attaching and merging documents
Separate: Splits a PDF document into one document per page.
Manage pages: Adds, rotates, reorders, and deletes pages inside a PDF document. This option is not shown for files in other formats than PDF.
More about Managing pages of a document
Edit in: Opens the document in another program so you can change its content. The exact name of the option depends on the file type:
an Office document can be opened with Edit in desktop app or Edit in Microsoft for web.
Anything else, a PDF for example, opens with Edit in desktop app.
Editing on your own computer requires the DocuWare Desktop Apps.
Delete: Moves the document from the tray to the trash bin.
Storing index entries without a document
Sometimes there is no document to archive, only data: a new customer, a supplier, an employee. With the Store index entries only checkbox activated you create such an entry in a file cabinet without a document behind it. In the classic client this is called Create data record.
Entries of this kind are used as master data, and as a data source for workflows and other processes.
Open a document tray and select Store. With no document selected, Store index entries only is already set.
If a document is selected, select Store index entries only. The document is then unselected, because only the entries are stored.
Select the store dialog, fill in the values, and store.
More about Storing documents from a document tray
Notes for administrators
Document trays are configured in the same way as in classic DocuWare. A user sees the trays assigned to them, and nothing has to be set up again for the new DocuWare client.
Each user sets their own default document tray, currently in the classic client. It stays open in the new DocuWare client and cannot be closed with Close other tabs.
Every action that is technically possible on a document in a document tray is offered, and nothing has to be configured for that.
More about permissions and dialogs in new DocuWare
Nothing has to be configured for the Upload activity. The dialog appears by itself when documents are imported.
Nothing has to be configured for the checkbox Store index entries only. The entries are stored through the store dialog, which defines the fields and their rules.