Incoming invoices are quickly and accurately processed with a document-based approval workflow.
Here is a basic example how an invoice approval workflow could work:
Workflow is triggered: A new invoice is stored in a DocuWare file cabinet. A new workflow for approval or rejection is executed.
Workflow steps: Create a new workflow + Set start activity
The invoice is routed depending on the amount: An amount above a threshold, for example 10,000, leads to the head of department. An amount equal or below a threshold leads to the team level.
Workflow step: Set a condition
Invoice is checked and approved or rejected: The head of department or team leads approve or reject the invoice. Depending on the decision the invoices trigger another workflow, for example, all approved invoices move on to a payment workflow.
Workflow step: Add tasks for approval or rejection
Workflow step: Connect the workflow activities
Configuration overview
You see here all actions needed for a basic invoice approval workflow. Learn how to configure the workflow with the DocuWare Web based Workflow Designer.

Create a new workflow
Go to DocuWare Configuration > Collaboration.
Click Workflow Designer to open the Workflow Designer dashboard.
On the dashboard, click New Workflow.
Select the file cabinet in which the incoming invoices are stored.
Add a name for the workflow configuration. This name is visibile to the users in the Web Client.
Confirm with Create to bring up the Workflow Designer canvas.
Set start activity
You are now configuring the start activity
In this step you will define the red marked section - the start activity.
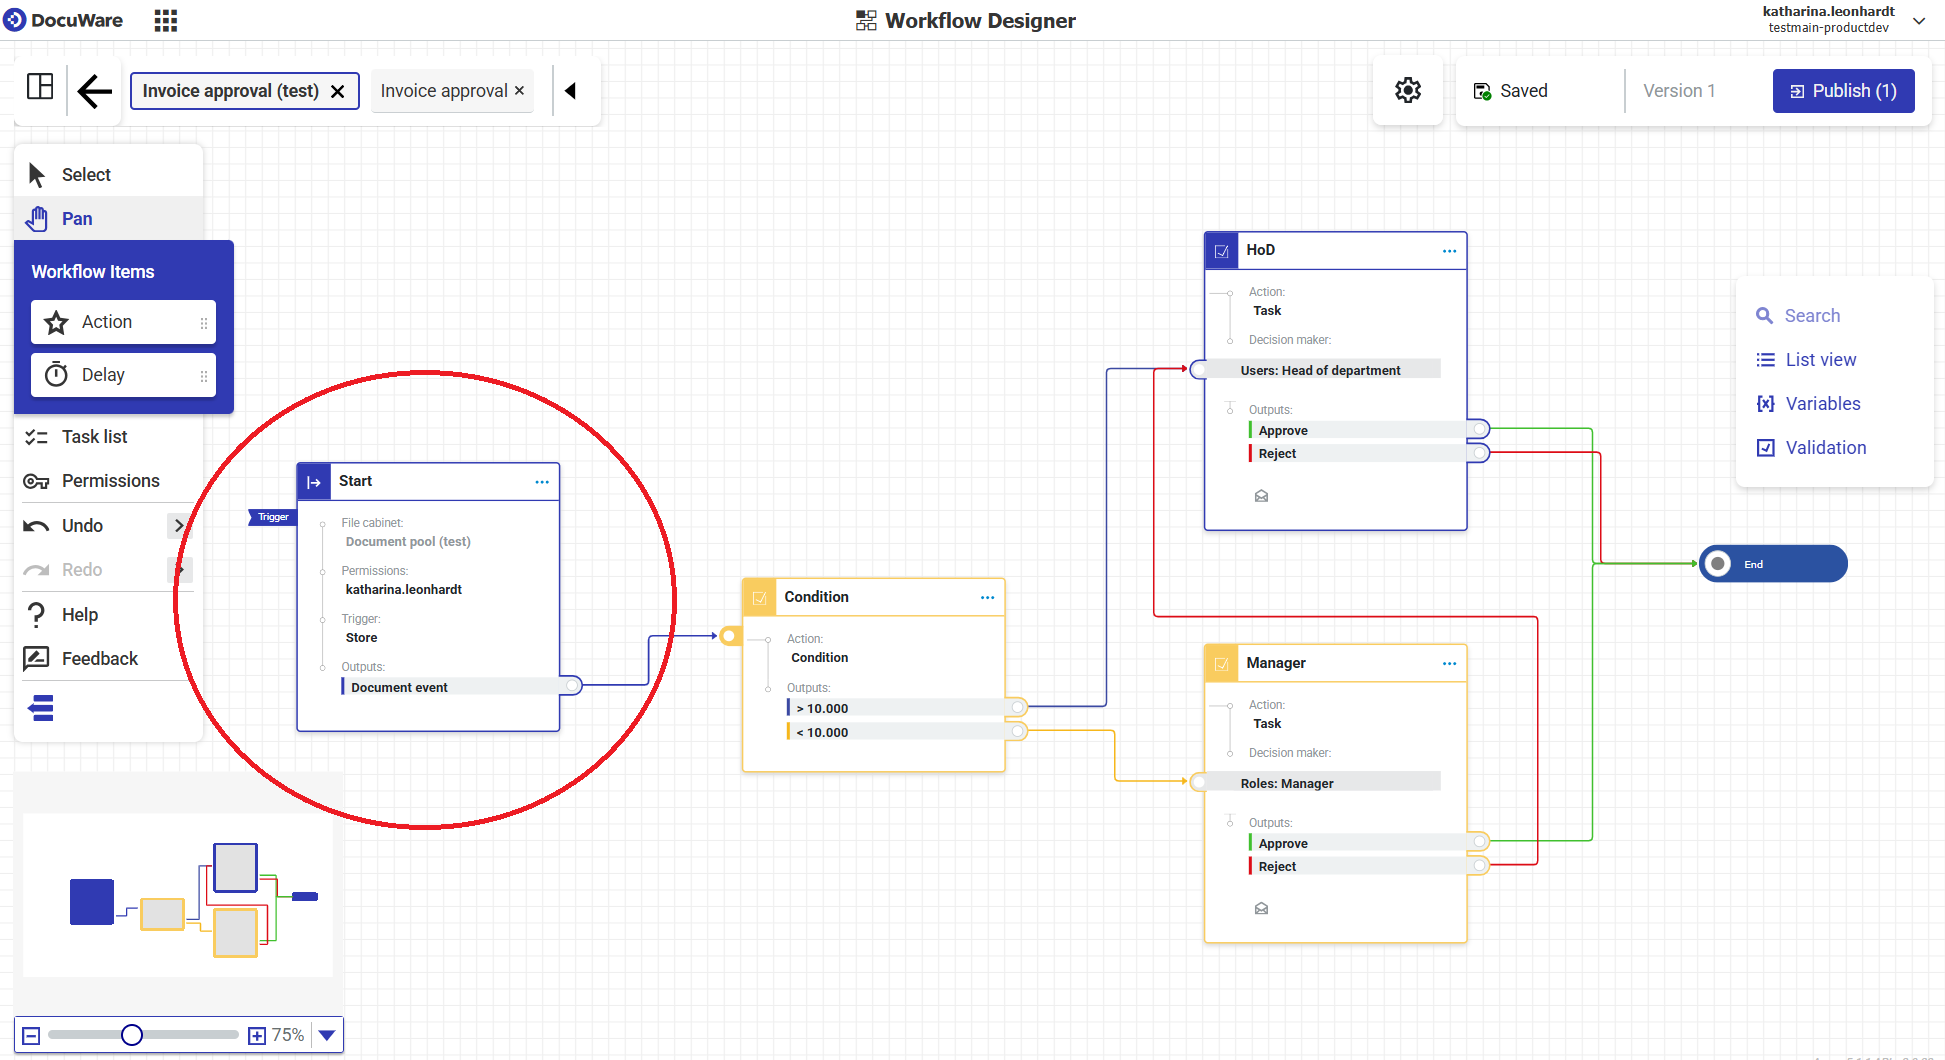
The Start activity is provided automatically when you create a new workflow. You do not need to add it manually.
The controller permission and the trigger are both required:
Permissions: A workflow requires a DocuWare user which acts as workflow controller. The workflow controller may handle workflow errors or stop and restart the workflow, among others.
Select a workflow controller and click Authorize.
Trigger: There are two trigger options, Document event and Schedule. Check the tabs below for more information:
For a Document event trigger, you specify the index values that the triggering document must meet in order for the workflow to start.
For example, a workflow is executed when a new document is stored or index entries of an archived document is changed or both.
A Schedule trigger operates basically the same way as a document event: you specify the index data conditions that must be met by the triggering document.
In addition to that, a scheduled workflow configuration is only executed at defined times:
daily or on specified days
weekly or in specified weeks
monthly or in specified months
Trigger configuration: For this workflow configuraiton, select the trigger Document event > Type > New document as shown below in the screenshot:
.png)
Trigger conditions: To define the type of document to be procecessed in the workflow click Set trigger requirements.
Enter two conditions:
The first condition ensures that all new stored documents are taken into account for the workflow:
System Index Field “Document ID”
Operator IS NOT EMPTY
The second condition ensures that only those new documents will be processed, which are tagged as an invoice:
Index field “Document type”
Operator is “Equal”
Fixed value is “Invoice”
.png)
Set these two trigger conditions for new invoices
Click Done.
Route invoice with a condition
You are now configuring the condition action
In this step you will define the red marked section - the condition, which routes the invoices to the appropriate users.
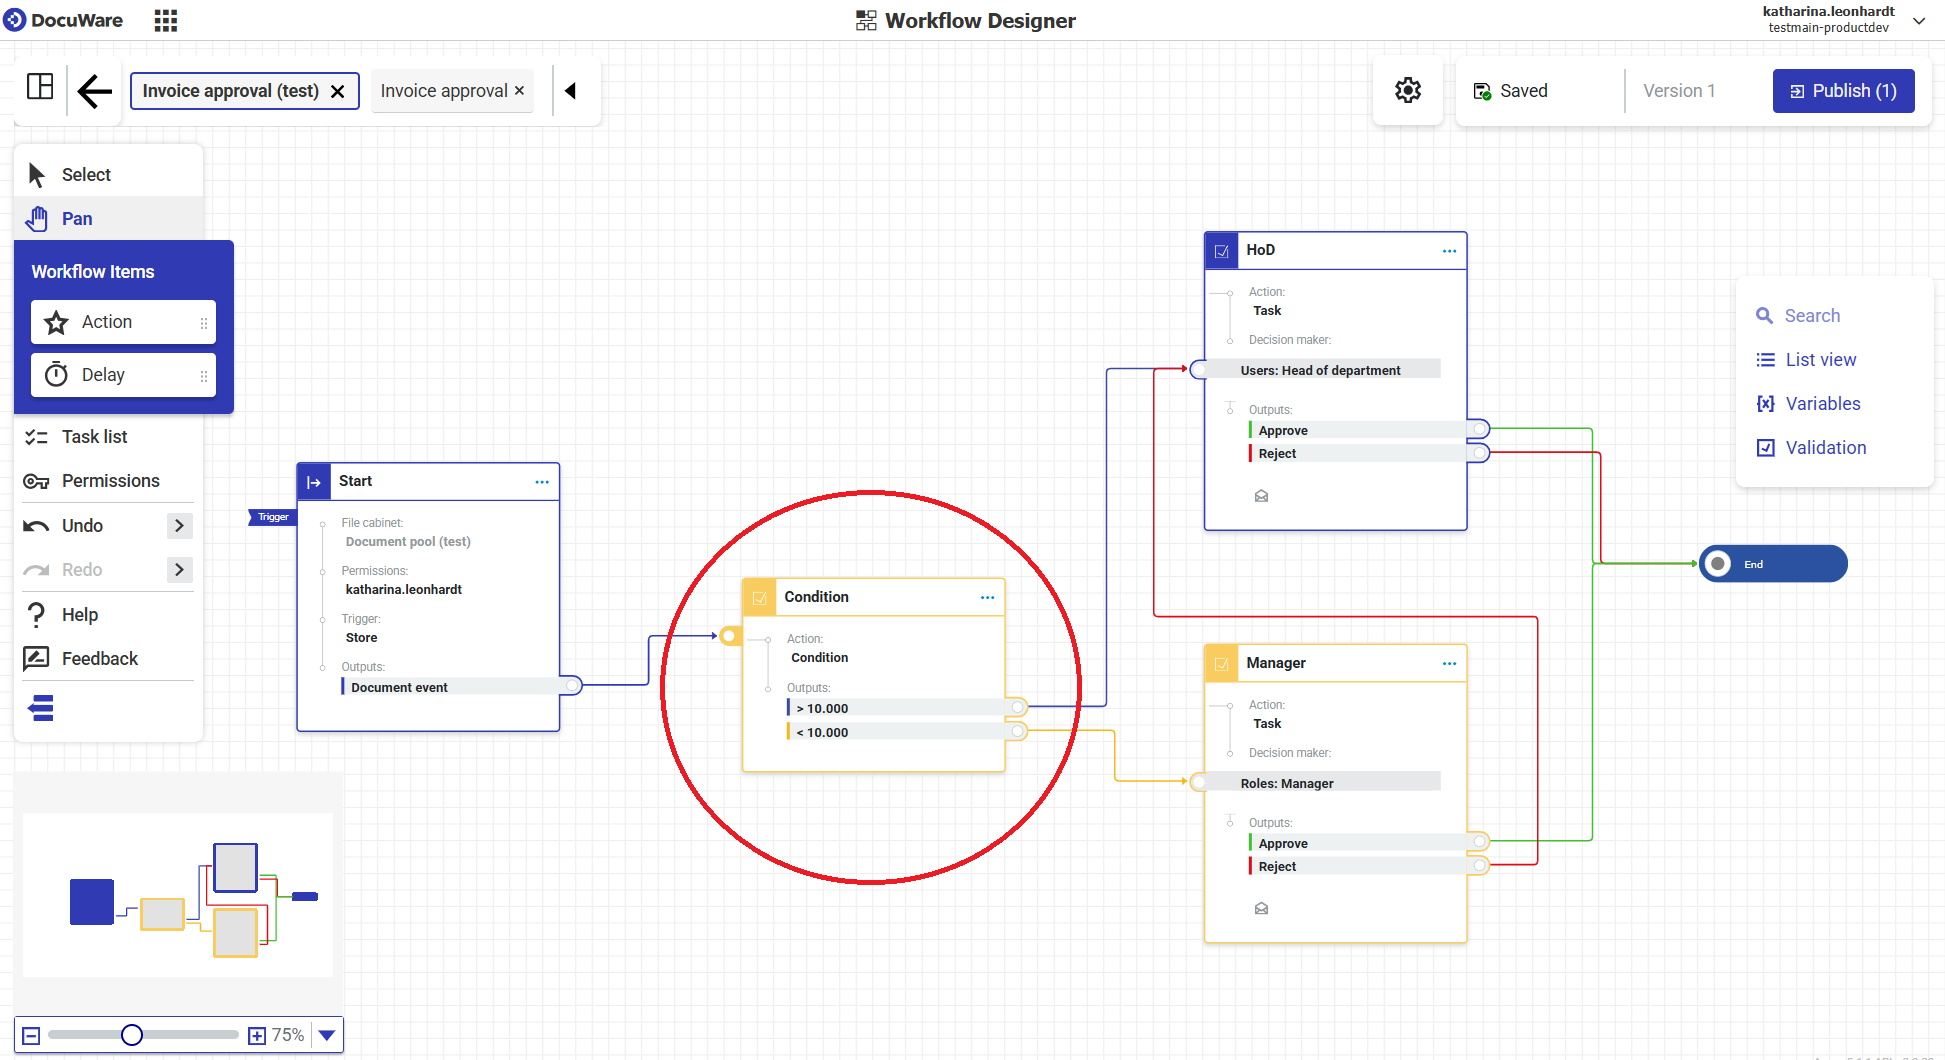
To route the invoices to the appropriate user or role in the company, use an action of the type Condition.
Invoices with an amount higher than 10.000 are routed automatically to the head of department, all other invoices to the team lead.
Condition: Add an activity of the type Condition.
True output: Define the rule for the “True” output of the condition:
Index Field: “Amount”
Operator “Greater Than”
Fixed Value “10000”
False output: Set the rule for the “False” output of the condition:
Index Field: “Amount”
Operator “Less Than Or Equal”
Fixed Value “10000”
Name outputs: Go to Condition > Outputs to change the default “True” and “False” outputs to more meaningful terms, as for example >10.000. Renaming is not required but is makes the configuration easier to track. You may also restyle the colors of the outputs.
.png)
.png)
Proceed with Next > No error handling > Done.
Add task for user group 1
You are now configuring the task for the first user group
In this step you will define the red marked section. It is the task that the head of department level has to complete.
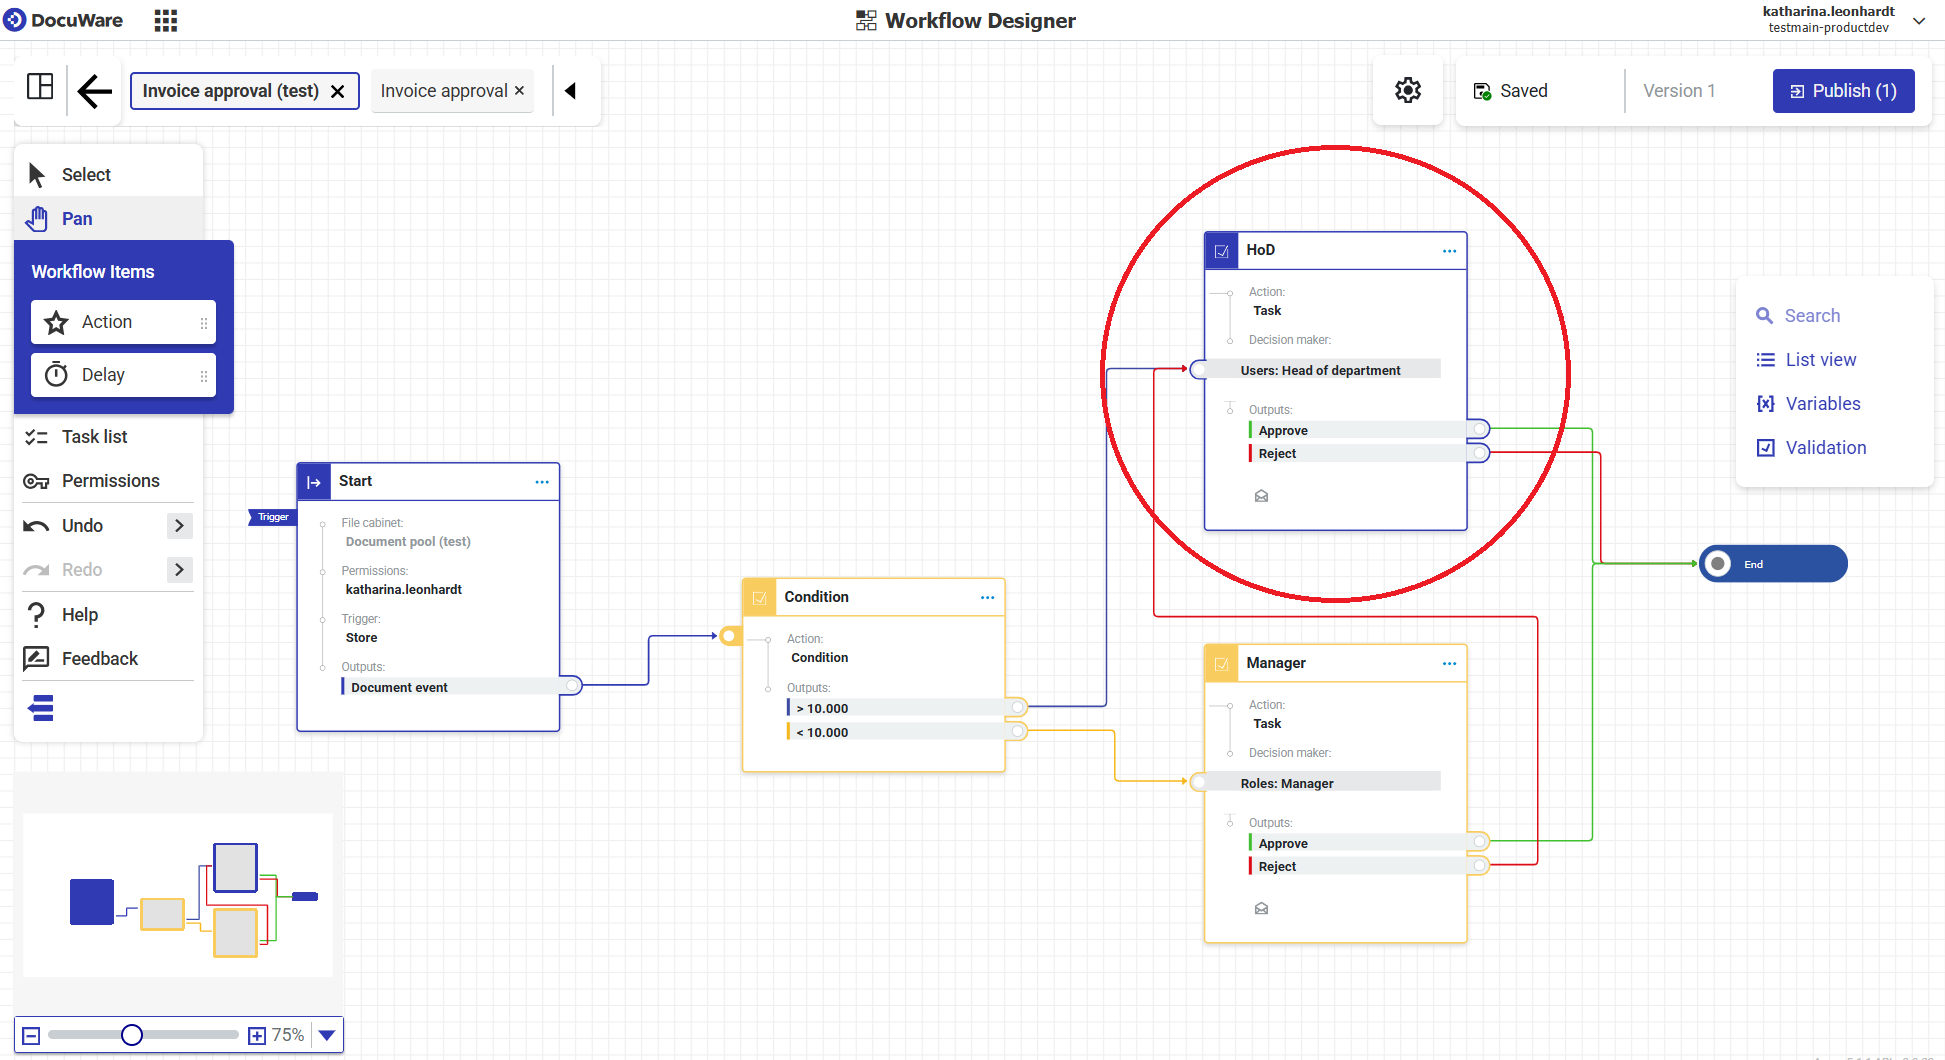
The invoice approval workflow requires two tasks depending on the amount of the invoice. The incoming invoices are routed to different users or user groups, which both can approve and reject.
To mirror this in the workflow you need two tasks.
One task is for the decision maker who approve or reject the high sum invoices >10.000.
The second task is for the decision maker who approve or reject the low sum invoices <10.000.
Create the task for the high sum inovices first.
Add a Task. In the next steps you will walk through the sections Method - Decision - Data - Behavior.
Choose Method > Dialog > Next.
In the next steps you will create two decisions, one for approval and one for reject.
Click Add first decision.Type “Approve” as Decision title and select a color optionally. The title is shown in the Web Client. The color is only visibile in the Workflow Designer as box color and connector line color:
.png)
Switch to the tab Decision > Dialog to specify the fields for the task in the Web Client.
Add an integer field to show the invoice amount.
Integer field settings:
Field type: Integer
Field label: Amount
Predefined type: Document Index
Predefined source: Amount
.png)
Optionally add a text field for comments and remarks:
Text field settings:
Field type > Text
Field label > Comment
Leave Field is required unchecked to keep the field optional.
.png)
Go to the tab Data Assignment. Here, you may define index data changes for the invoice which will be applied after the decision is made. Change the status field to “Approved.”
The changed index data can trigger a another workflow - for example, to pay the invoice.Click Add first assignment
Destination type > Document index
Destination entry > Status - These are the index fields of the file cabinet
Source type > Fixed value
Source entry: Approved
.png)
You have finished the first decision for approval now.
Click Done to return the the Decision tab.
Create the second decision for the rejection. Click Add next decision.
.png)
Proceed similarly to the first decision. Type “Reject” as Decision title and select optionally a color.
Create an integer field for the amount of the invoice:
Integer field settings:
Field type: Integer
Field label: Amount
Predefined type: Document Index
Predefined source: Amount
Add a text field so that people enter a reason for the rejection. Make the text field required this time.
Text field settings:Field label: Reason
Activate Field is required
.png)
Data Assignment: Go to the tab Data Assignment. Here, you define index data changes for the invoice after the decision is made. Change the status field to “rejected.”
As with approval, a separate workflow can also be defined for rejection—depending on the needs of your company.Click Add first assignment
Destination type > Document index
Destination entry > Status
Source type > Fixed value
Source entry: Rejected
Done
Behavior: In the tab Behavior you may configure notifications, which are sent to the users to notify or remind them to accomplish a task. In this example, there is no notification used, as it is a basic workflow.
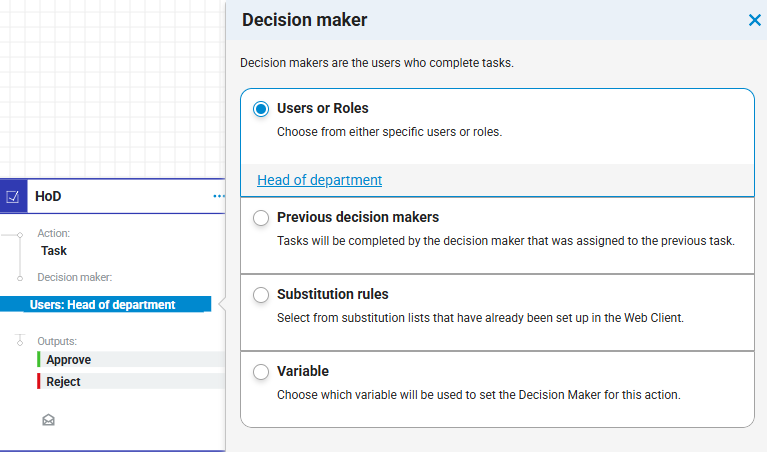
Decision maker: A decision maker is the user who accomplishes the task in the Web Client.
Click on Decision makers in the task dialog and Choose users or roles.
Add task for user group 2
You are here
In this step you will define the red marked section. It is the task for the second user group.
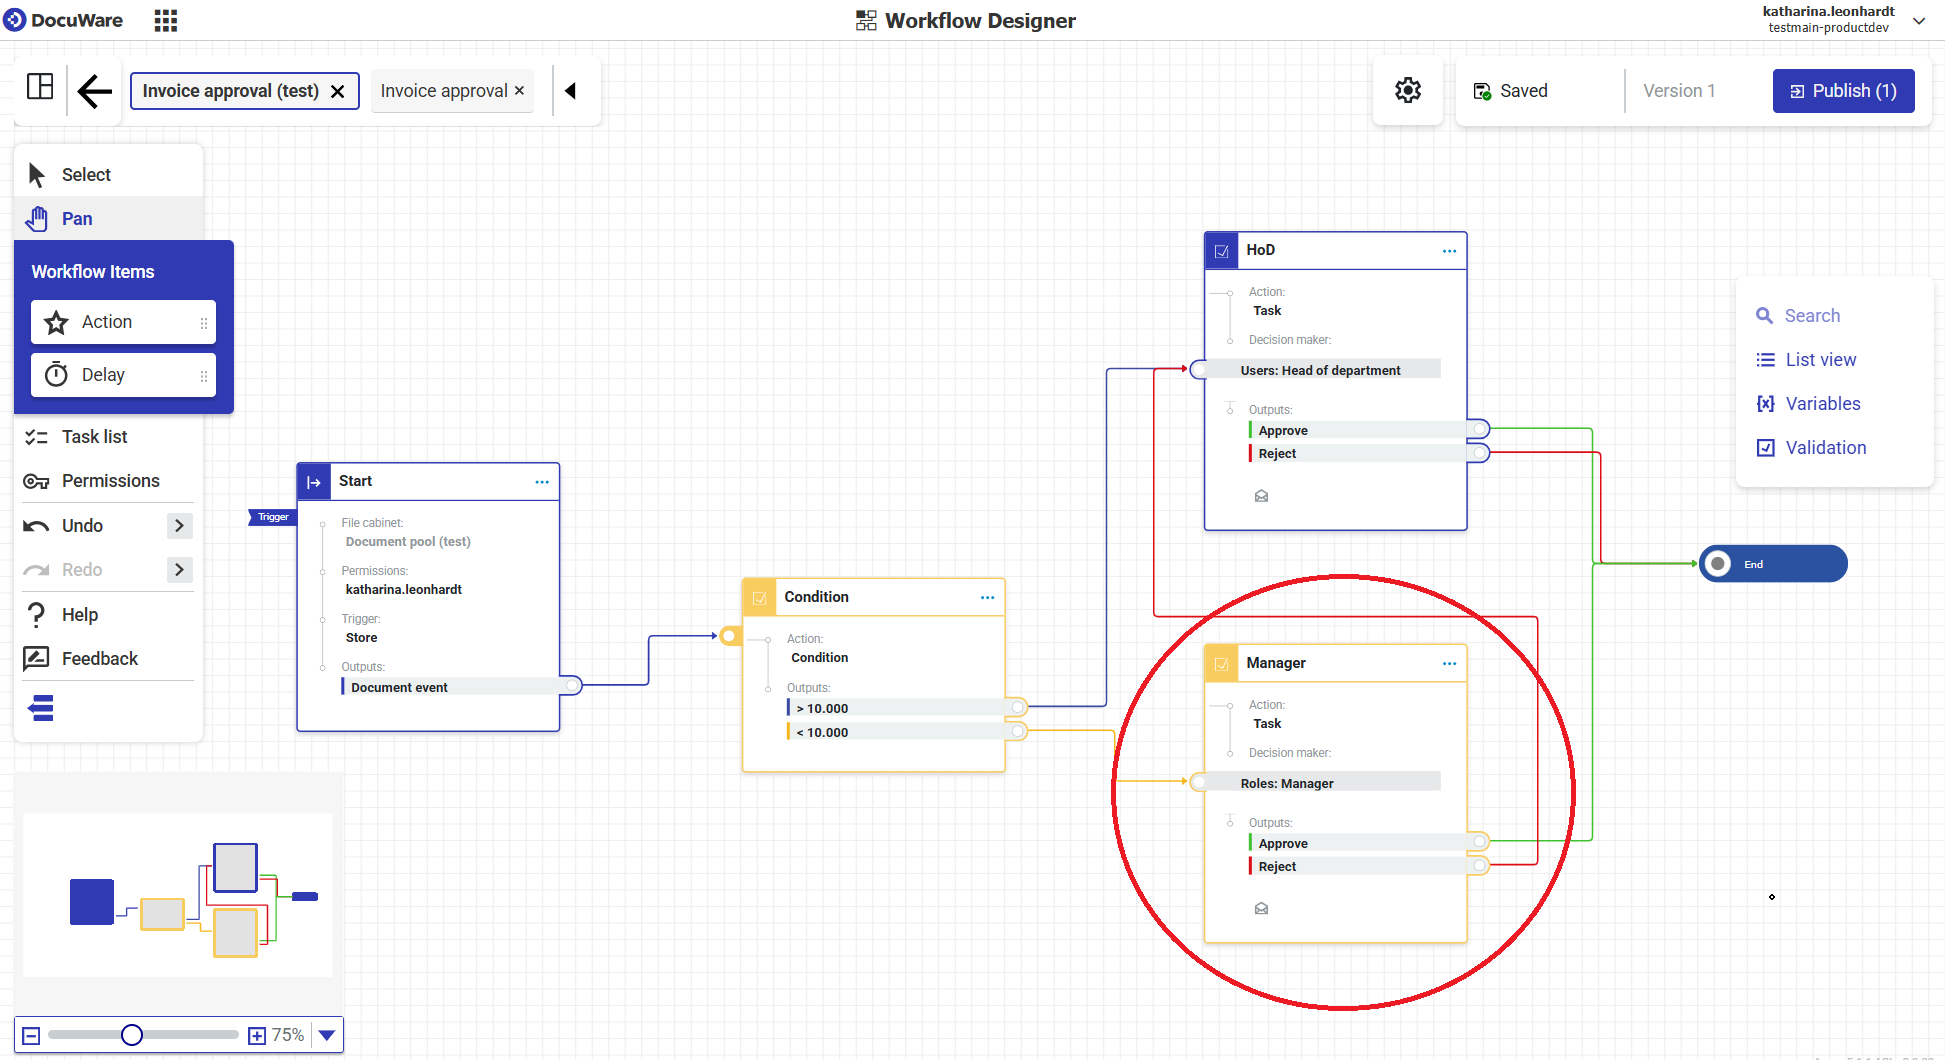
The invoice approval workflow requires two tasks depending on the amount of the invoice. The incoming invoices are routed to different user groups, which both can approve and reject.
To mirror this in the workflow you need two tasks.
One task is for the decision maker who approve or reject the high sum invoices >10.000.
The second task is for the decision maker who approve or reject the low sume invoices <10.000.
Now you create the second task for the low sum inovices. This takes fewer steps than the first task.
Duplicate the task you have created in the previous step:
.png)
Then, change the decision maker from head of department to the team lead role.
Optionally you can switch the color and the name of the task.
Connect the workflow actions
Finally, connect the workflow actions.
Grab the output ports and drag the connectors to the input ports.
See How to connect workflow activities in detail.