The activities Task and Parallel Task add a user-interaction step to a workflow. Unlike automated activities such as Assign data or Email, these tasks require one or multiple persons to make a decision like approving or rejecting an invoice and, if needed, enter information.
A task and a parallel task have the same configuration dialog, with one difference: A Parallel Task offers the additional exit condition option.
The instructions that follow therefore use Task as a general term; everything described also applies to Parallel Task unless stated otherwise.
In a DocuWare workflow, the task and parallel task activities serve the same purpose: completing a workflow step that requires a user’s action.
Task versus parallel task: when to use each
A Task may be assigned to one or several users. The workflow continues as soon as any one of the assignees completes the task. Example: An invoice appears in one user’s task list in the DocuWare Web Client. The user opens the task and selects Approve or Reject.
A Parallel Task sends identical tasks to several users at the same time. The workflow moves on only after every assignee has completed the task. Example: The approval task is sent simultaneously to several cost-centre managers. Each manager must approve or reject the portion of the invoice assigned to their cost centre. The workflow waits until every manager has completed this identical task. It does not move on until all approvals are in place.
1. Adding a task
To add a task to the workflow, click in the section DocuWare Configurations > Collaboration on Workflow Designer.
Click the button New Workflow or Edit to open a new or an existing workflow in the canvas.
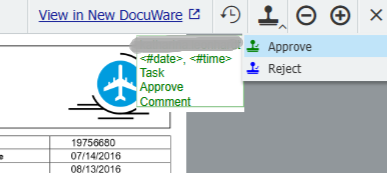
In the left sidebar, click Task.
A red asterisk in the configuration shows that the configuration is not complete and will vanish when all settings are adjusted.
.png)
2. Selecting the task submission method
Choose how users can submit their decision in the Web Client. There are two options:
Dialog: Users make their choice by clicking buttons and entering text in a dialog box.
Dialog and/or stamp: Along with the dialog box, a stamp can be placed on the document to visually show the decision.
Dialog
For a dialog, choose Task > Method > Dialog. No further settings are required. Proceed with the tab Decision.
Dialog and/or stamp
Stamps used in workflow tasks are created in the Workflow Designer only.
Stamps which are generally used in Web Client and Viewer are to be created in the section DocuWare Configurations - Stamps. These stamps are not part or used in DocuWare Workflow Manager.
For a stamp, go to Task > Method > Dialog and/or stamp.
Click the Stamp link.
Define the Stamp settings.
With the following stamp settings, you define the output and display of the stamp in the Web Client. Here is an example of a workflow stamp in the DocuWare viewer:
User name: DocuWare user name of the decision maker - it is greyed out in the screenshot.
Date: Decision date
Time: The time at which the decision was made
Decision title: Define, if the title is shown in the stamp. The title of the decision like for example “Approve” or “Reject” is specified in the next step Decision.
Workflow step title: The name of the current task you are editing, is shown here.
Frame: The stamp information is framed.
Simple signature: Select this option if the stamp should ensure the integrity of the stamped document within the DocuWare system.
The color of the stamp in the document will match the color defined for the decision.
In the Decision step, you can specify fields where the user must enter a comment or values when making a decision. You can also choose there whether these fields are displayed in the stamp.
Set exit condition
The Set exit condition option is only visible in the Parallel Task dialog. A parallel task assigns tasks for multiple users at the same time. The workflow pauses until all of them have completed their tasks. An exit condition allows the workflow to proceed to the next step even if not all users have completed their tasks.
An exit condition overrides the decision maker and advances the workflow as soon as it is fulfilled.
The exit condition is checked each time a user makes a decision.
To define an exit condition:
Go to Parallel Task > Method > Set exit condition.
Click the Set exit condition link.
Enter a Visual Basic expression for the condition in the field.
3. Configuring a decision
In a workflow, a decision refers to the set of options presented to a user in the Web Client for completing a task.
In this section you define which options will be displayed in the DocuWare Web Client.
Expand the block below to learn more about how a decision looks like in the Web Client.
Decisions in the Web Client
When opening a task in the Web Client users will see buttons for the decisions on the left and optionally additional fields for information and data entries:.png)
The users make their decisions by clicking a button, for example Approve or Reject. By clicking the Confirm button the task is completed.
Each button is based on its own decision configuration in four steps: General - Dialog - Data Assignment - Validation.
You may create as many decisions for one decision dialog as needed.
The Confirm button and the positions of the decision buttons are set by default and cannot be adjusted.
Decision > General
You can add name for the decision button in the Web Client here, among others.
Go to Task > Decision.
Click the Add first decision link or Add next decision link to add a decision.
Click the Decision link: Decision 0 to open the configuration wizard with the tabs General, Dialog, Data Assignment and Validation, which are explained in the paragraphs below:
.png)
On the General tab enter a title for the decision - for example “Approve.”
The decision title appears in multiple locations in the Web Client:as the name of the decision button
in the workflow history
in the workflow stamp, if this option has been activated in the stamp settings.
You can add a color for the decision, which will be visibile here to the decision maker in the Web Client as color of the stamp.
In addition to that, the color outlines the task dialog and the connector line of the task output in the canvas.If you activate Set this decision as default, this decision will be selected by default when the task is opened in the Web Client. To complete the task, the decision maker only needs to click the Confirm button.
Adding a Description is optional. The description is visible only in Workflow Designer and not to the decision maker in the Web Client.
Decision > Dialog
You add fields to the Web Client task dialog here.
A field serves two purposes: it can be filled by the decision maker or used to display predefined information to them or both.
Note: If you want that changes a decision maker applied to a predefined entry are saved in the document’s index data, you must specify both the source and destination for the data in the Data Assignment tab. If you do not configure this, any changes will only appear as remarks in the workflow history and in the stamp, but will not be stored in the document's index entries.
Go to Task > Decision > Dialog.
Click the link Add first field.
Choose the Field type first. Depending on the field type the field settings may vary.
Find detailed information about the settings for each field type in the tabs below:
The decision maker may type characters into a text field within the task dialog.
The following options are available to configure this field:
Define a character limit for new input.
Apply a field mask.
Field is required.
Field is read-only.
Stamp visibility - Display field input of a decision maker on a document.
This option is available if the option Dialog and/or stamp has been selected in the step Dialog > Method.Predefined type - select the source for the displayed information:
Document index
Fixed value
Global variable
File cabinet
Local database connection
System variable
Select list / Select list only / Editable select list are available as options.
The decision maker may type whole numbers into a text field witin the task dialog.
The following options are available to configure this field:
Field is required.
Field is read-only.
Stamp visibility - Display field input of decision maker on document.
This option is available if the option Dialog and/or stamp has been selected in the step Dialog > Method.Predefined type - select the source for the displayed information:
Document index
Fixed value
Global variable
File cabinet
Local database connection
Select list / Select list only / Editable select lists are available as options.
The decision maker may type numbers with decimal places into a text field within the task dialog.
The following options are available to configure this field:
Field is required.
Field is read-only.
Stamp visibility - Display field input of decision maker on document.
This option is available if the option Dialog and/or stamp has been selected in the step Dialog > Method.Predefined type - select the source for the displayed information:
Document index
Fixed value
Global variable
File cabinet
Local database connection
The decision maker may select a date or a date with time from a date picker within the task dialog.
The following options are available to configure this field:
Field is required.
Field is read-only.
Stamp visibility - Display field input of decision maker on document.
This option is available if the option Dialog and/or stamp has been selected in the step Dialog > Method.Predefined type - select the source for the displayed information:
Document index
Fixed value
Global variable
File cabinet
System variable
Local database connection
Select list / Select list only are available as options. Editable select list: only for Date, not for DateTime.
The decision maker select user from a group or a role within the task dialog.
The following options are available to configure this field:
Field is required.
Field is read-only.
Stamp visibility - Display field input of decision maker on document
This option is available if the option Dialog and/or stamp has been selected in the step Dialog > Method.Allow selection of more than one value
Predefined type - select the source for the displayed information:
Document index
Fixed value
Global variable
File cabinet
System variable
Local database connection
The decision maker select a substituion rule within the task dialog.
The following options are available to configure this field:
Field is required.
Field is read-only.
Stamp visibility - Display field input of decision maker on document
This option is available if the option Dialog and/or stamp has been selected in the step Dialog > Method.Allow selection of more than one value
Predefined type - select the source for the displayed information:
Document index
Fixed value
Global variable
File cabinet
Local database connection
The decision maker may type text into a keyword field within the task dialog.
The following options are available to configure this field:
Define a character limit for new input.
Apply a field mask.
Field is required.
Field is read-only.
Stamp visibility - Display field input of decision maker on document. This option is available if the option Dialog and/or stamp has been selected in the step Dialog > Method.
Predefined type - select the source for the displayed information:
Document index
Fixed value
Global variable
File cabinet
System variable
Local database connection
Select list / Select list only / Editable select list are available as options.
Link: The decision maker see or add a link. Only the link is shown in the link field.
Description: The decision maker see or add text in combination with index values and links.
The following options are available to configure these fields:
Predefined type - select the source for the displayed information:
Document index
Fixed value
File cabinet
Global variable
System variable
Local database connection
The decision maker may type data into the table within the task dialog.
The following options are available to configure this field:
Field label: Select the index table. An index table must be already created in DocuWare Configuration > File cabinets.
Show and hide columns
Table is read-only
Edit a table column. The settings depend on the type of the index field, on which the table column is based - check the other tabs to learn about the settings.
Prefill index table with data from another index table. Enter a SELECT statement to do so.
Decision > Data assignment
Create a data assignment to reflect the outcome of the decision.
Example: If the decision maker approves an invoice, the status of the invoice switches from “New” to “Approved.” This new value in the status index field might trigger another workflow.
Go to Task > Decision > Data assignment.
Click the link Add first assignment.
For the scenario described in the introduction, configure the data assignment as follows:
Destination type: Document index
Destination entry: Status
Source type: Fixed value
Source entry: Approved
.png)
Read more about about automatic data assignment in the article about the activity Assign data.
Comparing Assign data as activity and in as option in a task
The functions for data assignment are the same in the activity Assign data and in the activity Task.
The difference is that, within a task, automatic data assignment also supports the Dialog Field entry type.
For example, if an invoice is rejected, the rejection reason provided by the user can be automatically transferred to and saved in the "Comment" index field.
To assign this information as index data to the invoice, configure the data assignment as follows:
Destination type: Document index
Destination entry: Comment
Source type: Dialog field
Source entry: Select the field you defined as prefilled in the decision dialog section.
Decision > Validation
Before completing a task, you may optionally validate its inputs. For instance, during invoice approval, you can verify that the sum of the approved partial amounts matches the total amount in a split posting. If the values don't match, the user will receive a notification.
Enter a condition using expressions that include variables and values from index and workflow fields relevant to the current decision.
The validation is applied when the user confirms the task. If the validation fails, the user will receive an error message, which you can specify directly in the decision validation dialog.
4. Defining the behavior
Define task notifications and escalation rules to the keep tasks on schedule.
First determine whether the decision maker should receive an email notification in addition to seeing the task in their task list. This can be helpful if users don’t open DocuWare regularly.
If the task is not completed within the specified time, the Web Client flags it with a red indicator automatically to show it is overdue, with the workflow sending reminder emails to prompt timely action. Should there still be no response, the system automatically escalates the task to an alternate approver—either after the reminder or immediately, according to your settings.
Out-of-office rules ensure deputies take over whenever the original assignee is away.
These features keep your workflow moving and prevent tasks from falling through the cracks.
Go to Task > Behavior.
.png)
Notify the decision maker of a new task
Configure an email which is sent immediatedly when the task is triggered. In additon to that the task is shown in the Web Client in the task list of the decision maker.
In the Task > Behavior section, activate Send email for this decision.
Click the link Send to Current user.
Insert a subject the mail text.
Click Done.
.png)
Notes:
In the To line, the entry Current user is a system variable. Here, in a workflow task, Current user is always referring to the users or roles, you have selected as decision makers for the task. This is why this variable cannot be changed or removed here.
Click the three dots to open the editor for entering text in the subject line and to the email body. Read more about using system variables.
The links to the task or the task list are red colored to indicate that they are a different kind of variable than the system variables.
The options in the sections Attachment refer to the document in the workflow.
In the sections Sending behavior you may delect one of these options:
Send individual emails to each recipient: A decision maker will not see the other decision makers in the email address line.
Send one email to all recipients: A decision maker will see the other decision makers in the email address line.
Set an overdue date and remind the decision maker
If the decision maker has been inactive for a given time period, he or she will get a reminder mail to complete the task.
In the Task > Behavior section, activate Remind decision maker.
Click the link Remind after 3 Working Days. This is the default overdue period, measured from the moment the task appears in the task list.
Specify when the task becomes overdue. Choose Schedule to set a time period or Variable to set a specific date.
Optionally, specify an email reminder. The settings are the same as for email notifications.
Click Done.
.png)
Notes:
Every deadline can be measured in either Working Time or Elapsed Time.
The option Working Time counts only the hours that fall within the working schedule. For example, a period of “3 working days” that begins on Friday at 8:00 a.m. ends on Tuesday at 5:00 p.m.; the weekend hours are excluded.
The option Elapsed Time counts every consecutive hour, regardless of the working schedule. The same period of “3 days” that begins on Friday at 8:00 a.m. therefore ends on Monday at 8:00 a.m.
In DocuWare, the default working schedule is Monday through Friday, 8:00 a.m. to 5:00 p.m. You may define the working days for your company in the organisation settings.
Reassign the task after inactivity
The task is forwarded automatically to another workflow step when the assigned decision maker assignee takes no action within the defined timeframe.
In the Task > Behavior section, activate the option Reassgin after inactivity.
Click the link Timeout after 5 working days. This is the default overdue period, measured from the moment the task appears in the task list.
Set the timeout with the Schedule option:
Every deadline can be measured in either Working Time or Elapsed Time.The option Working Time counts only the hours that fall within the working schedule. For example, a period of “3 working days” that begins on Friday at 8:00 a.m. ends on Tuesday at 5:00 p.m.; the weekend hours are excluded.
The option Elapsed Time counts every consecutive hour, regardless of the working schedule. The same period of “3 days” that begins on Friday at 8:00 a.m. therefore ends on Sunday at 8:00 a.m.
In DocuWare, the default working schedule is Monday through Friday, 8:00 a.m. to 5:00 p.m. You may define the working days for your company in the organisation settings.
Activate the option Use routing to reassgin the task to another activity on the workflow canvas. You will see a new Timeout exit path after having closed the configuration with Done in step 6.
You can now optionally shape an email notification to inform users about the reassignment.
Click Done. Then can connect the Timeout output of the task to another activity of the workflow.
.png)
Note:
The output color for the routing refers to the connector in the canvas. The decision maker will not see this color or the name of the timeout:
.png)
Reassign task to a substitution rule
Forward the task using a substitution rule to ensure it is completed within the specified time period, even if the decision maker is unavailable or unresponsive.
In the Task > Behavior section, activate the option Out of office.
Click the link Reassign to the next user in the substition rule if the tasks becomes overdue.
Choose on of those two options:
Reassign to the next user in the substitution rule if the task becomes overdue before the current user returns
Reassign immediately to the next user in the substition rule if current Decision maker is out of office.
Click Done.
Notes:
Substitution rules and -lists are created in DocuWare Configuration > User Management.
A substitution rule can assign responsibilities for abstract jobs such as cost centers, which include a group of people. The task will be automatically routed to the first employees who is shown as "in the office." This means that each workflow proceeds to completion, regardless of whether a particular person is present.
For the first option Reassign to the next user… if the task becomes overdue, be sure to activate the option Remind decision maker to set a deadline. Without an overdue period, the substitution rule will not take effect.
5. Choosing the decision maker
The decision maker is the user who completes a workflow task by selecting an action in the task dialog or via stamp. The decision maker must be a DocuWare user or be part of a role. There are multiple options to define the appropriate user:
Users: Only DocuWare users may complete a task.
Roles: Define a user role. Every user of the role gets the task, only one needs to do the task.
Previous decision makers: This might be useful, if, for example, a task needs to be re-assigned. Assuming an invoice is rejected due to missing information and corrected. In this case, it makes sense to assign the decision back to the previous decision maker, to enable them to fill in the missing information.
Substitution rule: If the actual owner is out of office, the task then goes to the first employee in the substitution rule. Should this employee also be on vacation, for instance, the task is forwarded to the second substitute, and so on.
More about substition rules.Variable: Choose a user variable. Example: The workflow routes the invoice to the appropriate department for review. The DepartmentApprover variable is dynamically assigned based on the department responsible for the invoice. For example:
If the invoice is related to IT expenses, DepartmentApprover is assigned to User C from the IT department.
If the invoice is related to Marketing expenses, DepartmentApprover is assigned to User D from the Marketing department.
6. Specifying the outputs
The two final steps in configuring tasks are:
Connect the task with other activities in the worfklow or delays.
This step is required.
Draw a connector line for each decision to the appropriate next item.Create conditional output.
Conditions automatically route documents based on specific criteria.
Read more about configuring conditions and conditional output.