A workflow task is a decision a workflow asks you to make about a document: approving an invoice, checking a contract, releasing an order. Open Tasks in the left sidebar of the DocuWare client to see your tasks. Once you have made your decision and entered what the task asks for, the workflow continues by itself.
Supported versions: DocuWare Cloud + new DocuWare client only
On this page
Coming from the classic DocuWare client?
In the classic client, open the new DocuWare client with the link Open new DocuWare. Nothing has to be set up again: Your tasks are the same as in classic DocuWare. If you know workflow tasks from there, these are the differences.
The decision history is now the task history.
Decisions are now process options.
Send request is now Request input.
You hand a task of your own to a colleague in the task list, as before. The tasks of other users are reassigned by a controller in a workflow overview.
The new DocuWare client is available in DocuWare Cloud for now. On-premises systems continue to work with the classic client.
More about all current limitations of the new DocuWare client
Working with task lists
A task list bundles similar tasks from one workflow, for example all the invoices you need to approve. Each task list has its own tab.
The number on a tab shows how many tasks are in the list. It turns red as soon as the list contains unread tasks. If you have more task lists than fit on the screen, select the dropdown at the end of the tab bar and pick a list by name.
Three actions apply to the whole task list: Copy task list link, Share task list via email, and Export task list as CSV file.
When you click a tab, the tasks are shown in a table. Every column has a filter in its header, and you can sort by column, which is how you find one invoice among many tasks or start with the oldest. Your sorting and your filters are remembered for the next session: 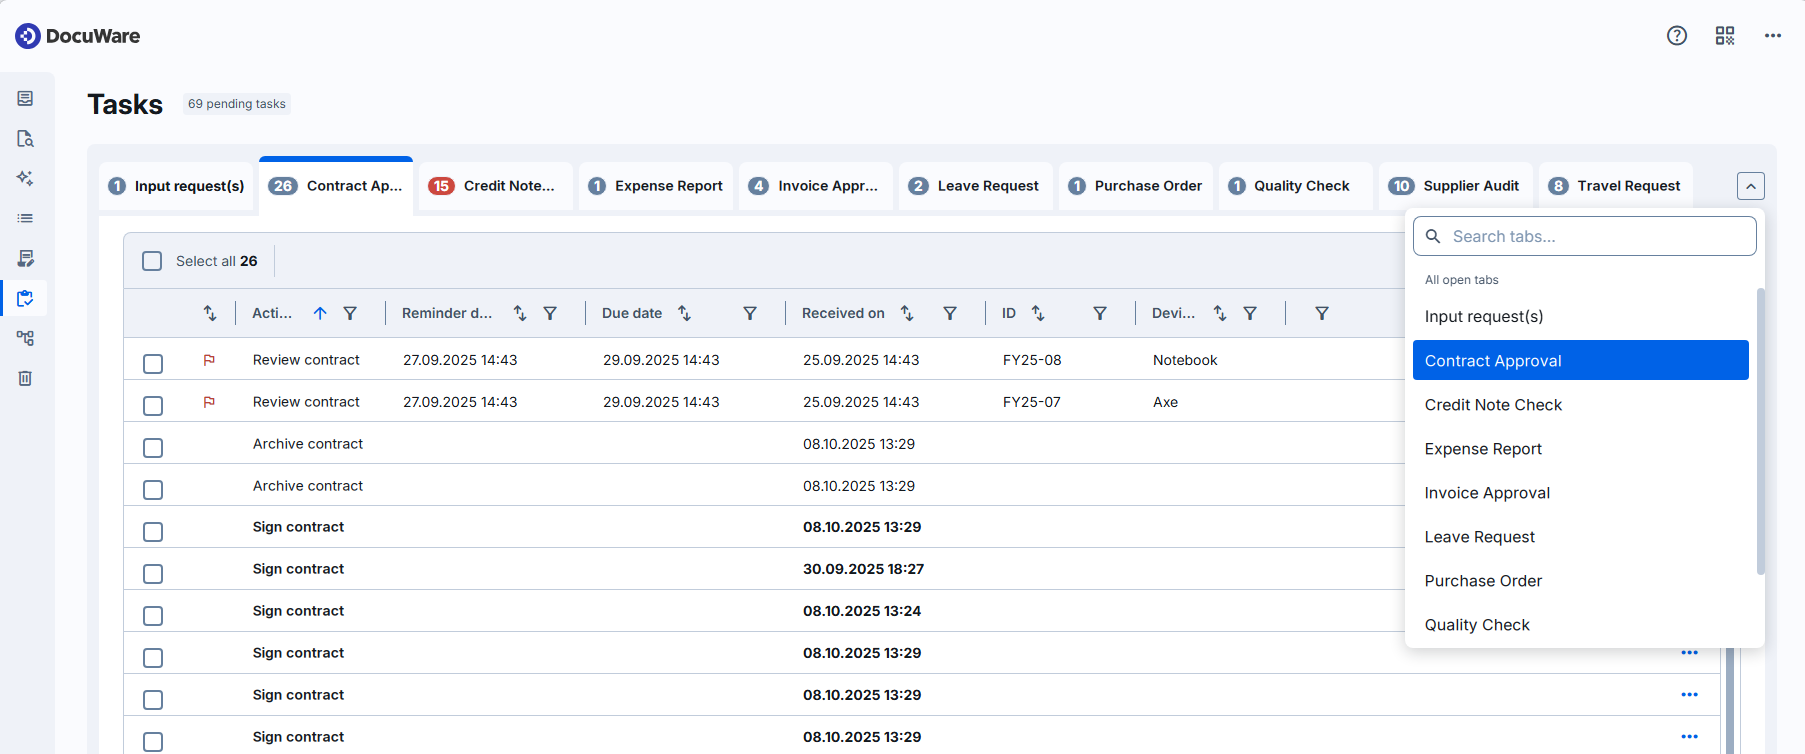
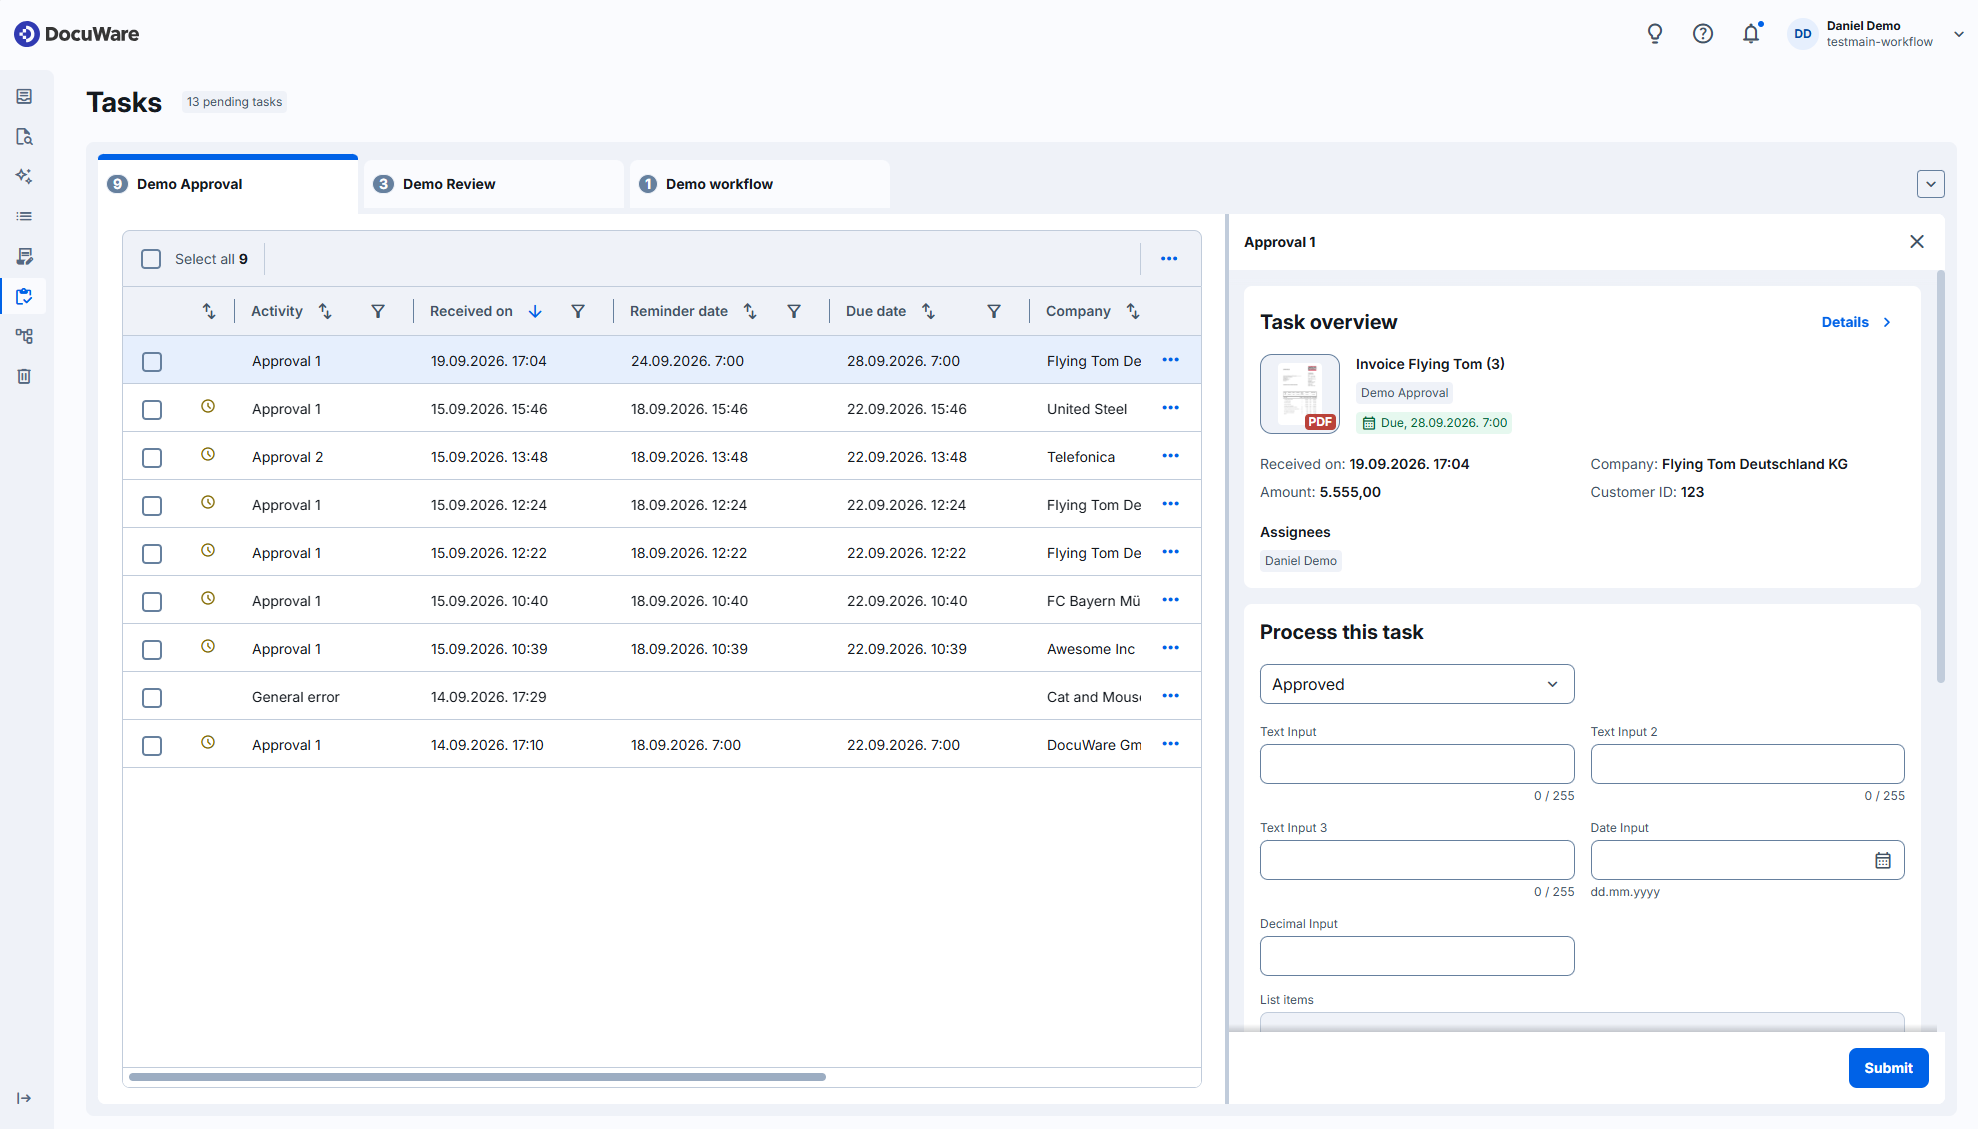
A task opens in one of two places. Both offer the same process options, they differ in how much room the document gets.
Side panel: The task is processed in a panel next to the task list. If you have tasks, which do not require the document, you can iterate fast using this view.
Details page: The task is shown fullscreen side by side with the viewer. This is the mode for a task that needs a close look at the document.
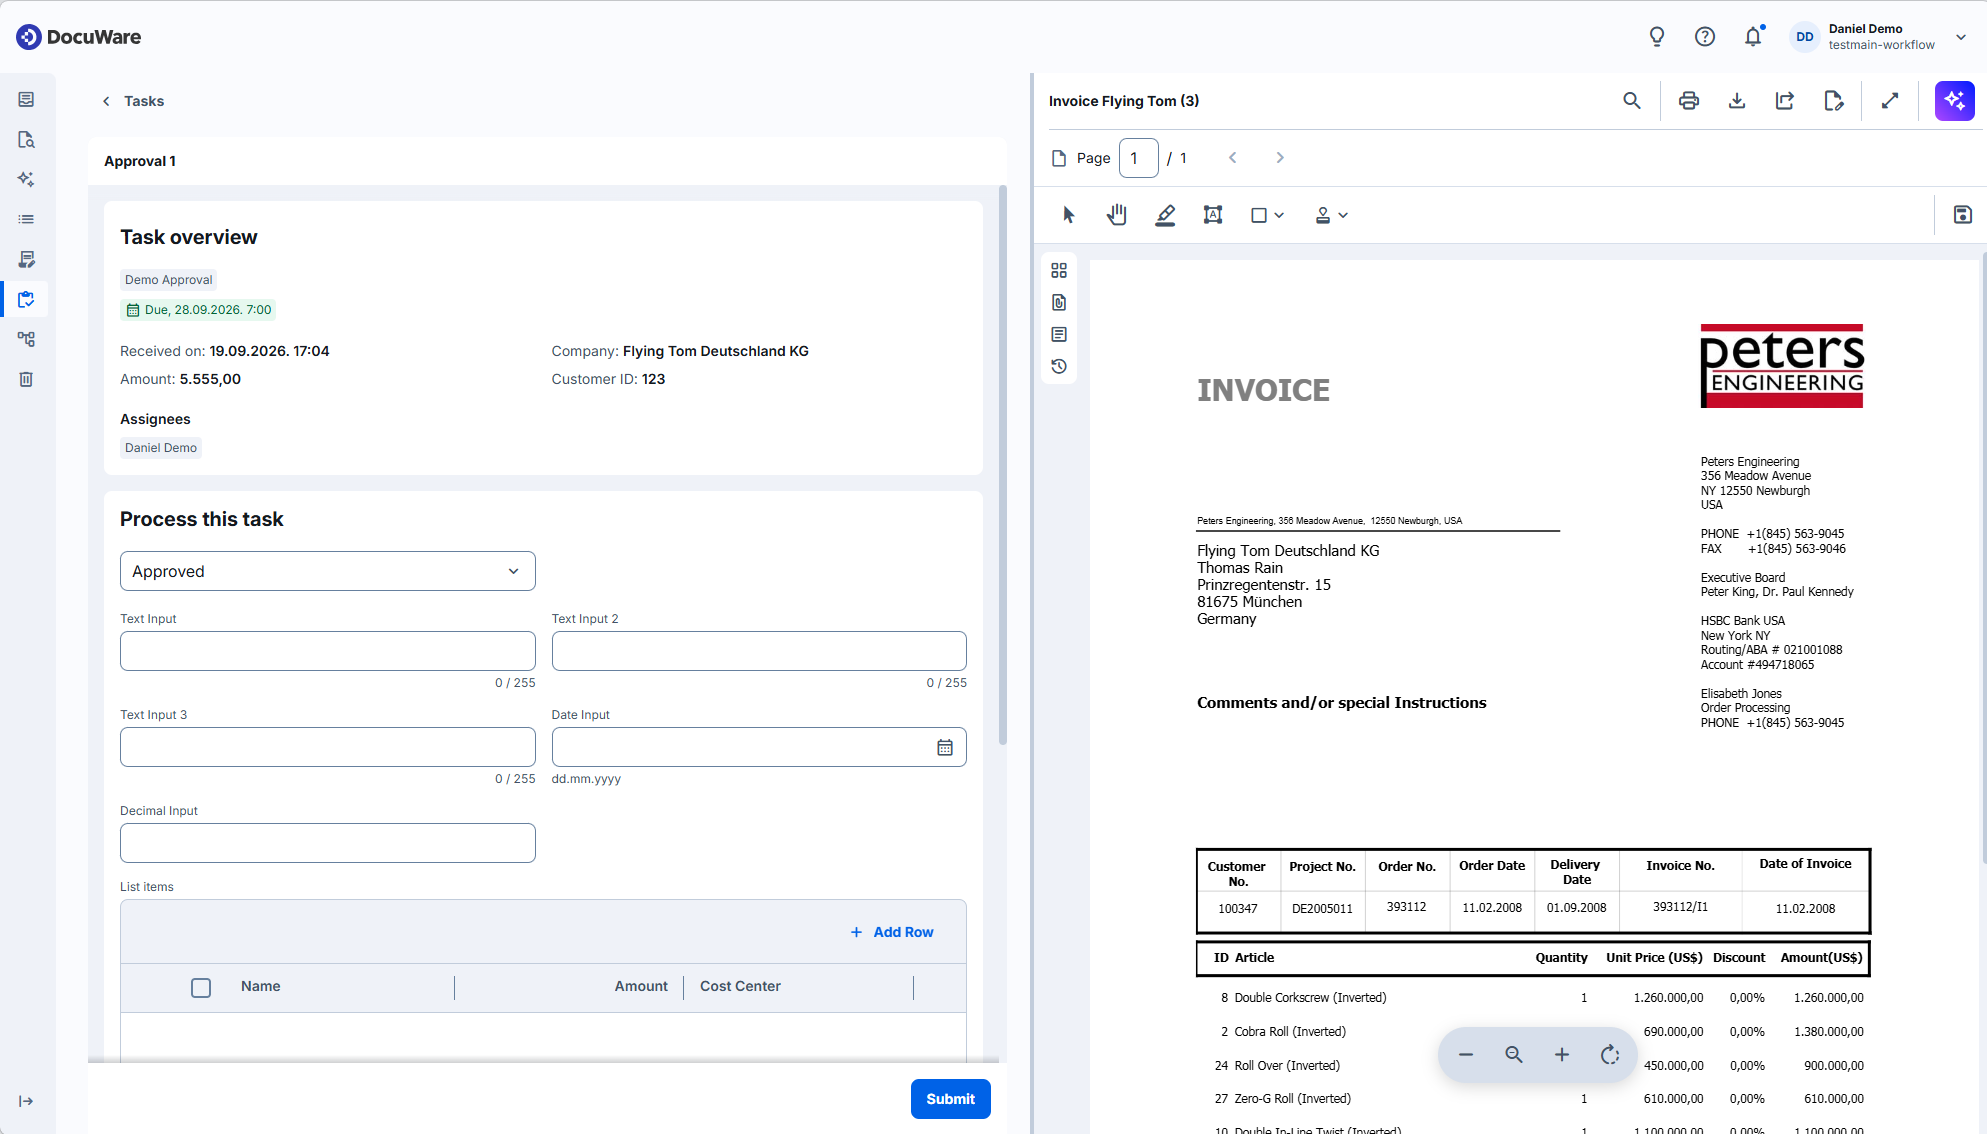
The task shows the key data for the workflow:
workflow name
due date
assignees
Process this task section with the process options the task offers
Where the workflow provides instructions, they appear in a yellow box below. Read them first, because they usually decide which option is the right one.
In the details page you can change the width of the viewer by dragging its divider. The width and the zoom level are remembered, so you set them once rather than for every task:
Locking of shared tasks is coming soon
A task that is assigned to several people is not locked while someone works on it. Two colleagues can therefore process the same task at the same time without either of them noticing. The second process option then fails with a message. For shared tasks, agree who takes what before you start.
Completing a task with a stamp
Instead of choosing a process option in the task form, you can place it on the document as a stamp. The workflow provides one stamp per proces option, for example Approved and Rejected. The decision then stays visible on the document for everyone who opens it later.
Open the document from the task either in the task details view or in fullscreen and open the stamp menu in the viewer. The stamps of the workflow are listed first, above your other stamps and separated by a line.
Select the stamp for your process option and place it on the page. If the stamp asks for information, a dialog opens first and your entries are checked before you can place the stamp.
The document is then saved and the task is closed. If you have annotations that are not saved yet, you are asked to save them first.
These stamps only exist while the document is open from a task. Opened from a result list, the same document does not offer them.
Stamping needs the document in front of you, so it works in the details page and in full screen, not in the side panel.
Viewing the task history
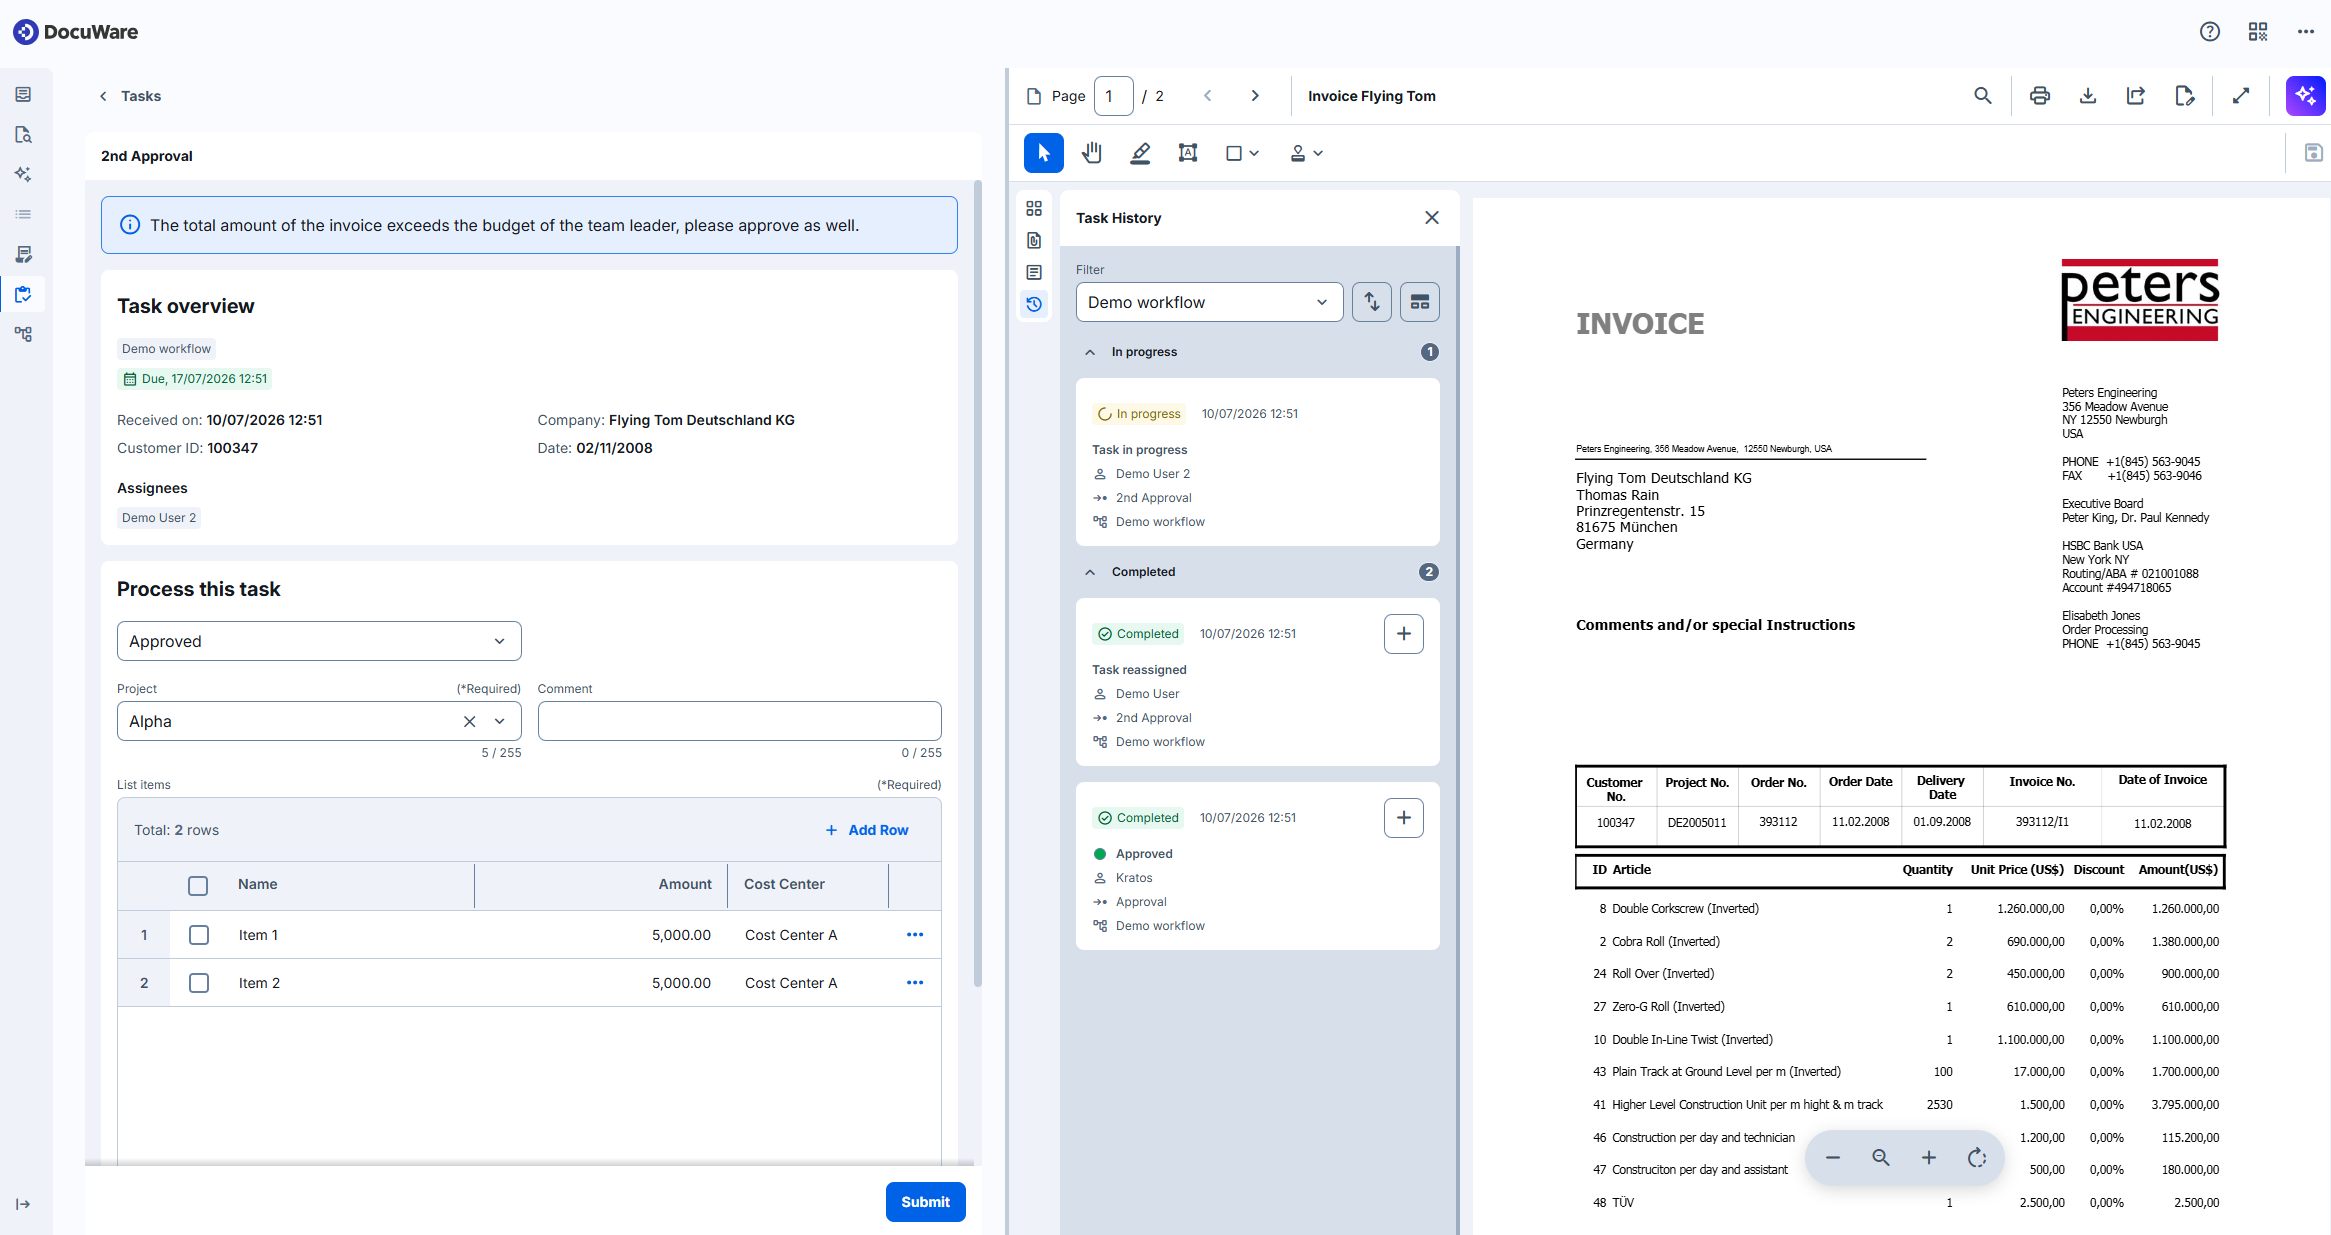
Before you decide, it usually helps to know what happened to the document before it reached you. The task history answers that: who acted, when, which decision they made, and what they entered in the task fields. Select its icon in the viewer to open it.
Every earlier action appears as a card with the name of the task, its workflow name, the decision maker, the time, the process option, and a badge showing whether the step is In progress or Completed. Empty fields are left out. Task reassigned marks a task that was handed over, Instance stopped a workflow that was ended.
The history lists what people did. Steps the workflow performs on its own, for example assigning data or sending an email, are not shown.
A document can pass through several workflows. The history you open from a task starts with that task's workflow; switch the filter to another workflow, or show all of them at once. Steps are listed newest first, and you can group them by workflow or by status.
The task history holds only the tasks. The instance history in whe workflow overview section however holds every step of the workflow, including the automatic ones such as data assignments and emails.
Actions for a task
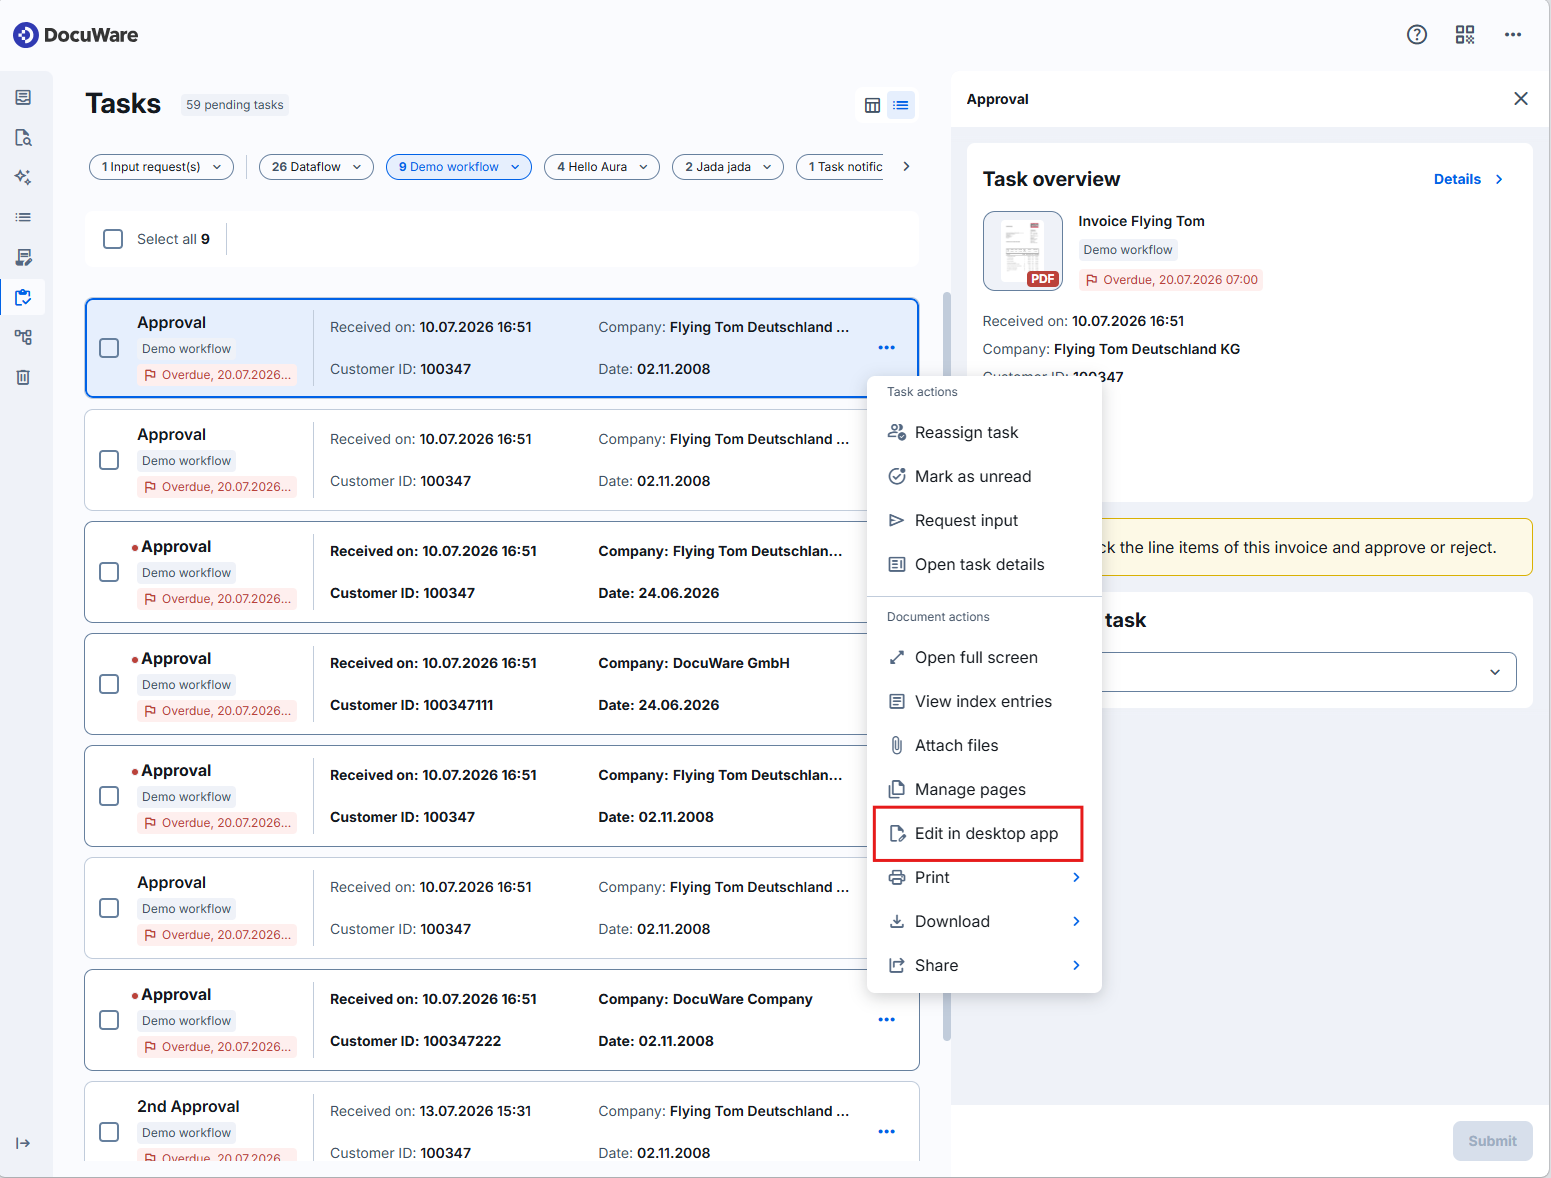
Right-click a task, or open its menu with the three dots. The menu is in two groups: the task actions, and the actions for the document the task belongs to. When you select several tasks, the actions for all of them are in the toolbar above the list.
The menu shows only the document actions your file cabinet permissions and your license allow. An action you may not use does not appear in the menu.
Reassign task: Hands your task to someone else. The same action for the task of a colleague is in Workflow overview.
Mark as unread: Puts the task back into the unread count of its list.
Request input: Asks a colleague for information before you decide.
Open task details: Opens the task in the details page.
Open full screen: Opens the document in the viewer across the full window.
View index entries: Shows the index entries of the document.
Attach files: Opens the document in the viewer with the panel for attached files active.
Manage pages: Opens the document in the viewer with the page panel active, so you can rotate, reorder, or delete pages before you decide. The entry appears only for PDF documents.
Edit in: Opens the document in another program, so you can change the document itself. See Opening documents in their native application.
Print: Prints the document.
Download: Saves the document to your computer.
Share: Shares the document with others.
Notes for administrators
Tasks are configured in the same way as in classic DocuWare in Workflow Designer. Tasks keep their settings, and nothing has to be set up again for the new DocuWare client.
The link in a notification email opens the DocuWare client that is set as the default for the organization in DocuWare Configurations > Organization settings > General.
Document actions in a task list follow the file cabinet permissions that already exist. An action the user is not allowed to use is not shown in the menu, and the same check applies to the toolbar for several selected tasks.
Reassign task, Mark as read, Mark as unread, and Open details are task actions, not document actions, and are not affected by these permissions.
The permissions are read when the user opens their tasks, so a change of the permissions takes effect only after the user reloads the DocuWare client.
A read-only Web Client license or a Workflow User license withholds the editing entries and Attach files even when the file cabinet rights are set.