If your organization uses Active Directory or LDAP directory to manage employee access to tools and services, you can utilize On-premises UserProvisioning feature to automatically provide your users with access to DocuWare via SCIM. This guide will walk you through the steps to configure both DocuWare User Provisioning plugin and user provisioning directory connector application to set up provisioning for your organization.
The current version of UserSync (v3) supports the following provisioning features:
Automatic User Creation: Users assigned to either the synchronized groups or organizational unit are automatically created as users in DocuWare.
Attribute Synchronization: Any updates to user attributes (userName, email, activeness, firstname, lastname) in Active Directory will be reflected in DocuWare.
User Deactivation: When users are deactivated in the directory, they are marked as 'disabled' in DocuWare, preventing them from logging in.
Group Creation/Update: Groups that are configured to be synchronized will be automatically created and updated if a change in the group memberships is detected.
Configuring DocuWare:
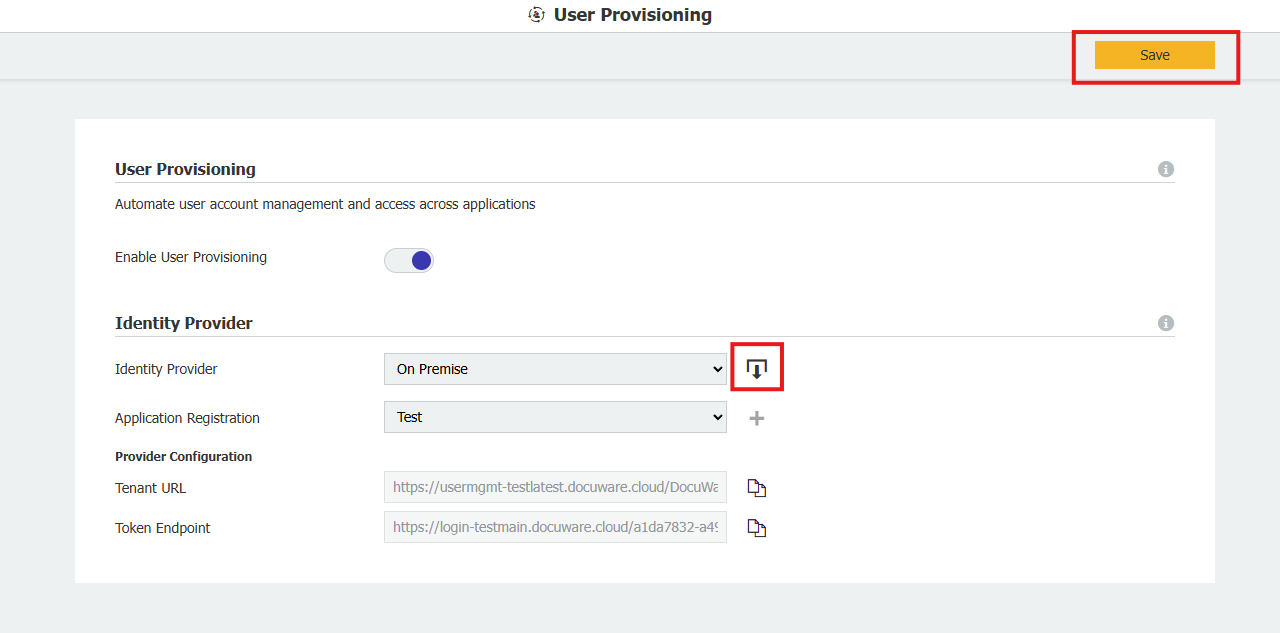
Go to DocuWare Configurations > General > User Provisioning.
In the User Provisioning plugin, activate the option Enable User Provisioning.
In the Identity Provider dropdown select "On-premise".
In the dropdown Application Registration select previously created app registration or click Create Application Registration.
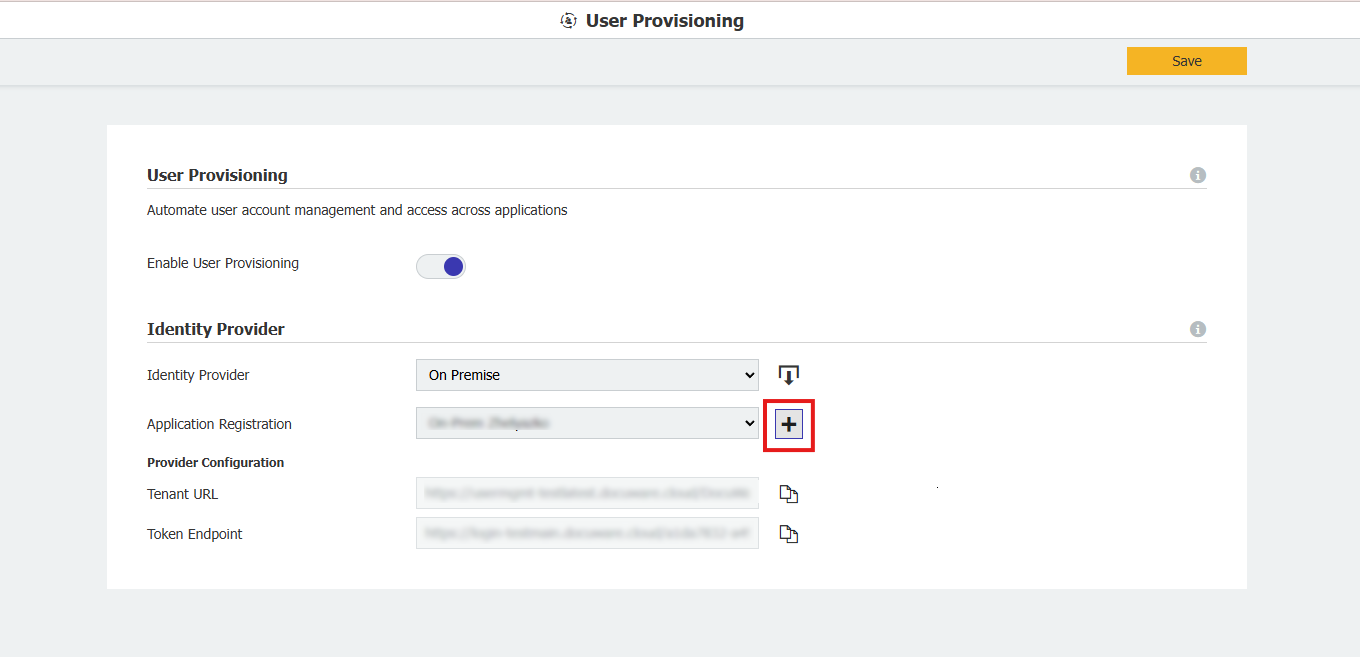
Write the Application Name.
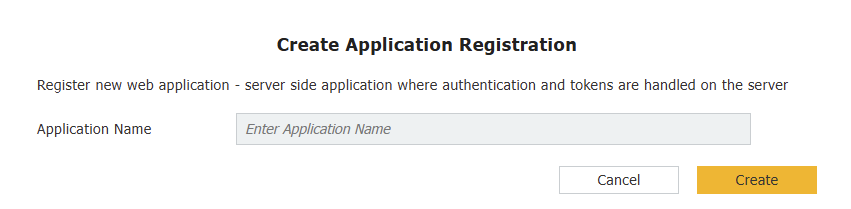
From the just created app registration copy the values of
Application (Client) ID
Client Secret
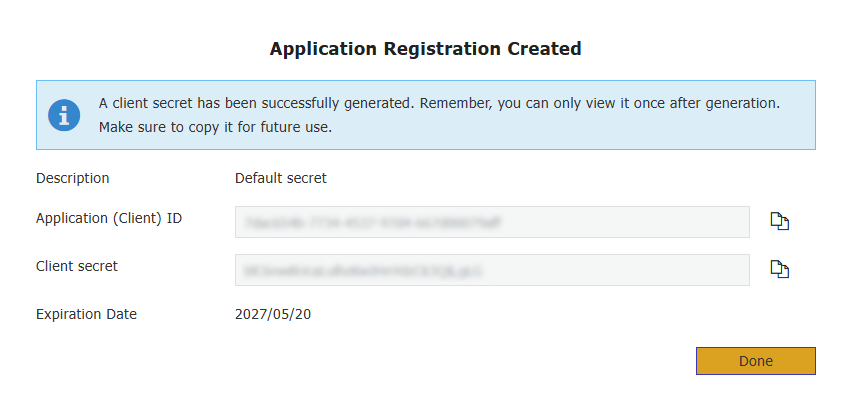
Click the Done button.
After saving, copy the following values:
User Provisioning tenant URL
Token endpoint URL
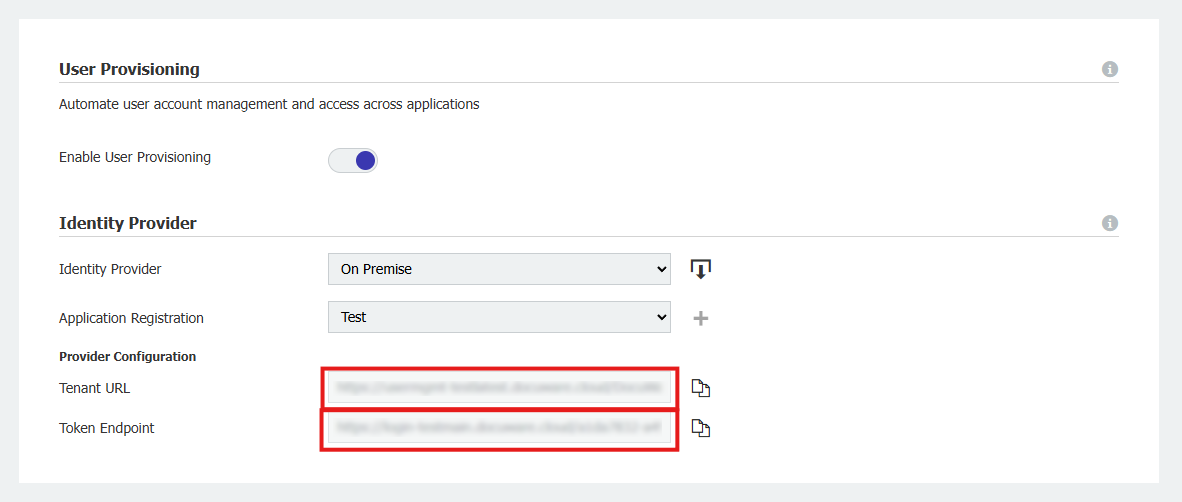
All information needed from Configuration page:
The Application (Client) ID
The Client Secret
User Provisioning tenant URL
Token endpoint URL
Download the User Provisioning connector tool and click Save.
Configuring User Provisioning Configurator application:
Download the User Provisioning directory connector tool.
Open
Docuware.userSyncOnPrem.zip.Open
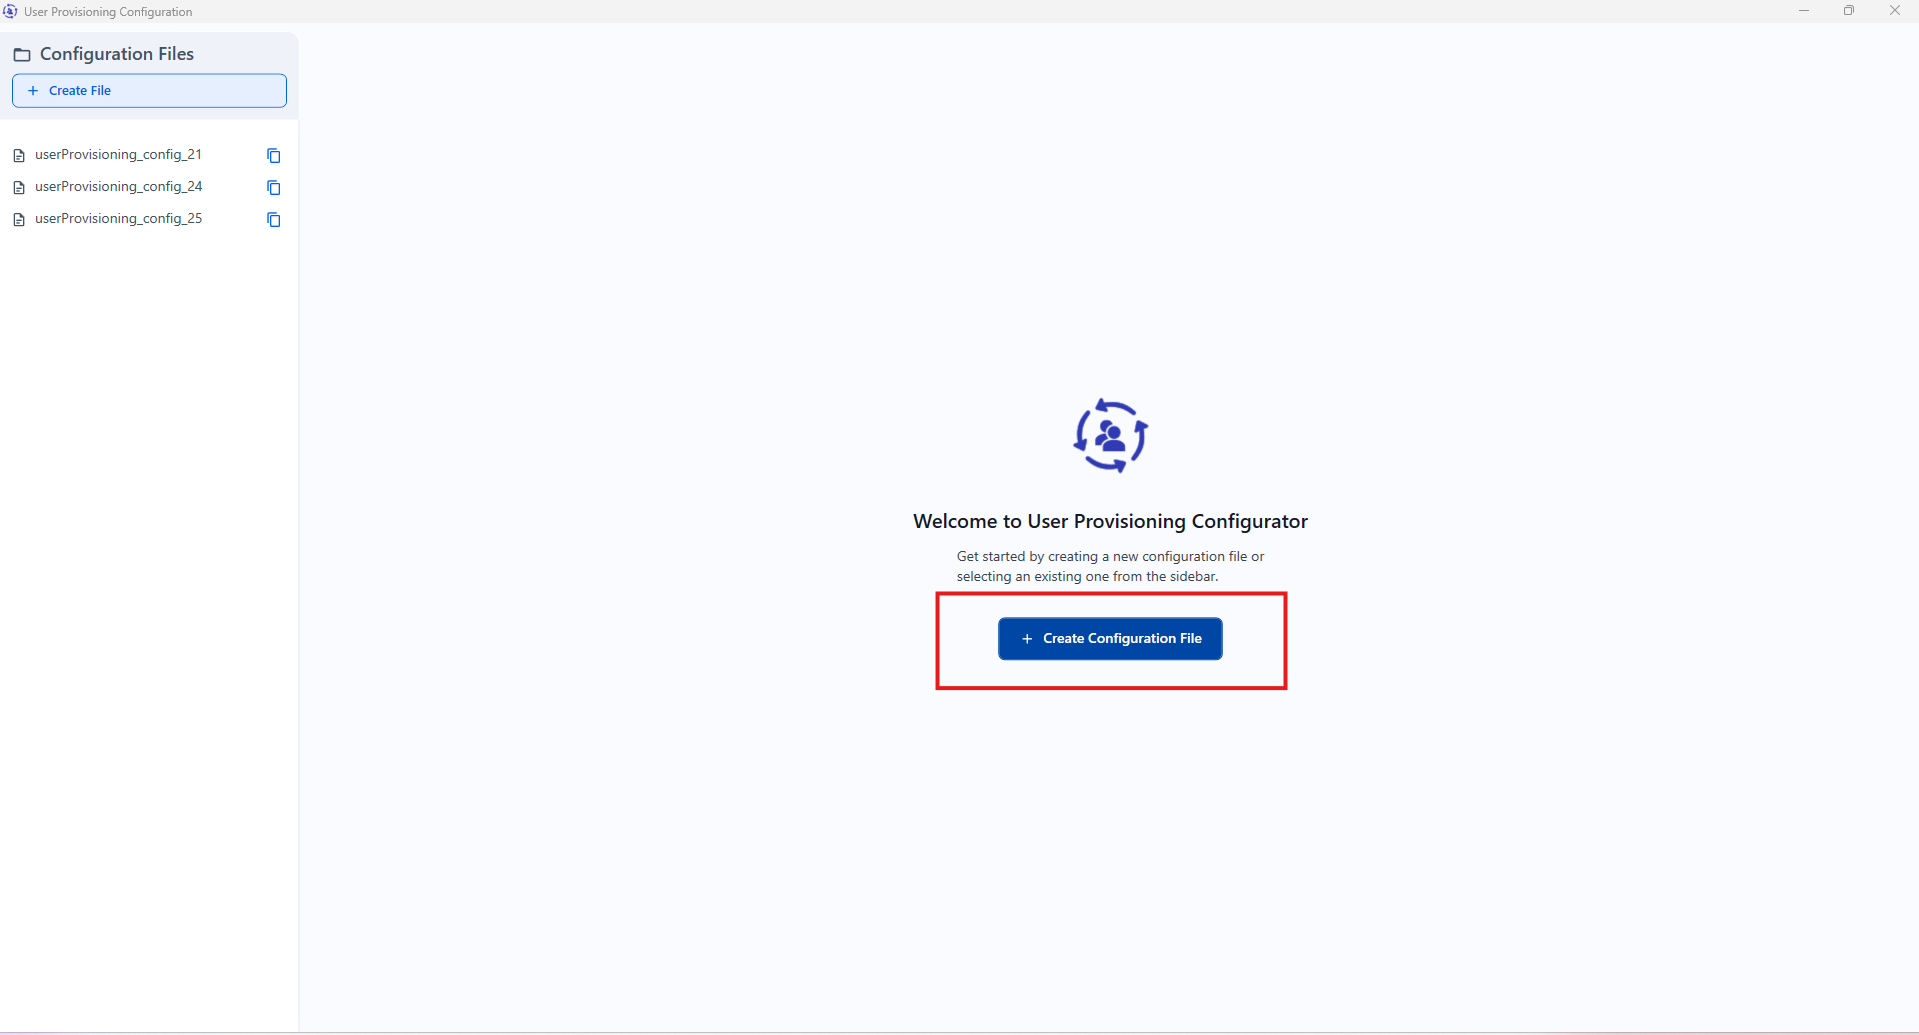
UserProvisioningConfiguratorfolder and clickUserProvisioningConfigurator.exe.Once opened, click on the Create Configuration File button to create a configuration.
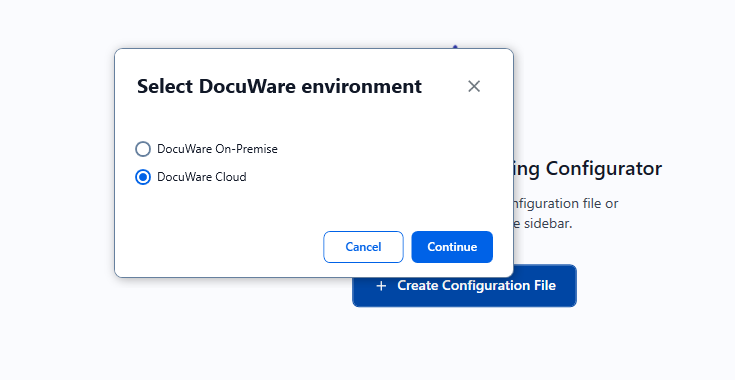
New screen with radio buttons appears. Select DocuWare Cloud and click Continue.
New screen with textboxes appears. All details for connecting to DocuWare should be pasted there. The needed information should be copied from the UserProvisioning plugin in Configuration page (Step 9 from Configuring DocuWare section).
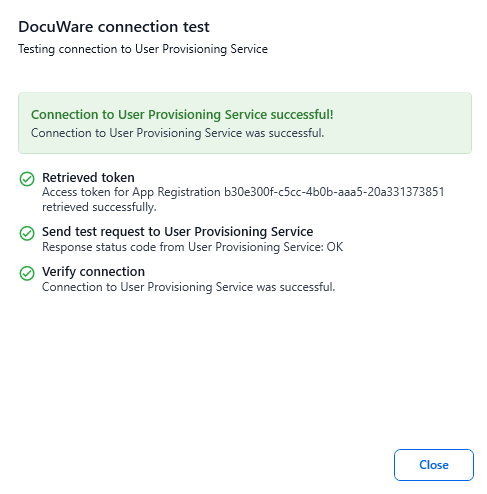
After pasting the details, optionally click on Test Connection button to validate the configuration.
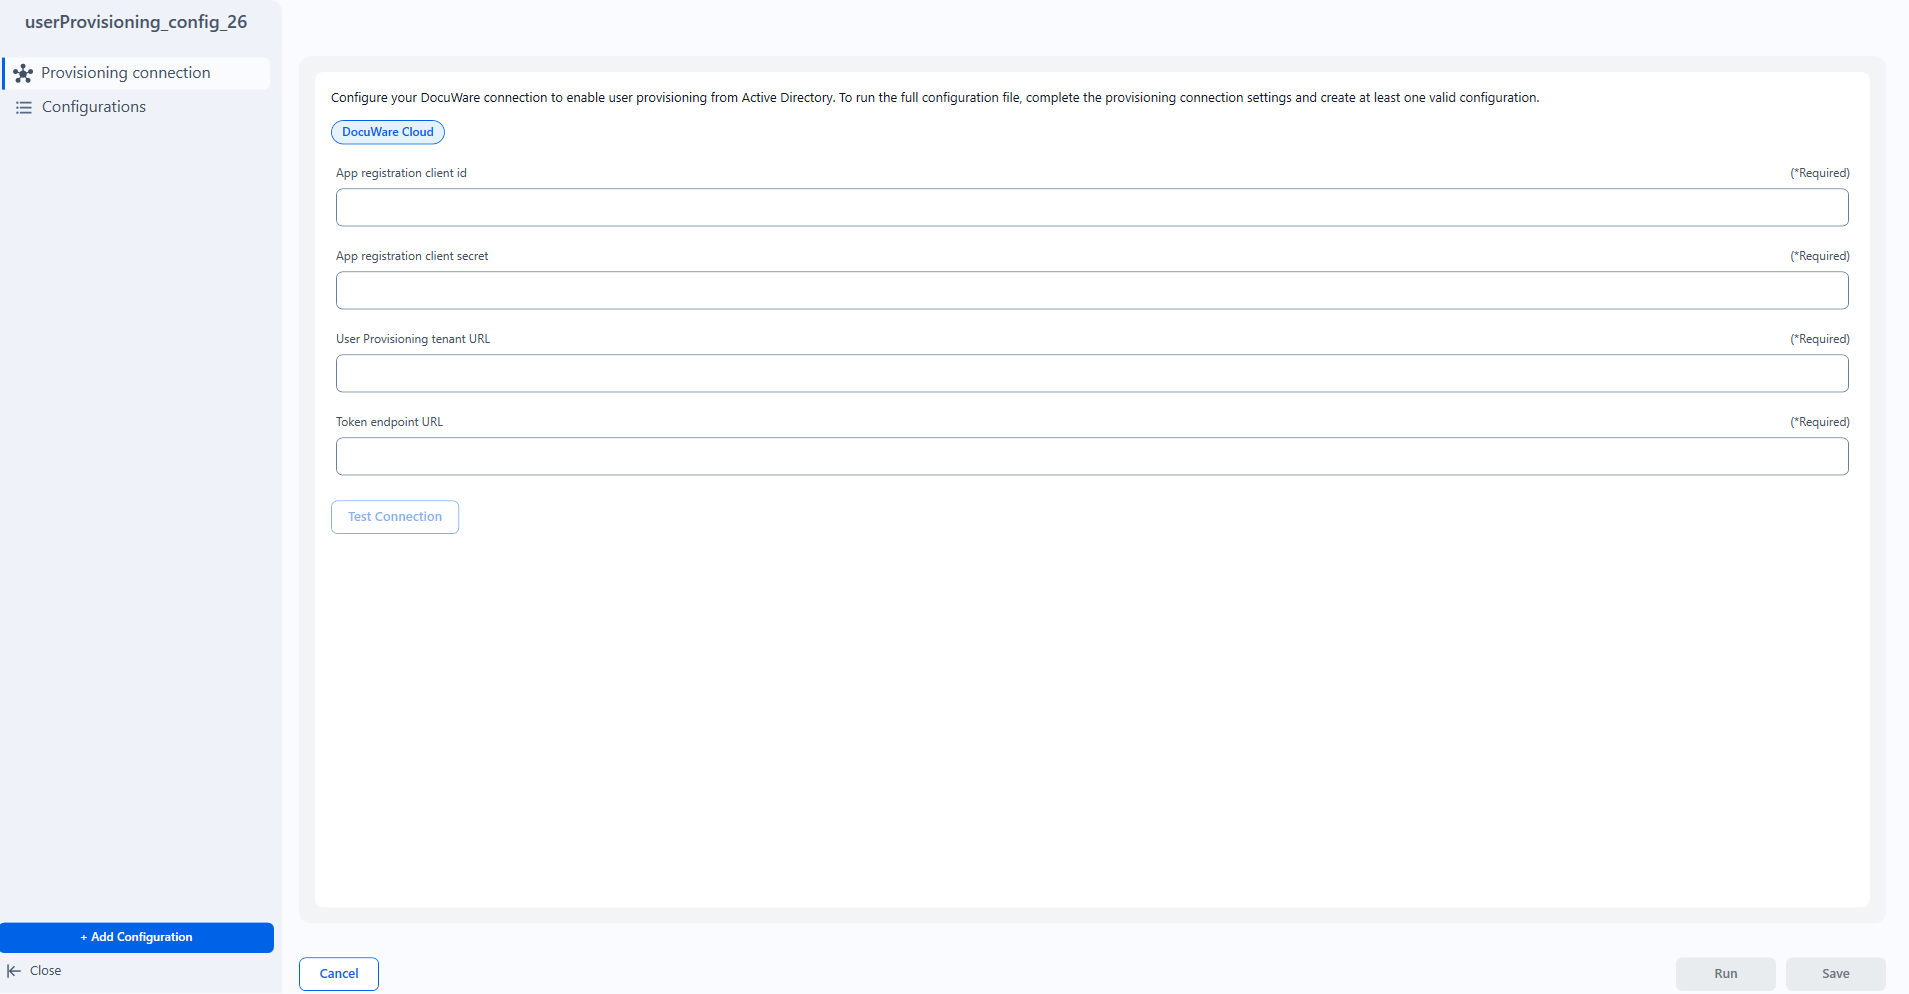
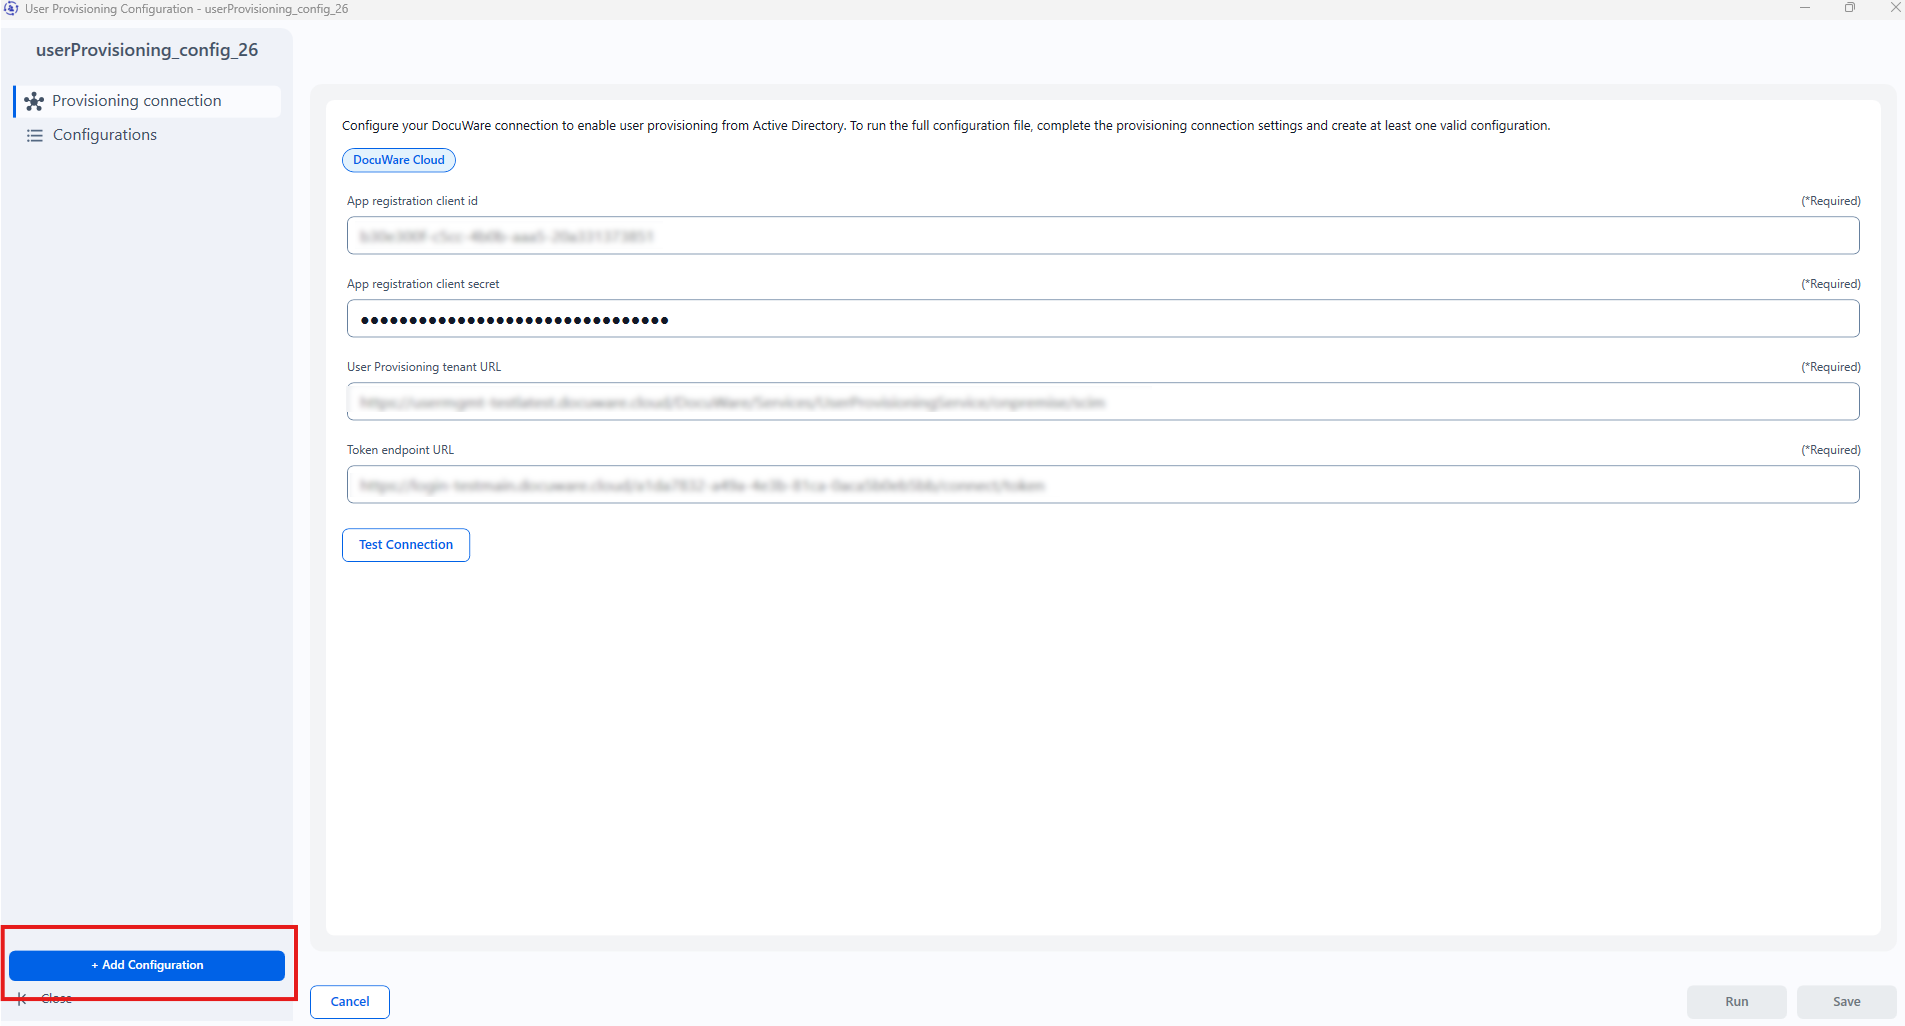
Click Add Configuration to start entering information about the Directories you'd like to connect.
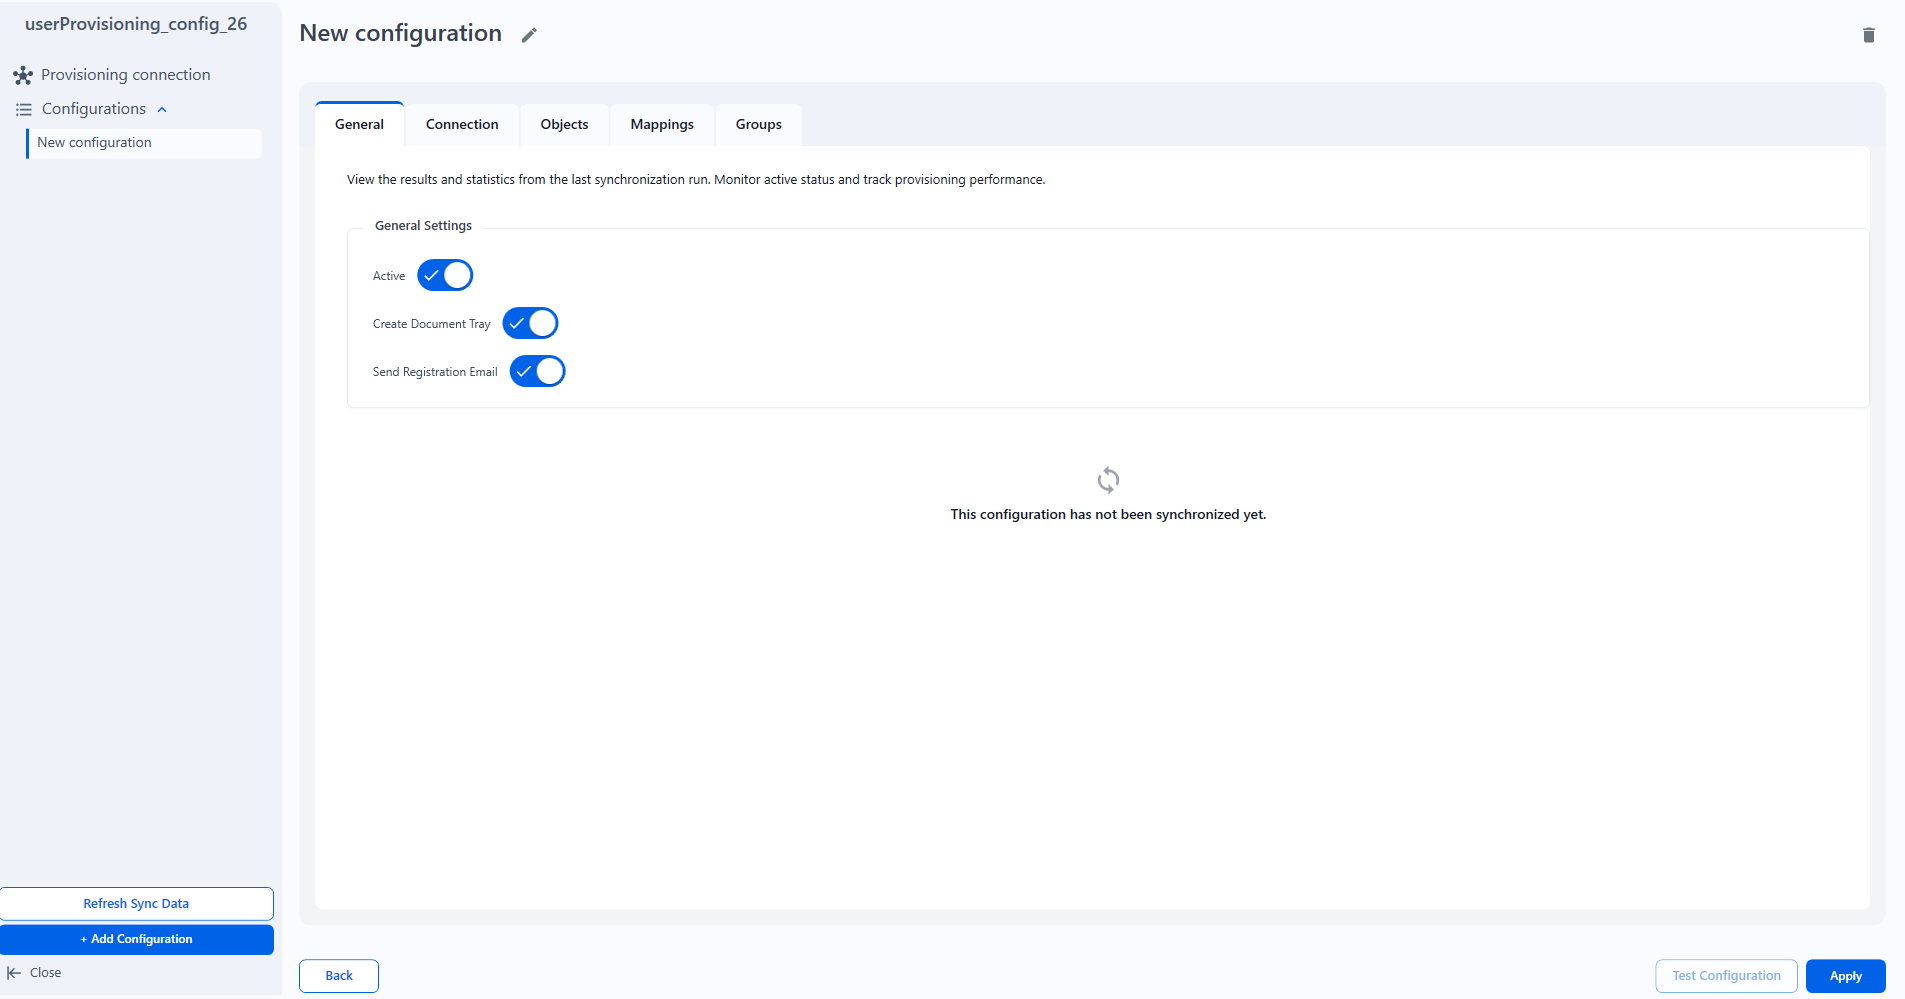
When you start editing the configuration you will see a tab menu with different settings. By default all options in the General tab are set to true.
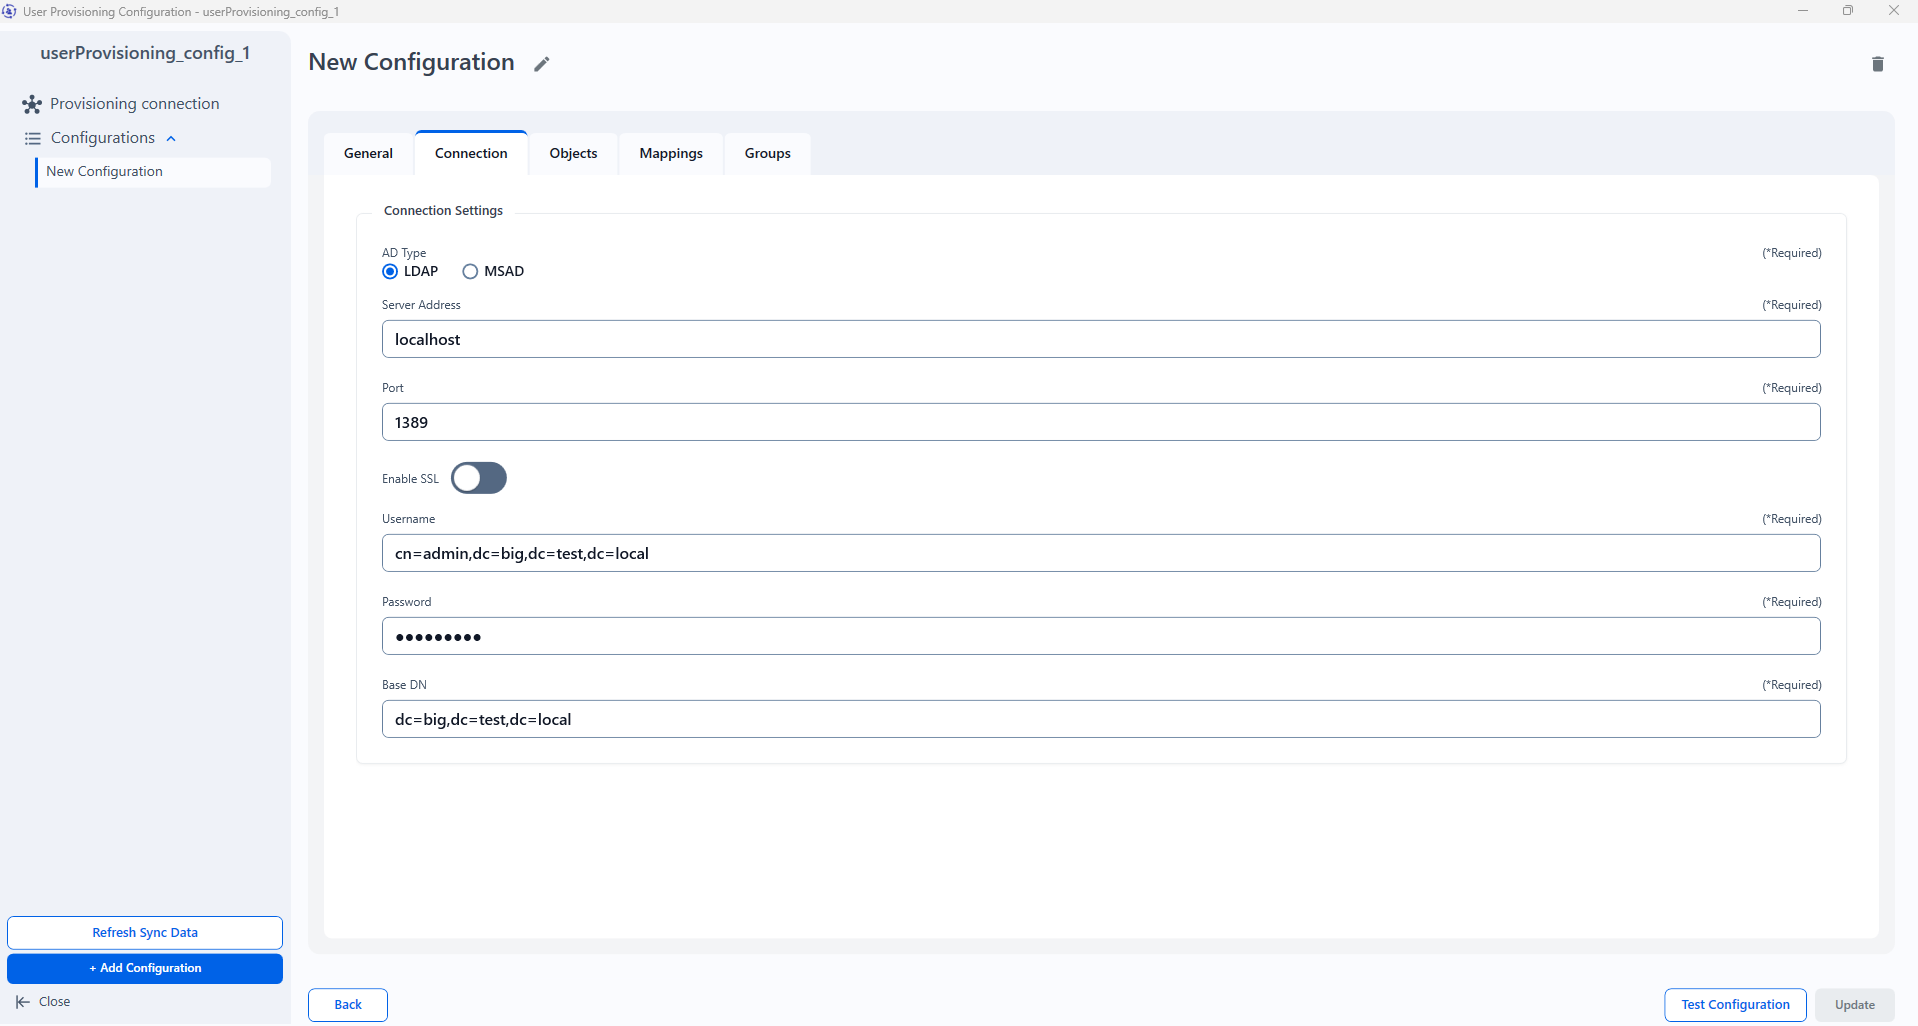
Click Connection tab and choose - LDAP or Microsoft.
Add needed information.
BaseDN and Groups DN should follow the syntax:
Groups DN examples:
cn=Admins,dc=example,dc=comorcn=Developers,ou=IT,dc=company,dc=orgBaseDN examples:
dc=example,dc=comorou=IT,dc=company,dc=org
Objects and Mappings tabs are pre-filled with required data based on the selected AD type.
You can test the configuration clicking on Test Configuration button.
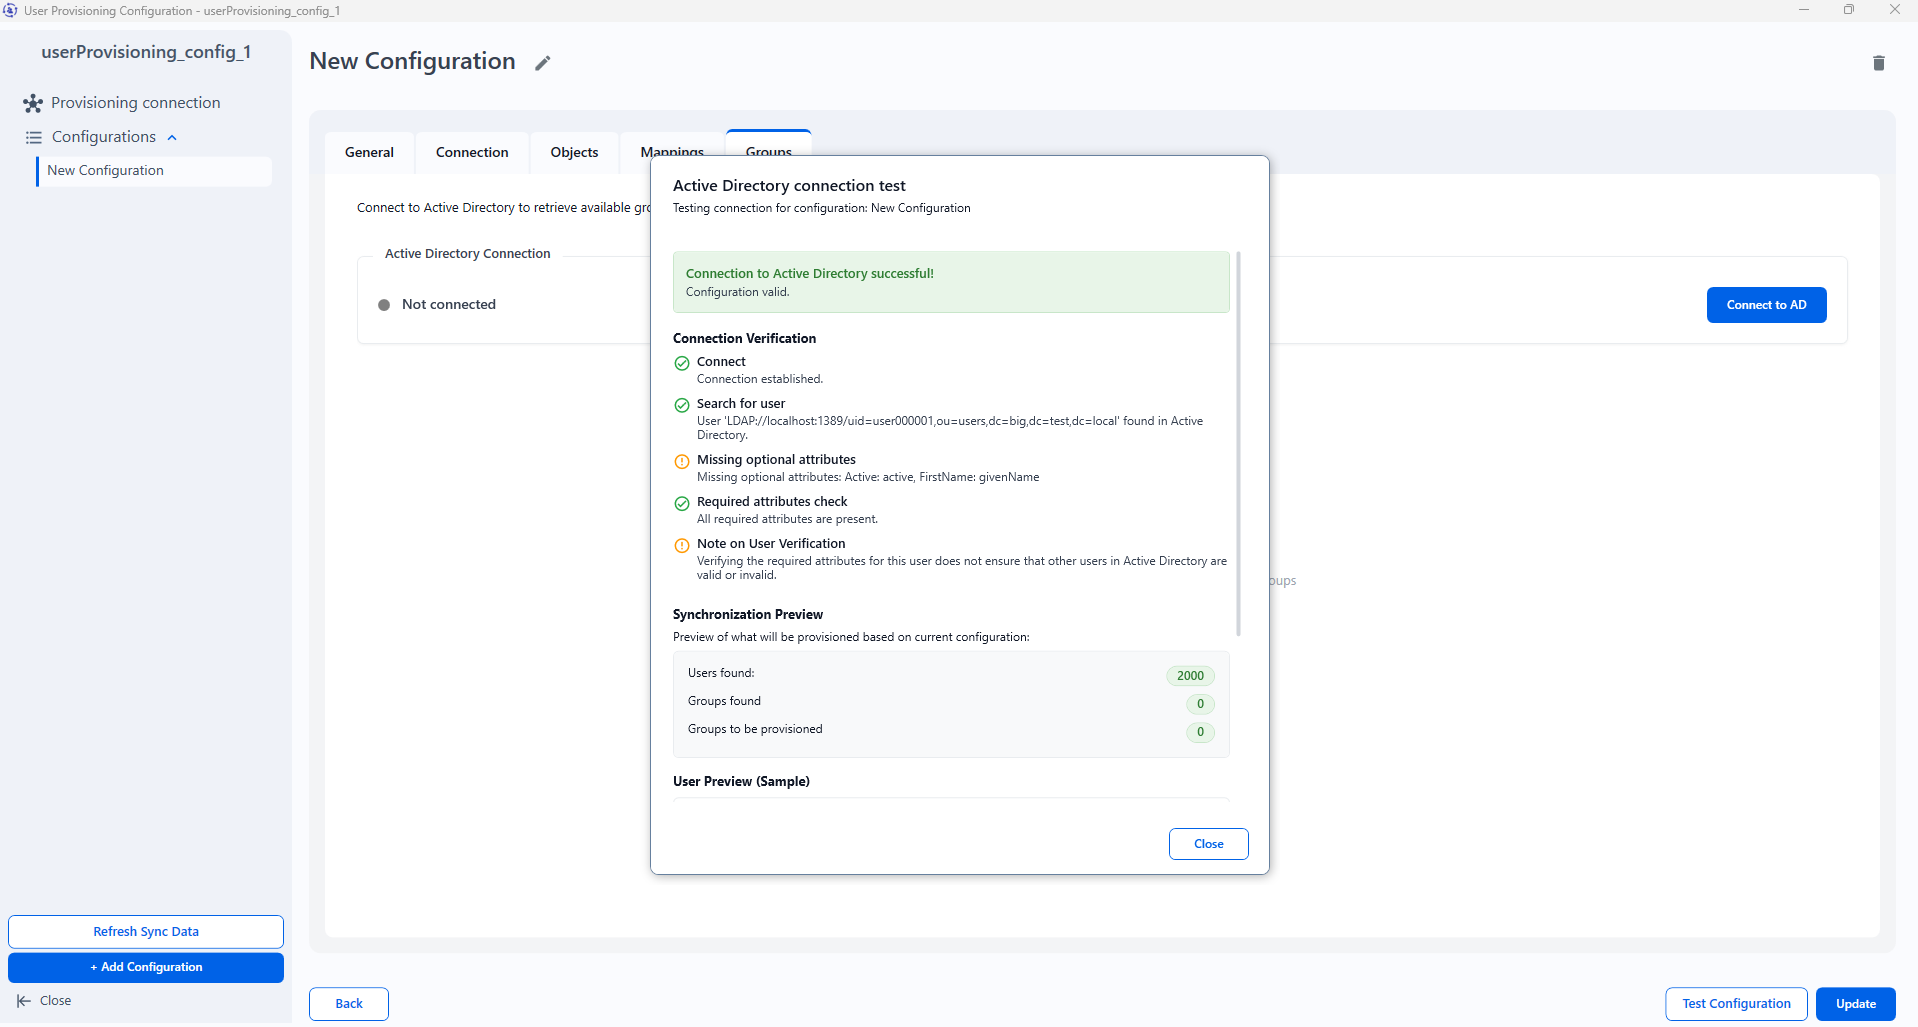
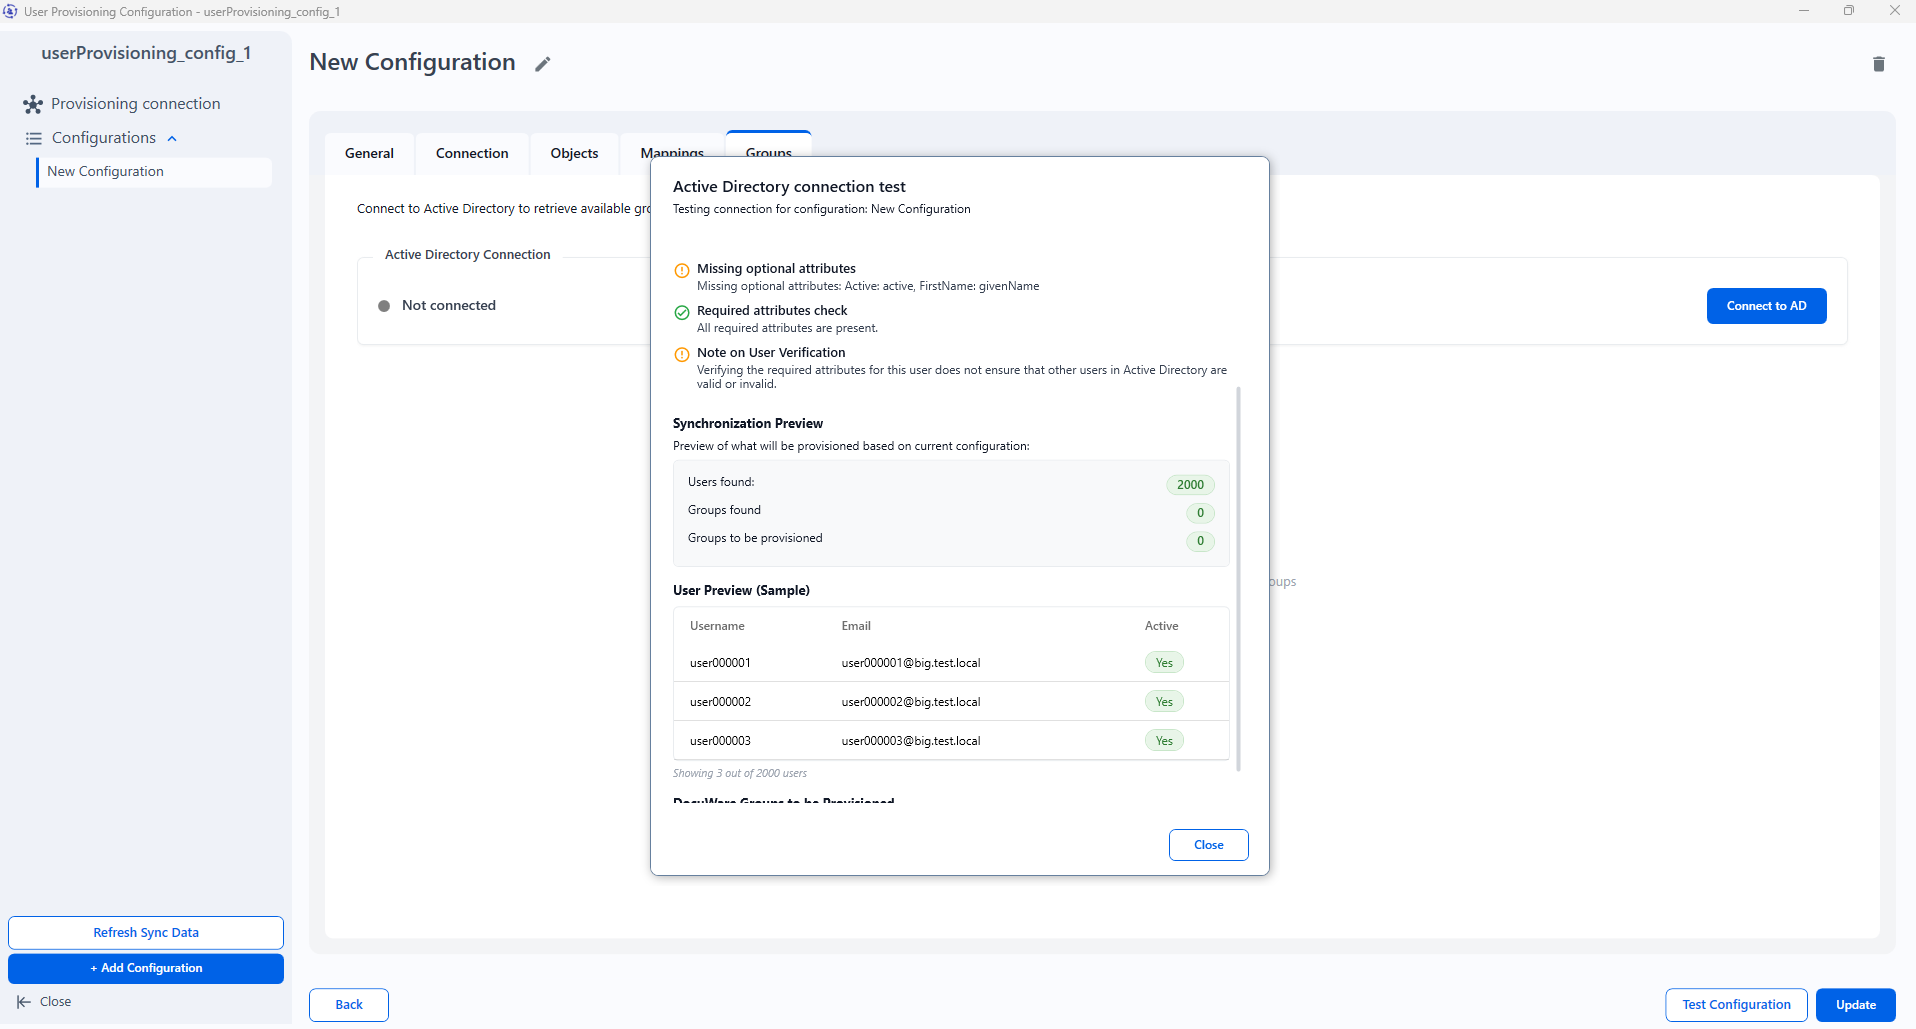
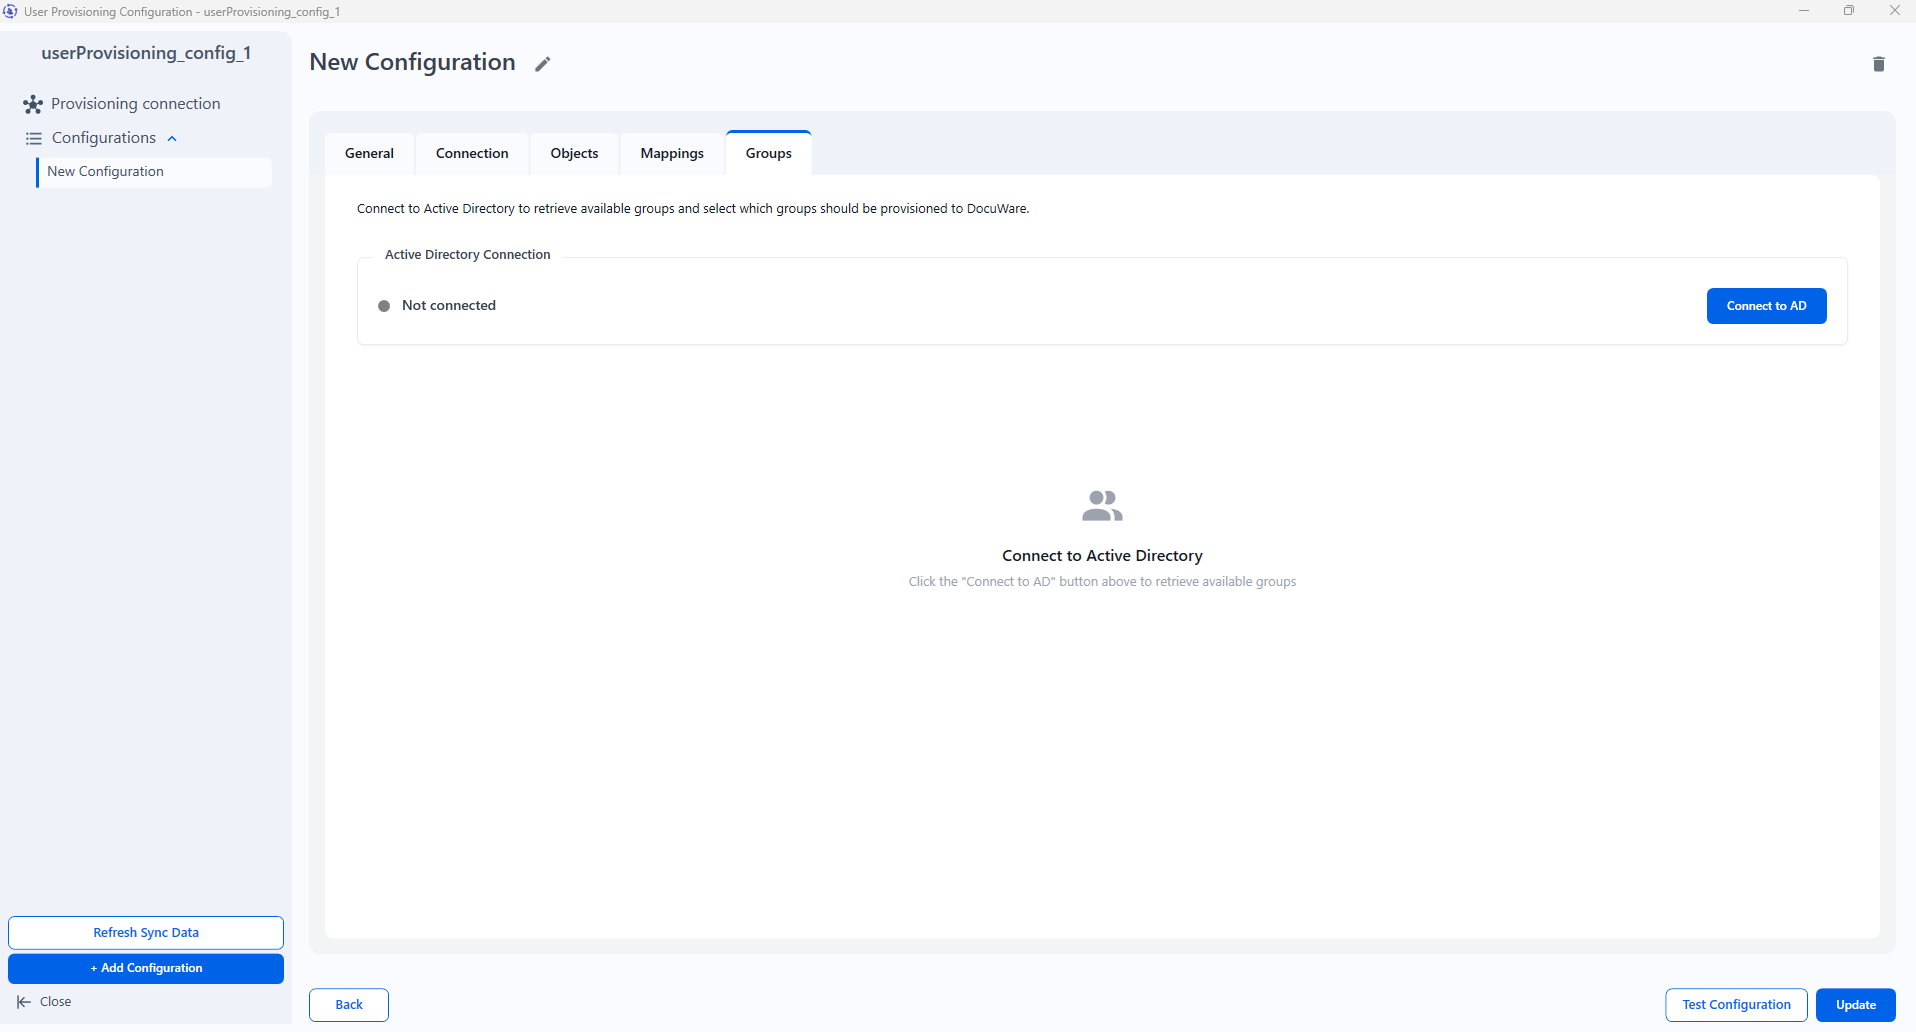
Click on Groups tab and then on Connect to AD button.
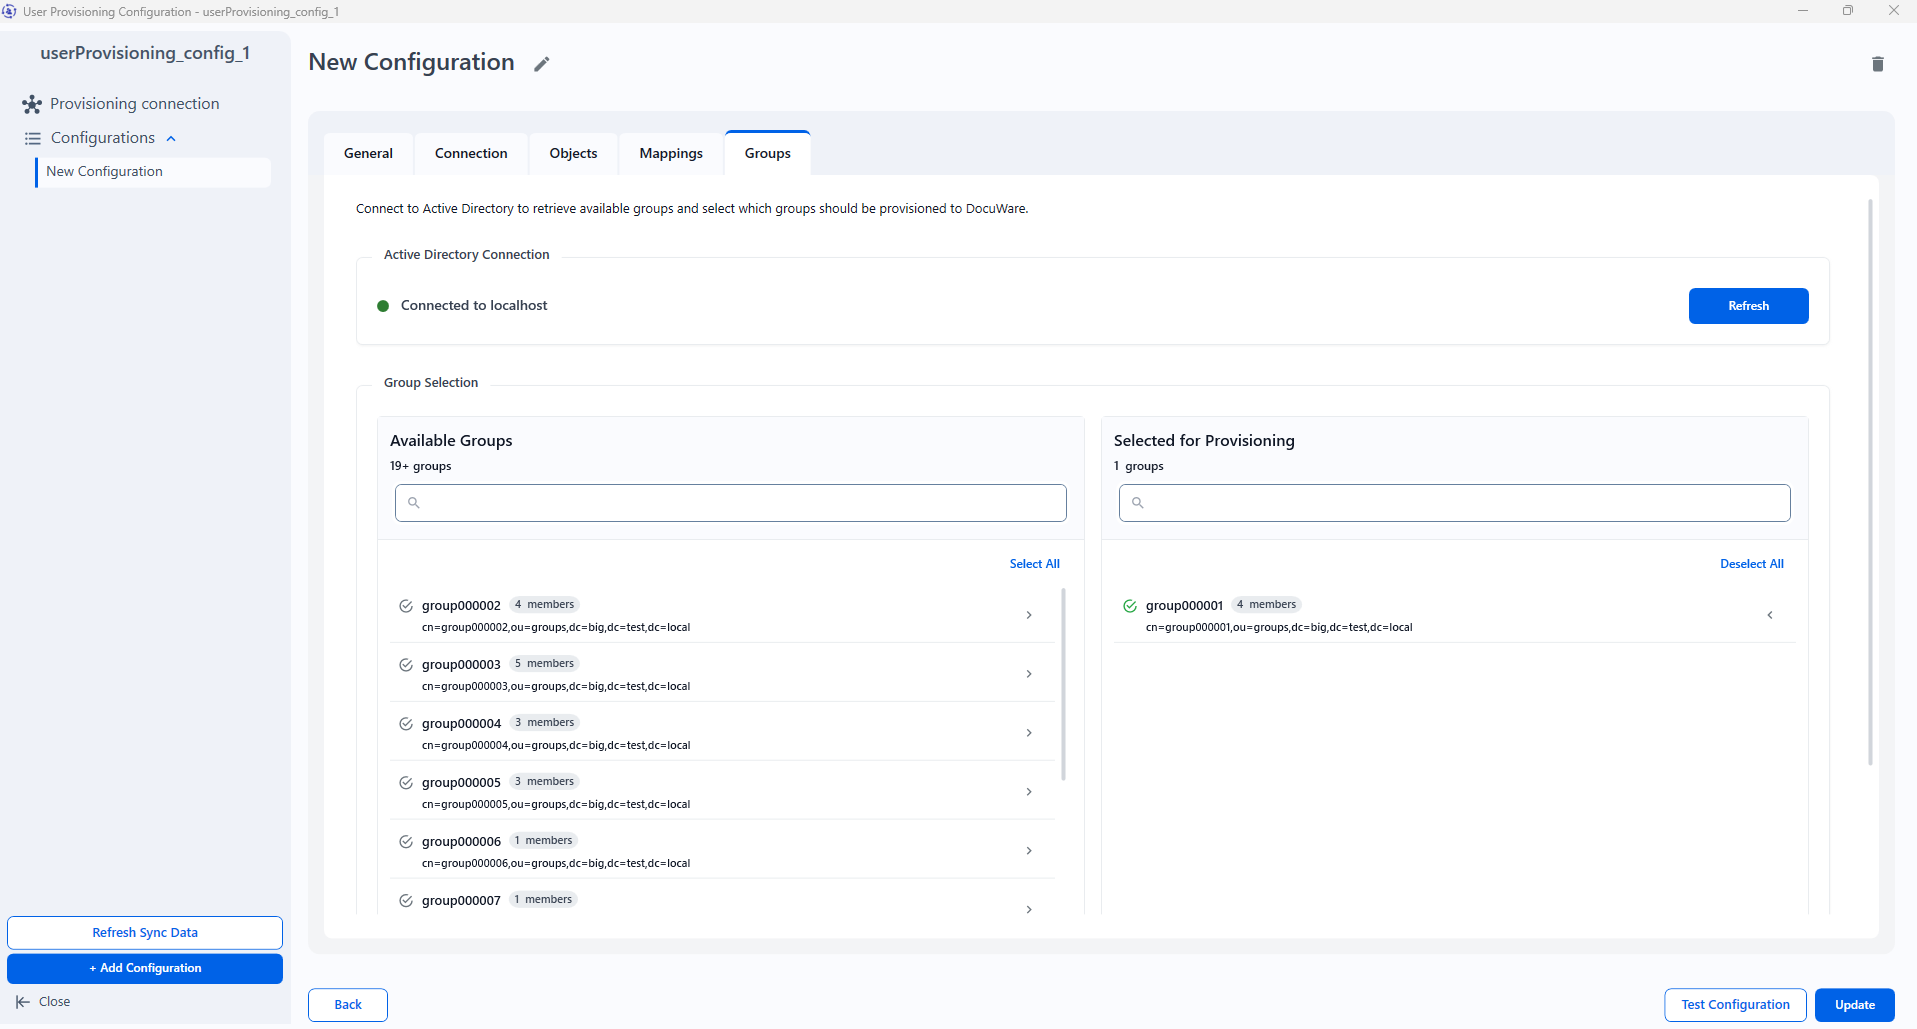
You will see a list of available groups, from which you can select the ones that need to be provisioned.
You can test the configuration once again when the groups are selected.
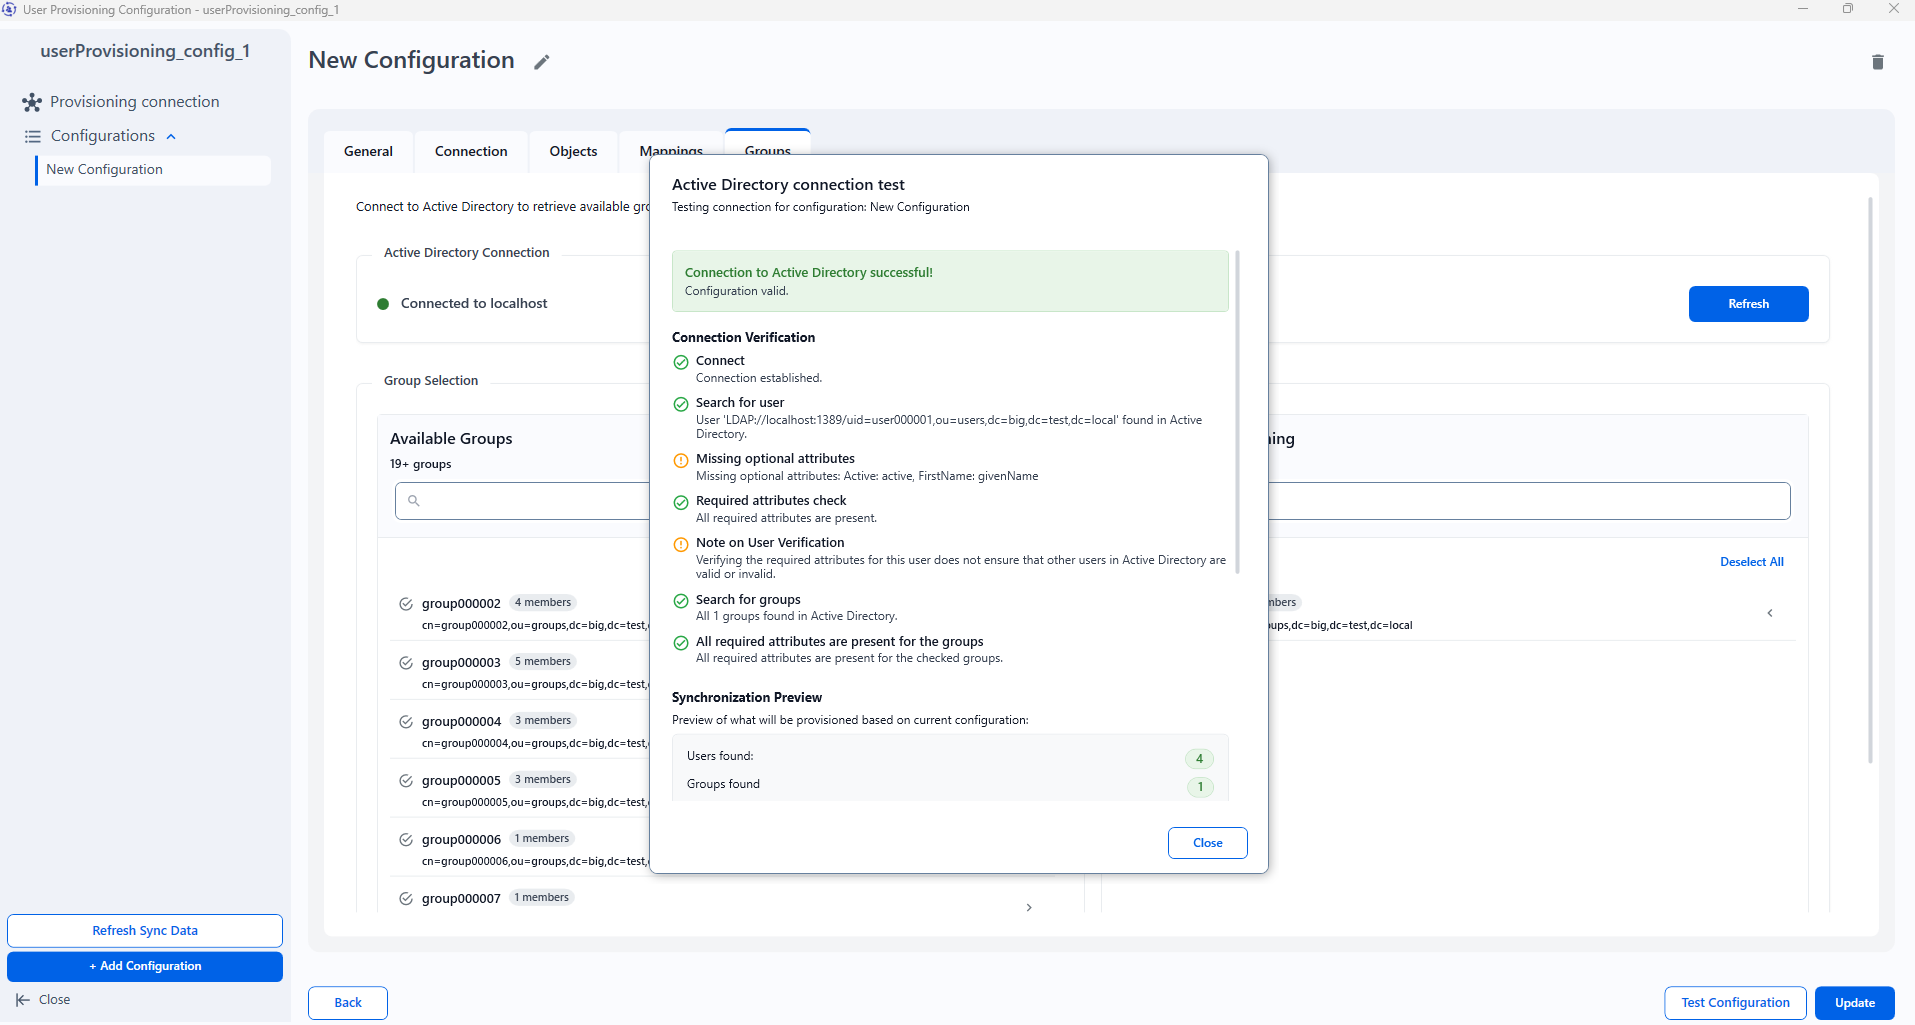
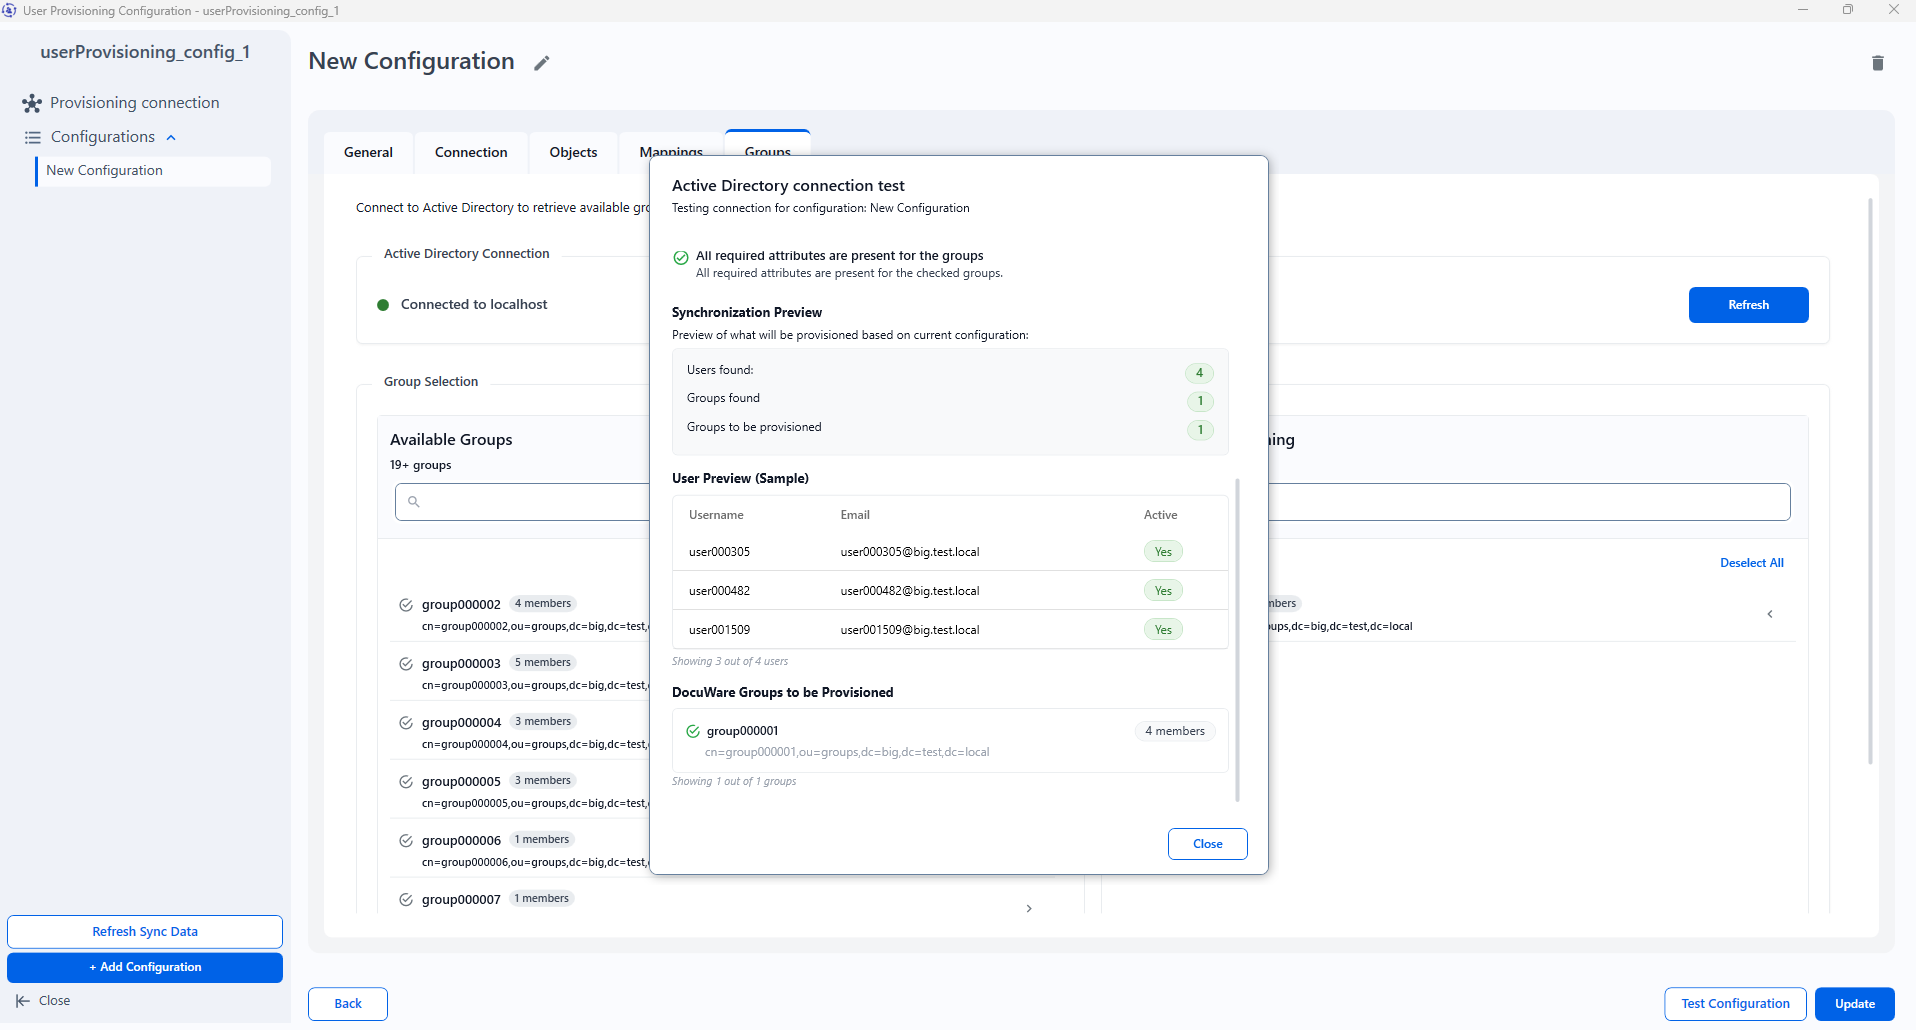
Once the configuration is saved it will appear in the Provisioning connection view. Each configuration can be updated or deleted.
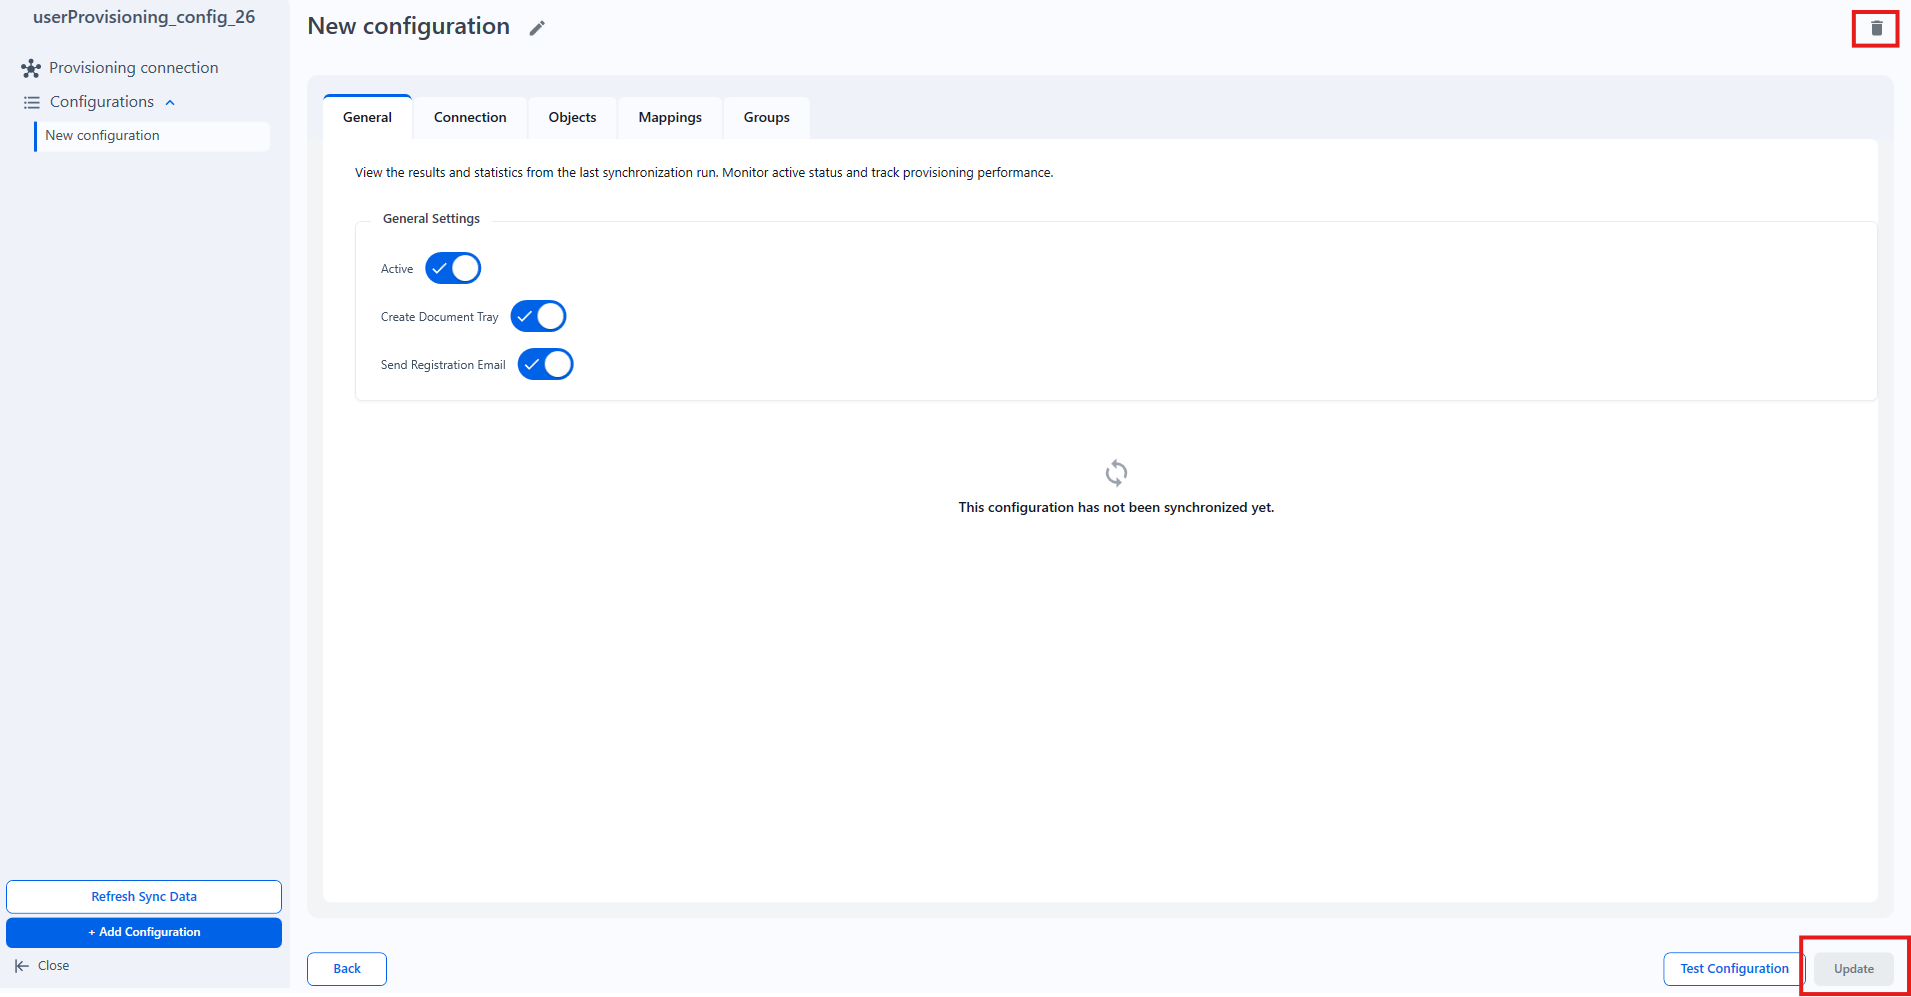
To create multiple connections to various servers and active directories, a separate configuration should be created for each one.
Once you have filled in the provisioning connection data and created at least one valid configuration, you can save the provisioning file by clicking Save.
Close the User Provisioning Configurator application. Your configuration is already saved and can be found in the following folder:
C:\ProgramData\DocuWare\UserProvisioningConfigNow create and schedule a Windows task for executing the User and Groups Synchronization.
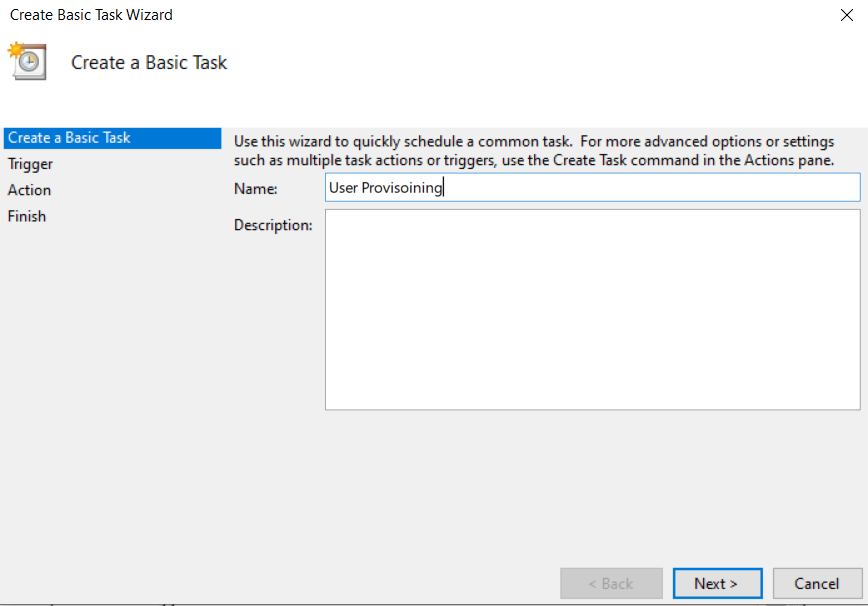
Open Windows Task Scheduler and click Create Basic Task.
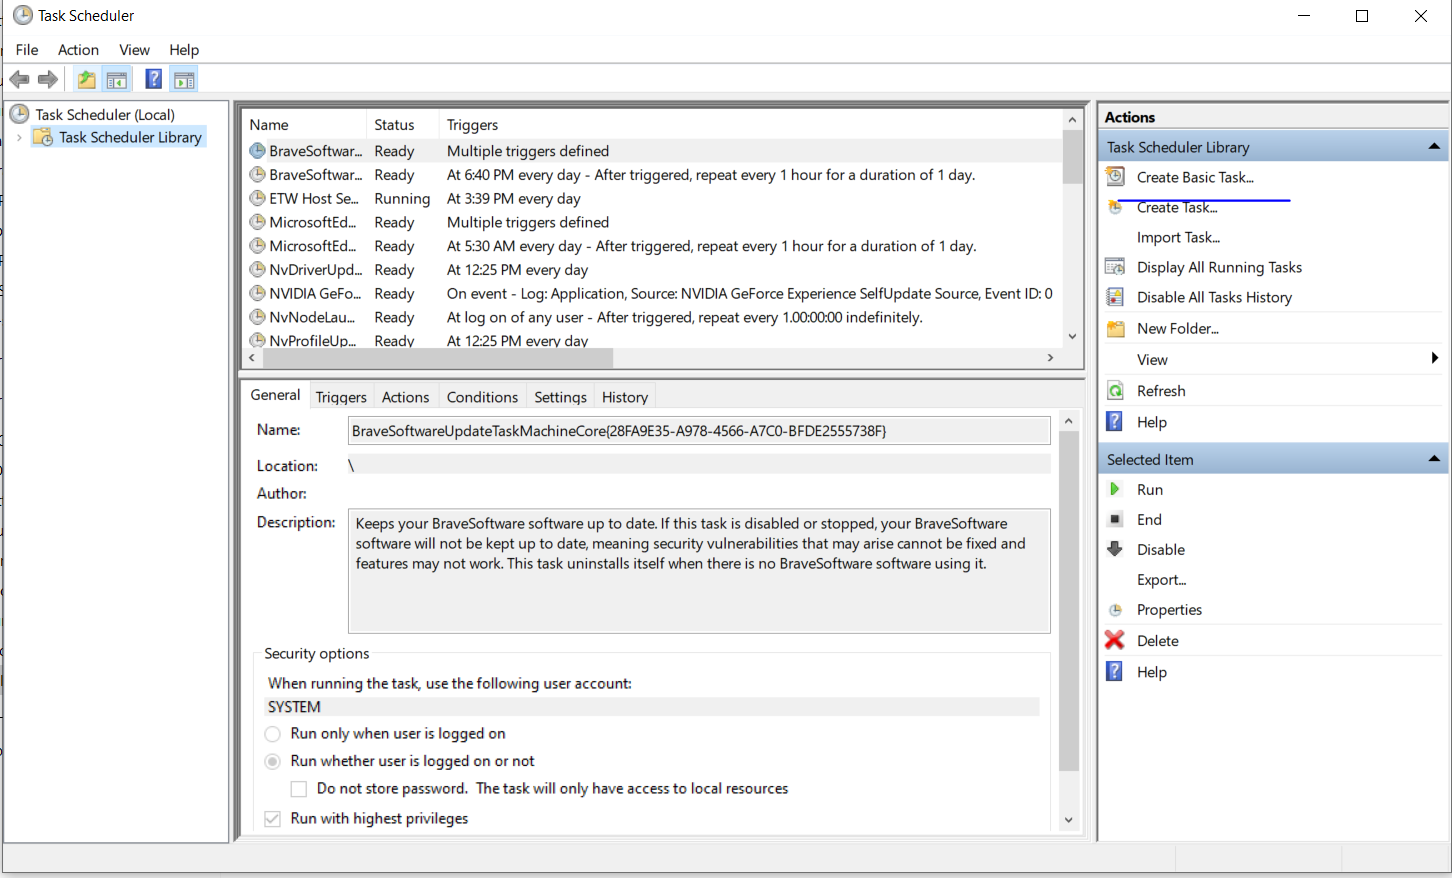
Follow the steps shown in the wizard. Enter a name for the task.
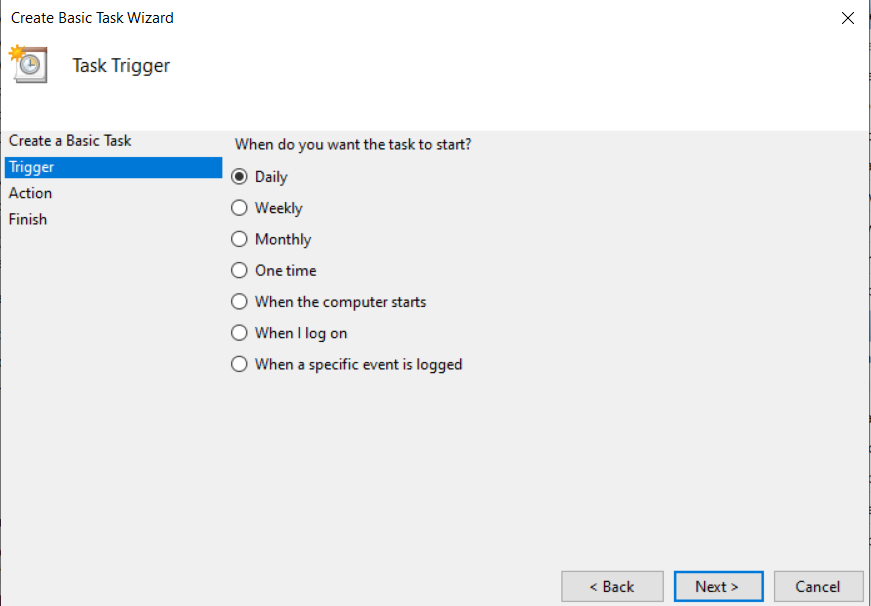
Choose when the synchronization should be triggered.
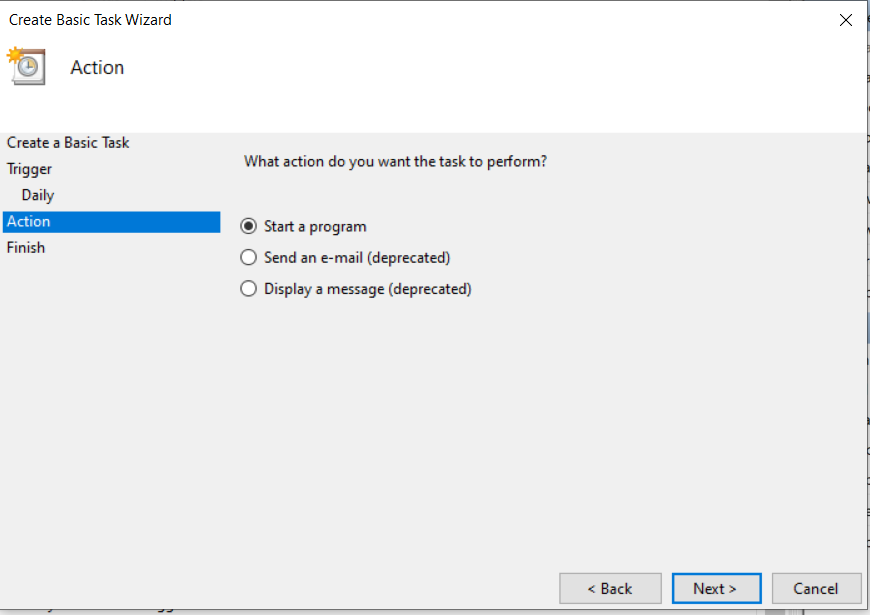
Select an Action.
Now select the task you'd like to be executed and the arguments (configurations) which have to be used.
For Program/Script - browse again to
DocuWare\PowerTools\UserProvisioning\UserSyncExeand selectUserProvisioning.exe.
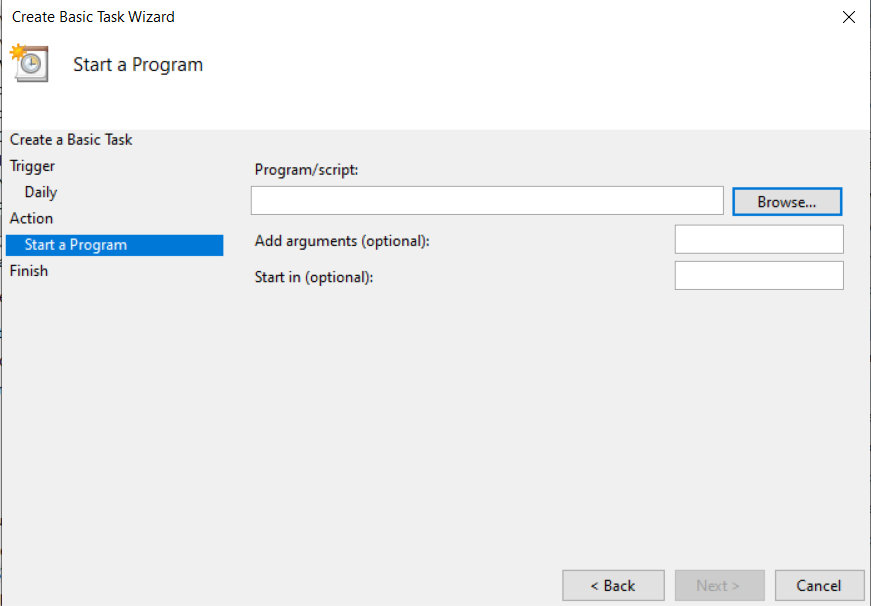
For Argument write the name of the file copied from the Windows Application (
userProvisioning_config_1.json).
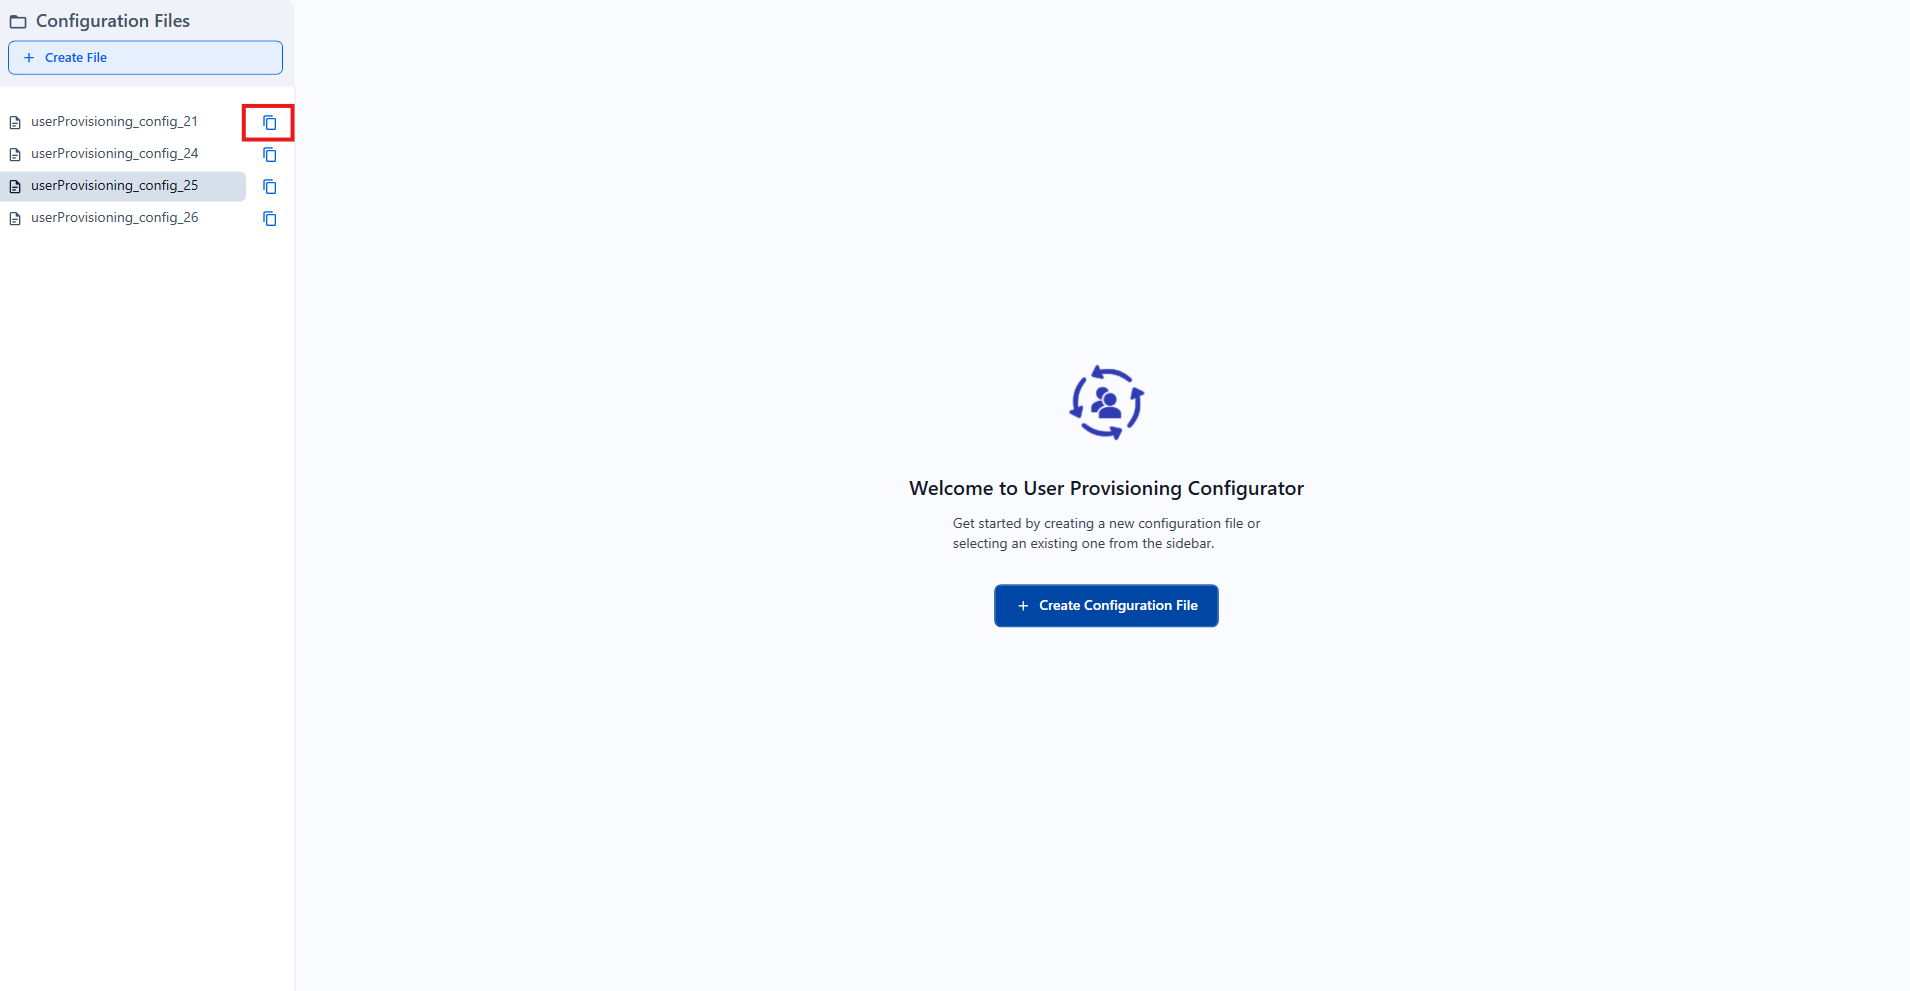
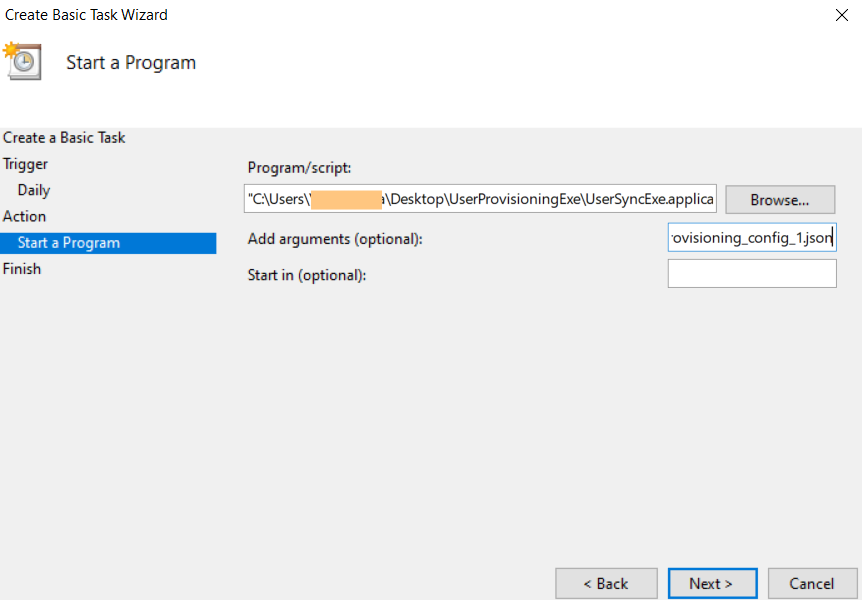
Click Finish and wait for synchronization.
Once the synchronization is finished the following information will appear in the User Provisioning Configurator:
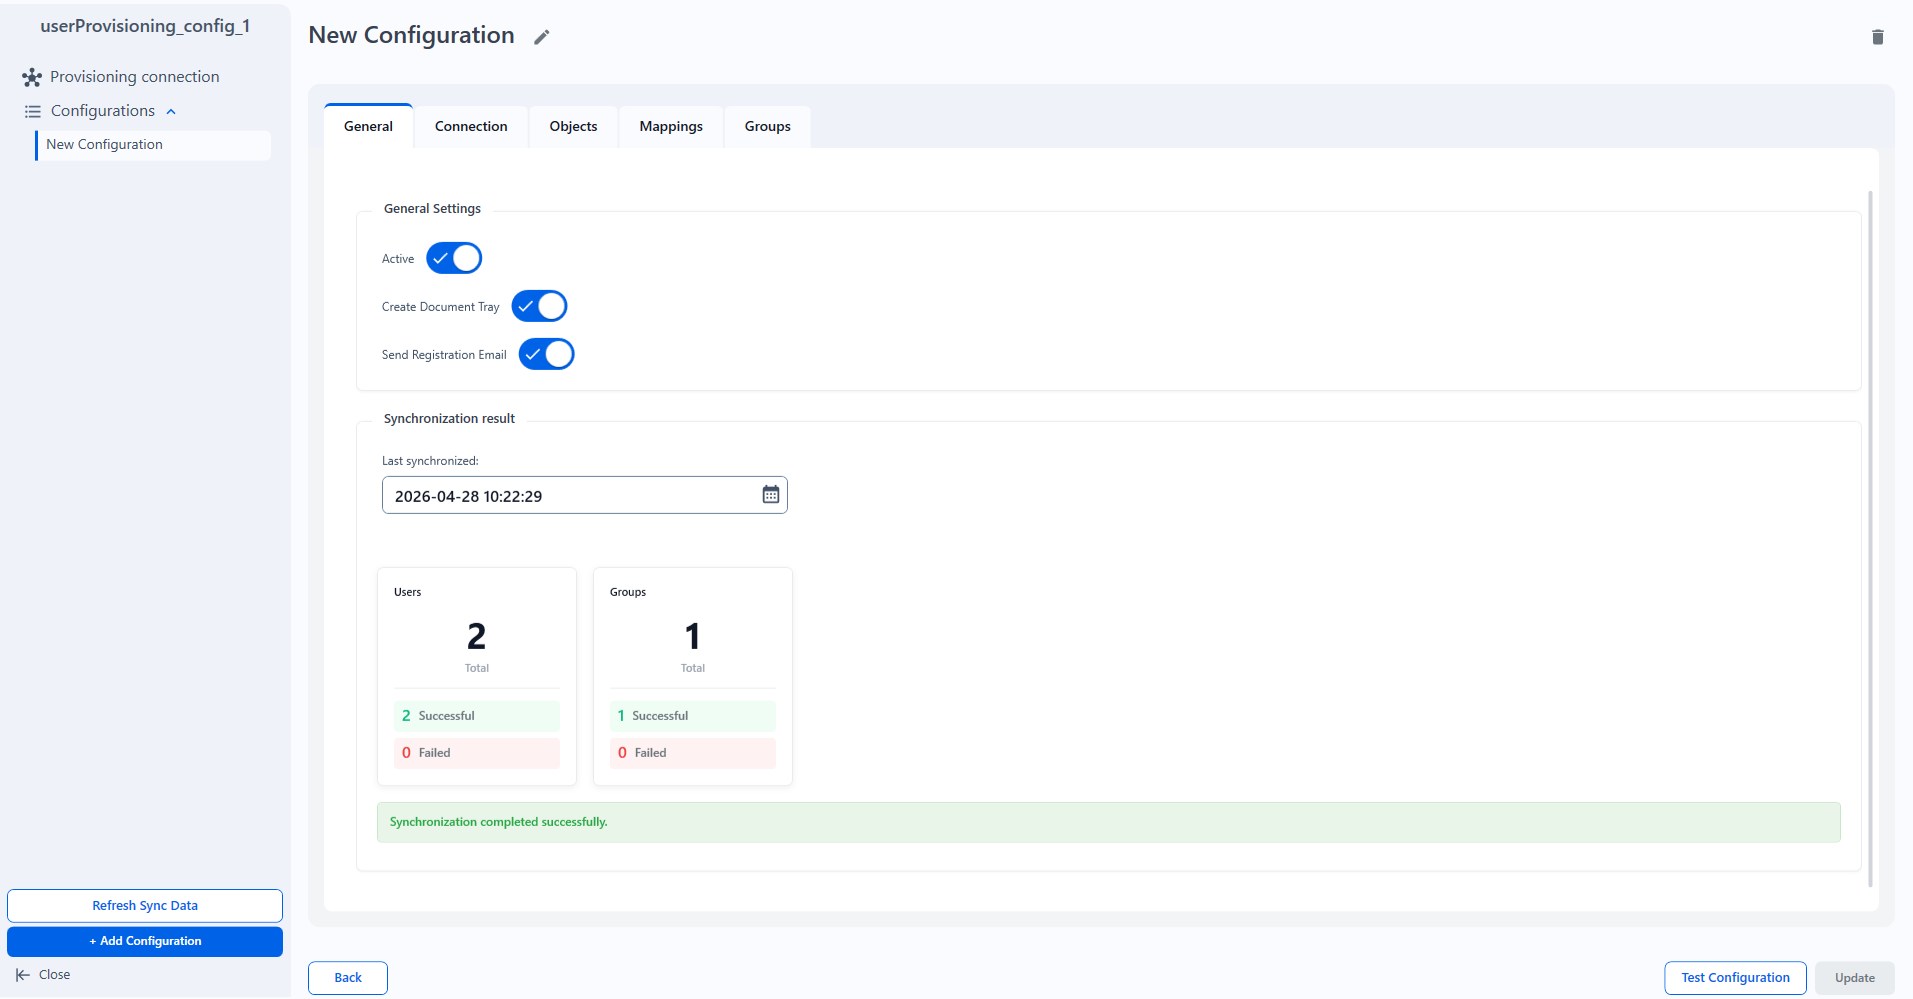
If there are failed users or groups the Timestamp field can be edited with previous date so the synchronization task can run again.
Logs can be found here:
C:\ProgramData\DocuWare\UserProvisioningConfig